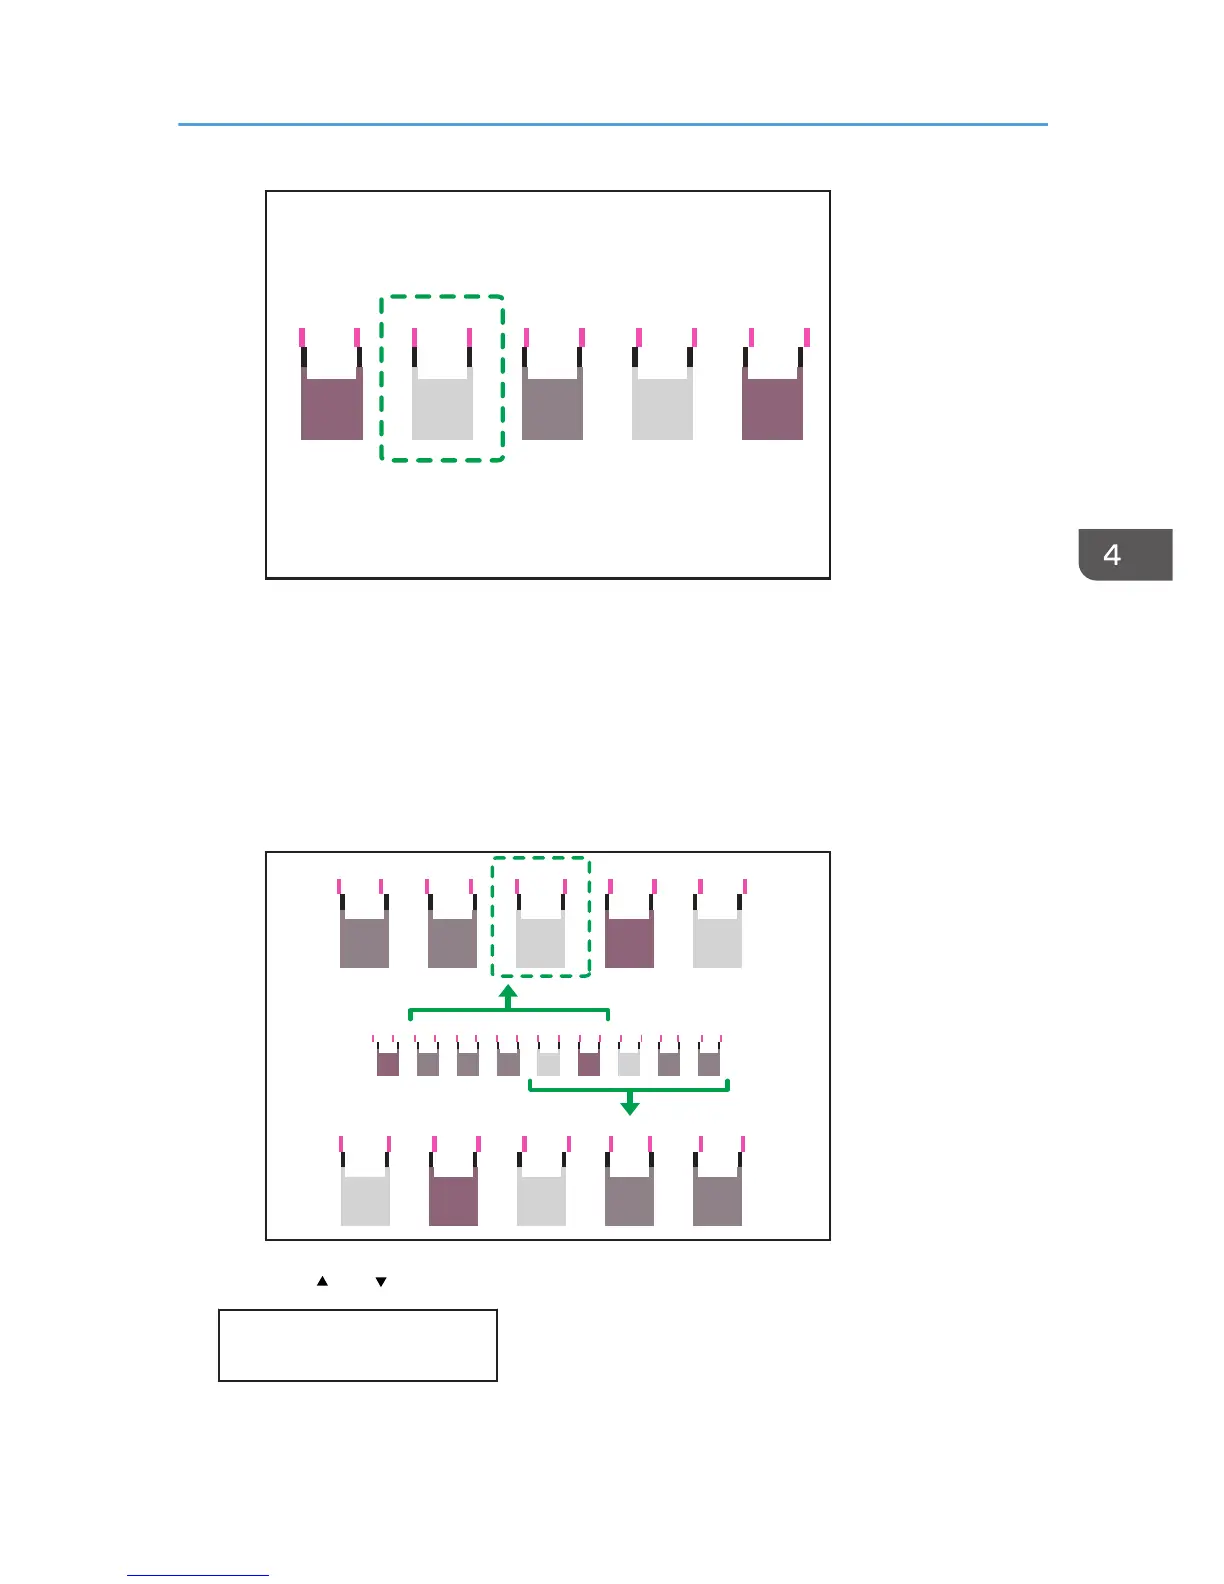
Each vertical line is made of an upper part and lower part. If the print head is not properly
positioned, the vertical line will be displayed as two disconnected lines, so that the line looks
misaligned.
• If you still cannot determine the adjustment value, locate the square that is between adjacent
squares whose lines form symmetry. Adjacent squares can be one or two places either side (at
positions ±1 or ±2).
This illustration indicates an adjustment value that is set to "-1".
7. Press the [ ] or [ /Menu] key to display [Adjustment], and then press the [#Enter] key.
Head Position:
Adjustment
Using the [Maintenance] Menu
137
 Loading...