56
The screens displayed vary depending on what optional equipment has been connected and how you have completed settings.
Some items may not be displayed, depending on how the administrator has congured the settings. For details, ask your
administrator.
•
•
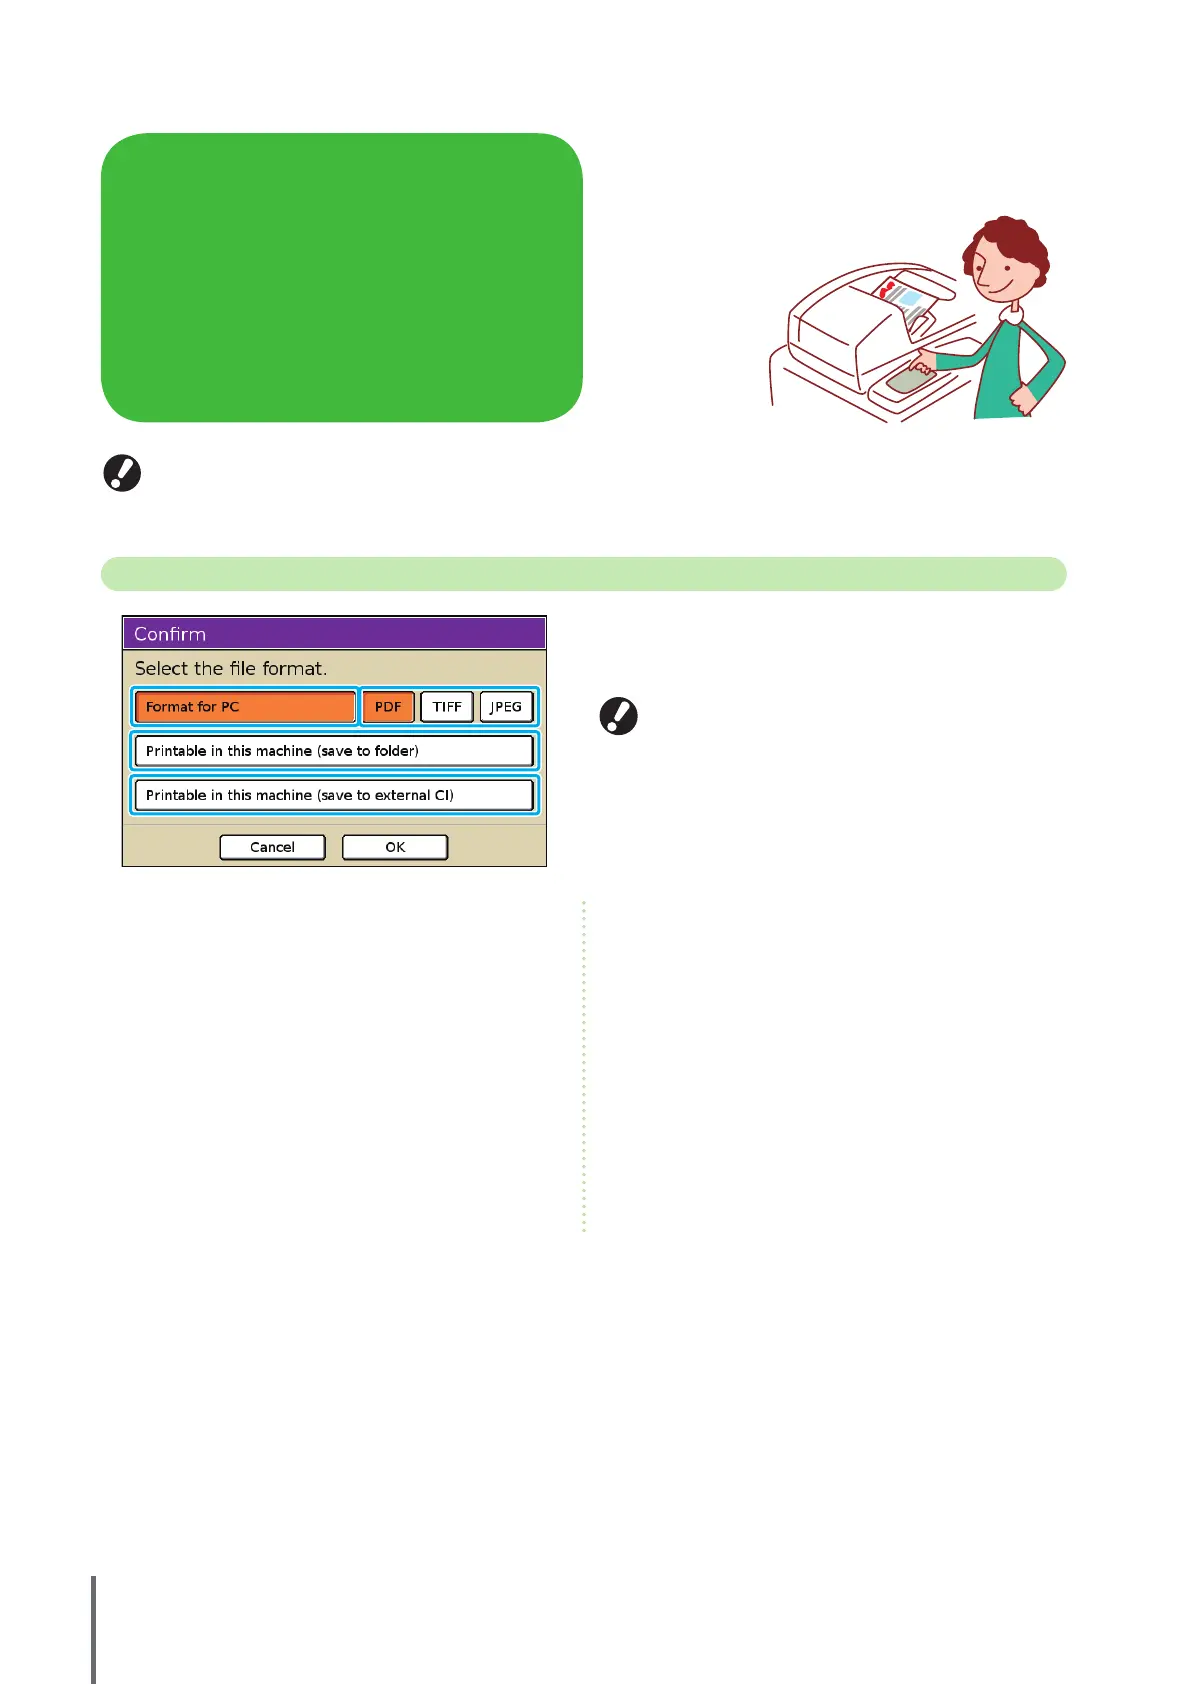
Conrmation Screen
Selecting scanner mode will display a conrmation screen for
specifying the scanning format.
After selecting the format, press [OK] to go to the next screen.
Administrator settings enable you to access the scanner
mode without displaying this screen.
For information on le formats, see “F
ile Format” (p. 59).
•
•
① [Format for PC]
Select this option when importing scanned images on a
computer, to attach them to email messages or for other
purposes.
② [PDF], [TIFF], or [JPEG]
When you have specied [Format for PC], choose the format
for scanned images.
③ [Printable in this machine (save to folder)]
Select this option when saving scanned images in a job
folder on the machine to printing them.
Selecting this option will display the [Save to folder] screen
in copy mode.
For details, see “Save to folder” (p
. 42).
④ [Printable in this machine (save to external
CI)]
Only displayed when an optional external controller
(ComColorExpress IS900C) has been connected. Selecting
this option will display the [Save to archive] screen in copy
mode.
For details, see “S
ave to archive” (p. 42).
You can use the scanner function if you connect the
optional scanner. This section describes the scanner mode
screen of the touch panel.
Scanner Mode Screens
ComColor Series Basic Guide 02