57
Scanning >> Scanner Mode Screens
4
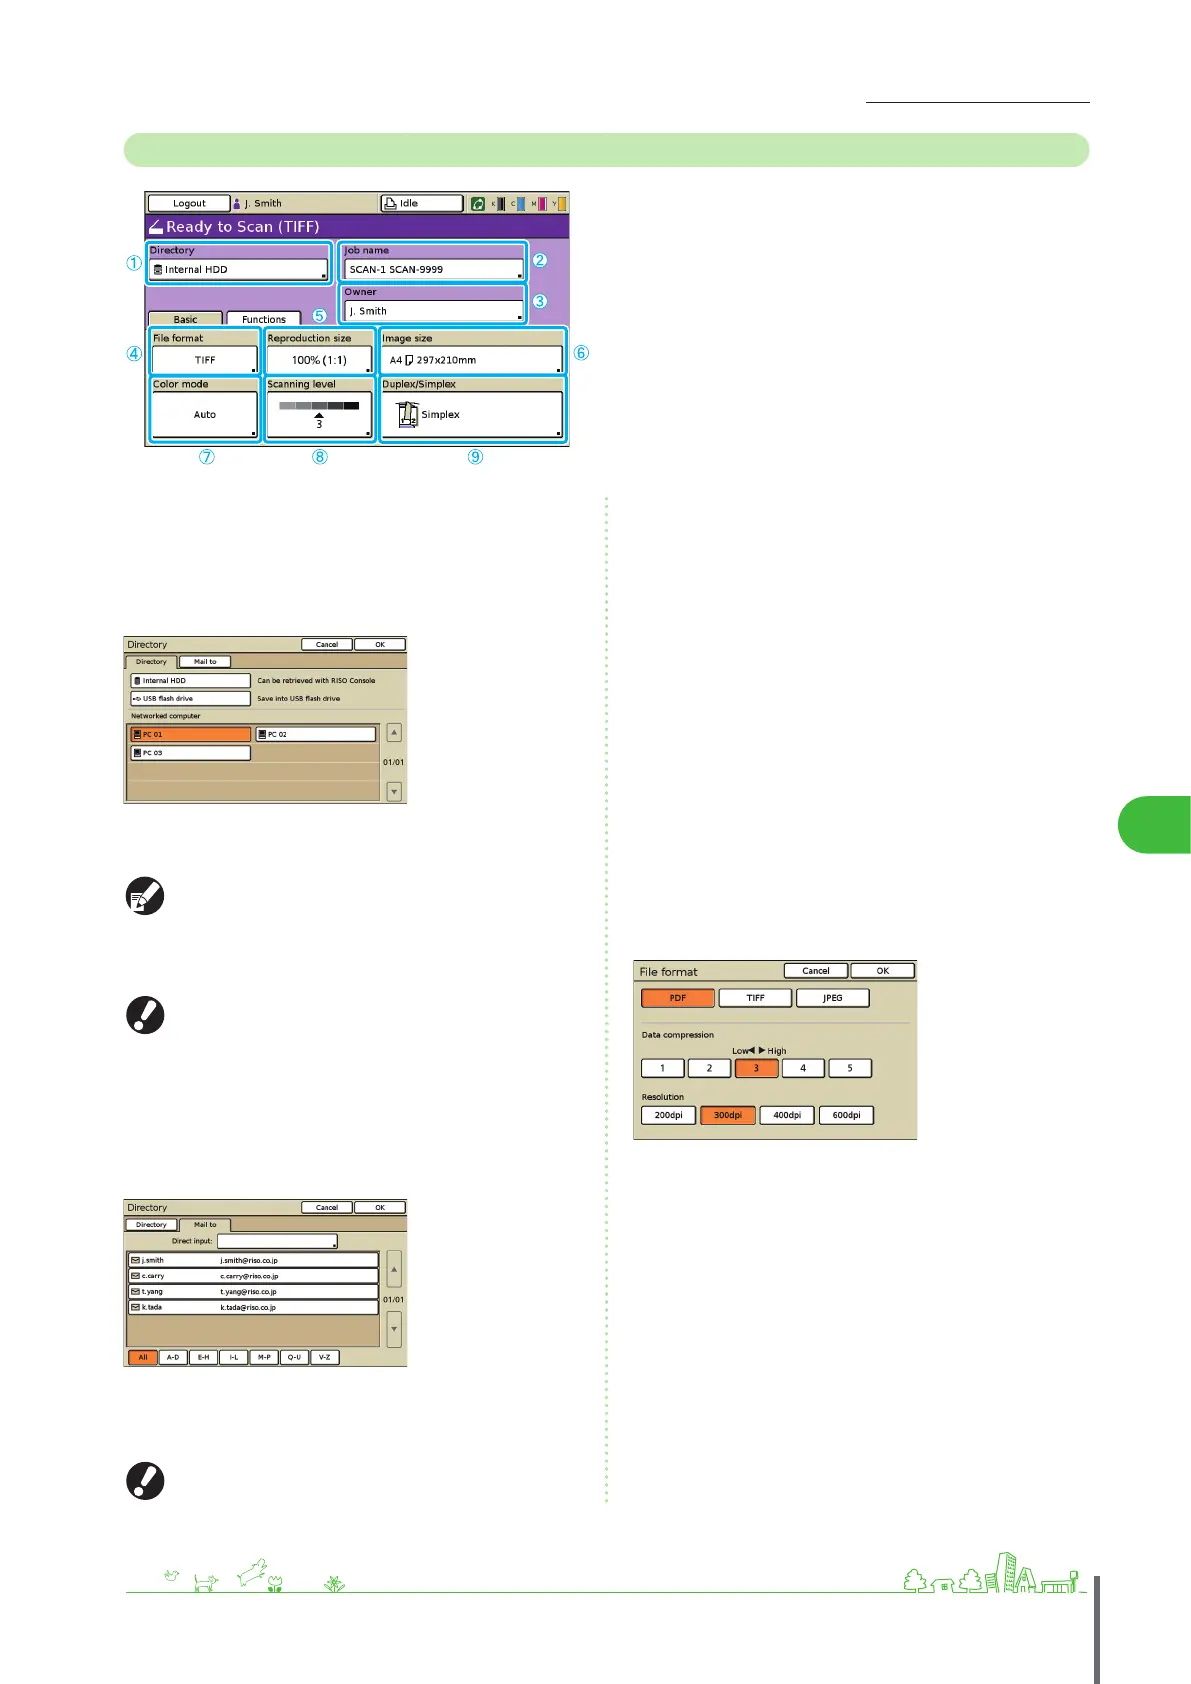
Basic Screen
The rst screen displayed when you have selected scanner
mode. Complete basic scanning functions on this screen.
① [Directory]
Specify the destination for scanned images, as well as email
recipients.
Directory screen
Specify where to save scanned images.
[Internal HDD]
Save scanned images on the machine’s hard disk drive.
Scanned jobs can be downloaded from the RISO console.
For details, see “Do
wnloading Scanned Images” (p. 78).
[USB ash drive]
Save scanned images on a connected USB ash drive.
This option is grayed out if no USB ash drive has been
connected to the machine.
[Networked computer]
Save scanned images on a network computer, as registered in the
administrator settings.
Mail to screen
Specify email addresses of recipients for scanned images.
[Direct input]
Enter the email address directly. Pressing [Direct input] will display
the text input screen.
[Direct input] may not be displayed, depending on the
administrator settings.
●
●
Mail to list
A list of email recipients (registered in the administrator settings) is
displayed on this screen. Use [▲] and [▼] to scroll through names,
or press the index buttons on the bottom of the screen to display
corresponding names.
② [Job name]
Indicates the job name of scanned images. By default, the
name is indicated as SCAN-n (where n is a serial number in
the range 1–99).
Pressing the button will display the text input screen,
enabling you to type or edit the job name.
③ [Owner]
Identies the owner name of scanned images. Pressing the
button will display the text input screen, enabling you to
type or edit the owner name.
④ [File format]
Specify the format, compression, and resolution of scanned
images.
ComColor Series Basic Guide 02 ComColor Series Basic Guide 02