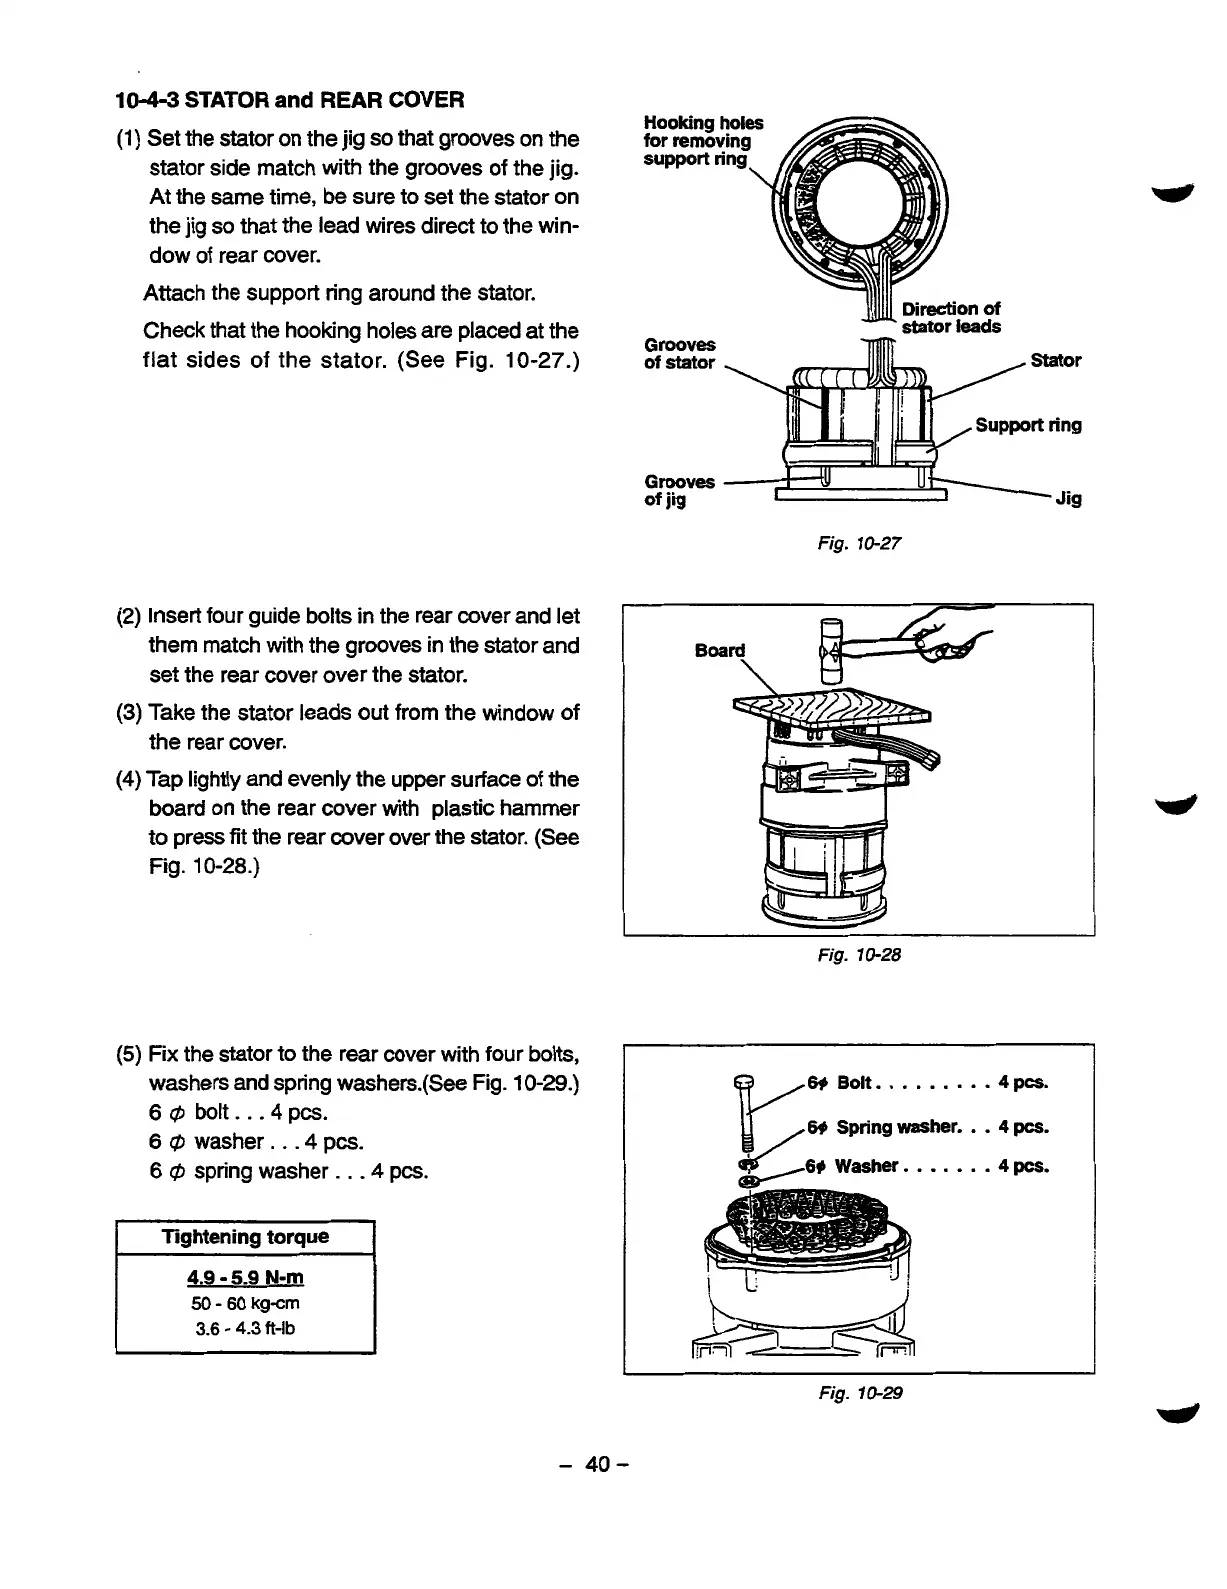
10-4-3
STATOR
and
REAR COVER
(1)
Set the stator on the jig
so
that grooves on the
stator side match with the grooves
of
the jig.
At
the
same time, be sure to set the stator on
the jig
so
that the lead wires direct to the win-
dow of rear cover.
Attach the support ring around the stator.
Check that the hooking holes
are
placed at the
flat sides of the stator. (See Fig.
10-27.)
Direction
of
stator
leads
Grooves
of
stator
(2)
Insert four guide bolts in the rear cover and let
them match with the grooves in the stator and
set the rear cover over the stator.
(3)
Take the stator leads out from the window of
the rear cover.
(4)
Tap lightly and evenly the upper surface
of
the
board on the rear cover with plastic hammer
to press fit the rear cover over the stator. (See
Fig.
10-28.)
(5)
Fix the stator to the rear cover with four bolts,
washers and spring washers.(See Fig.
10-29.)
6
@
bolt.
.
-4
pcs.
6
@
washer
.
.
-4
pcs.
6
@
spring washer.
.
.4
pcs.
I
lightening torque
1
I
4.9
-
5.9
N-m
~ 50
-
60
kgcm
3.6
-
4.3
fi-lb
Grooves
IN
of
jig
1’
-U\
Jig
Fig.
10-27
”
Board
\
Fig.
10-28
69
Bolt.
.
.
.
.
.
. . .
4
pa.
69
Spring
washer.
.
.
4
pcs.
Fig.
10-29
-
40-