Performing a Blood
Glucose Test
1. Wash hands and put on latex gloves.
Clean site for lancing.
Check expiry date of strips.
Remove strip from vial and replace lid securely.
2. Press the Power On/Off Button to power on the Meter.
3. Once the Accu-Chek
®
Inform II Startup screen appears, press
to display the Operator ID screen (if required.)
4. Enter or scan Operator ID, then press
to display the
Main Menu screen.
5. Press Patient Test and then press Glucose Test.
6. Enter or scan Patient ID, then press
to display the Strip Lot
confirmation screen.
7. Verify Strip Lot, if required.
• If correct, press
• If incorrect, press X
If you select the X you will be given a list of Lots in the memory,
select the one you require and press
. If the Lot you require is
not available, either code your instrument as described in the full
Inform II Operator Manual (if applicable) otherwise contact the
Point of Care team.
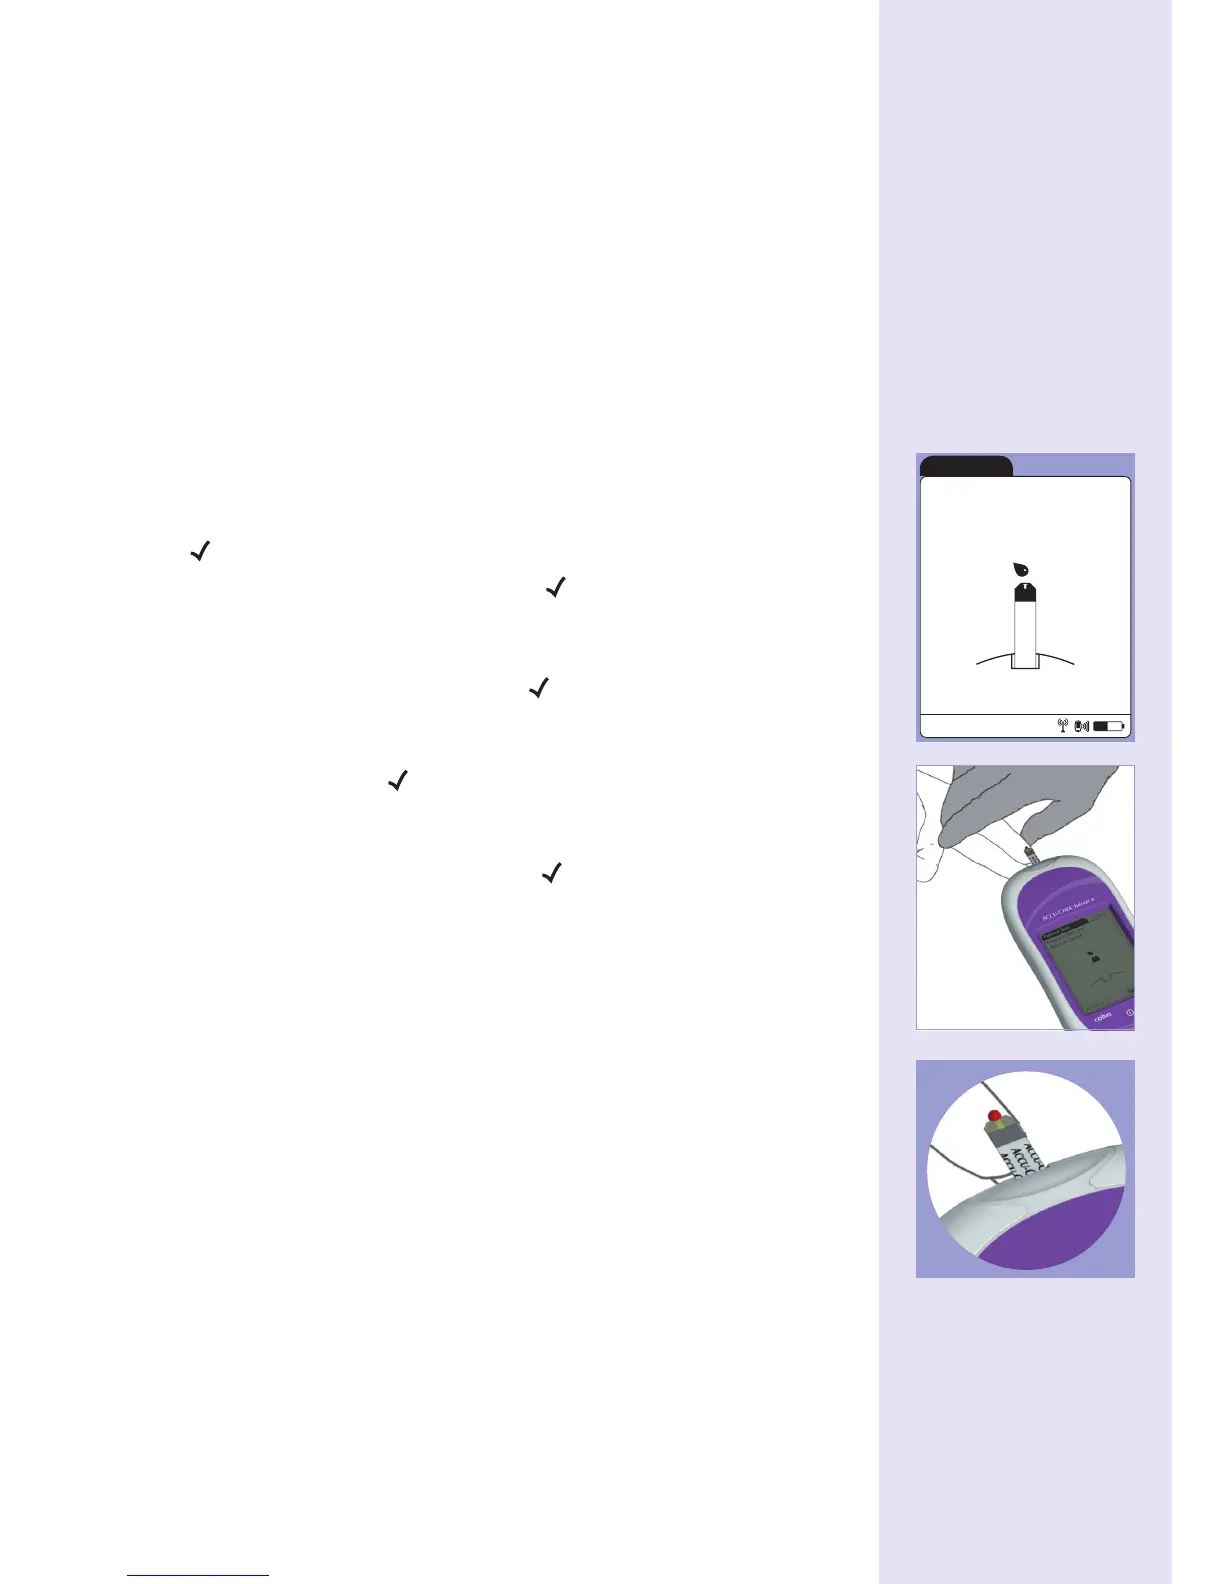
8. When prompted by the instrument, gently insert strip into the
meter with electrodes facing up and toward the test strip port.
Once strip checks are completed, the Apply Sample screen is
then displayed.
9. Lance the side of the finger. Wait for 5 seconds before proceeding
to the next stage. Keeping hand below the heart, start to milk the
palm of the hand firmly working towards pierced finger. Continue
milking along finger to form a hanging drop of blood - enough to
fill the yellow target area.
10. Touch the end of the strip to the droplet of blood and keep it in
place until the yellow target area is covered entirely. An hour glass
appears on screen until the measurement is completed and
the result displayed.
11.
Properly dispose of used strip and soiled materials. Remove
and dispose of latex gloves. Obtaining reliable results depends
on careful application techniques. When applying blood to the
test strip, ensure the entire yellow target area is covered.
12
User Guide
 Loading...