40 Rockwell Automation Publication 2711P-UM008I-EN-P - February 2022
Chapter 2
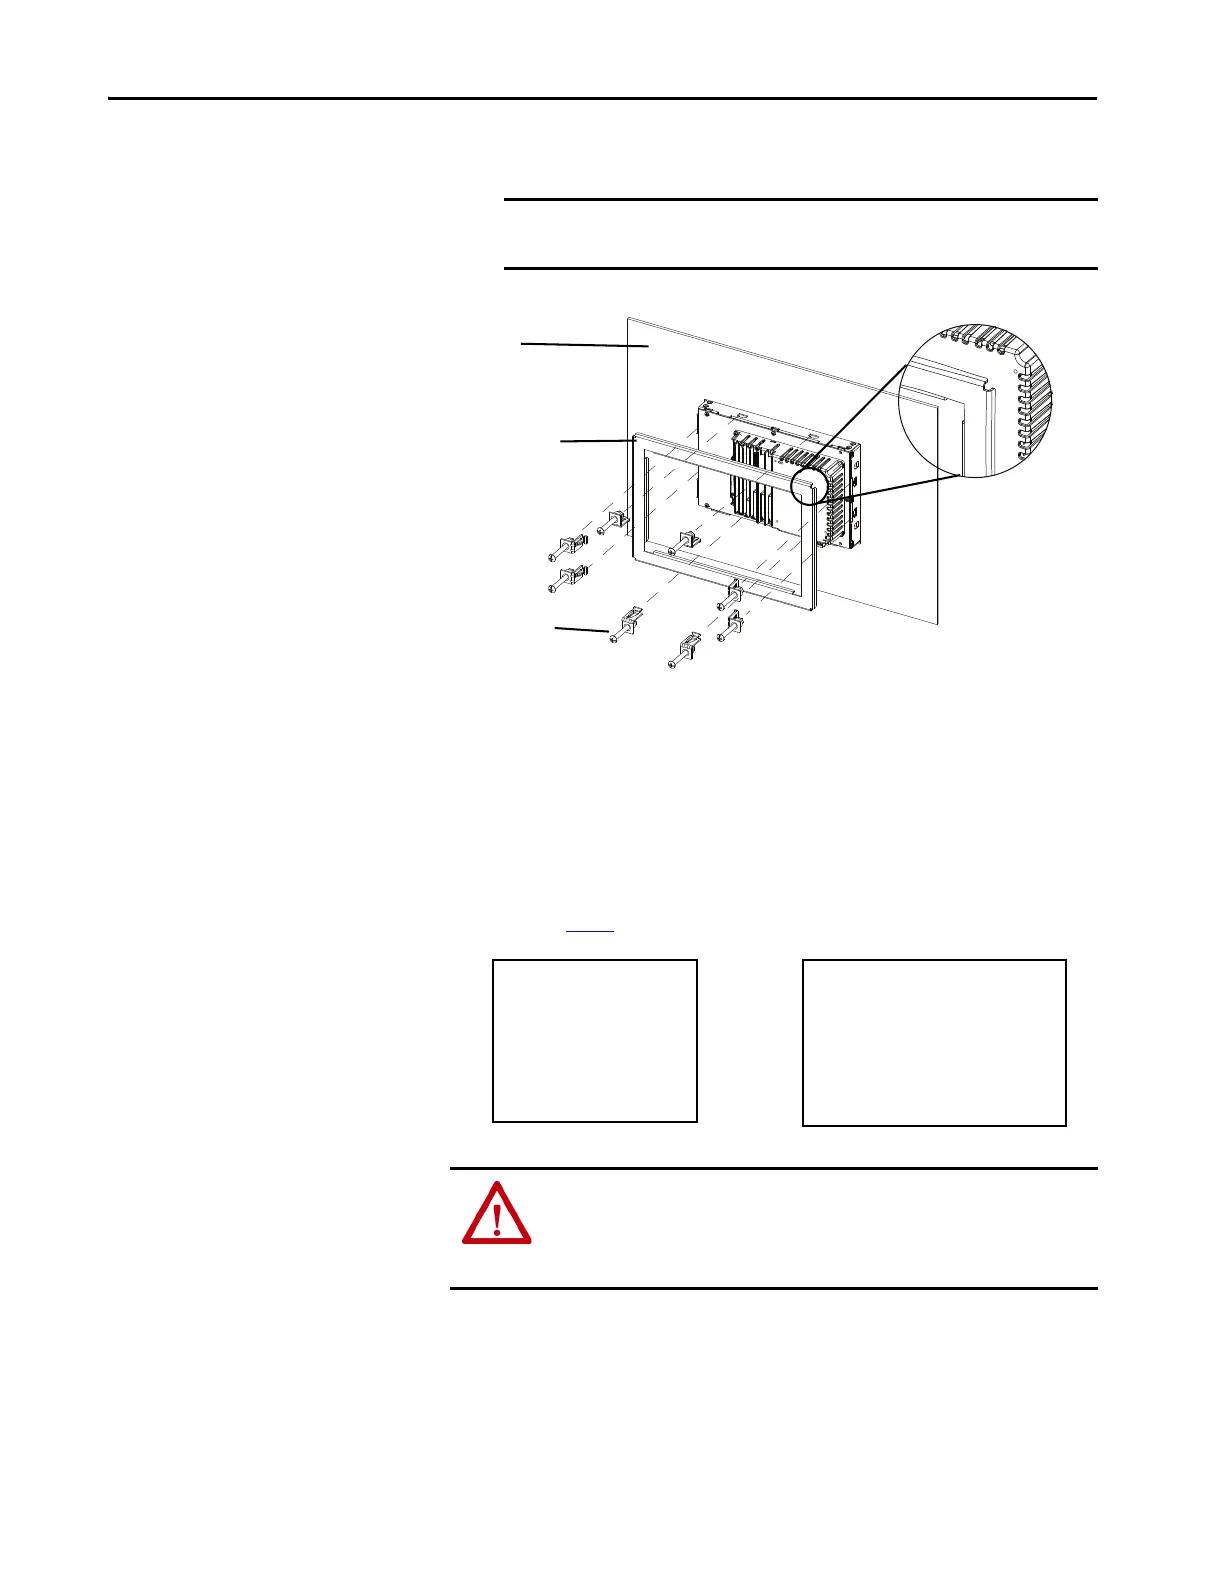
6. Position the backing plate over the terminal.
7. Slide the ends of the mounting clips into the slots on the terminal.
8. Tighten the mounting clip screws by hand until the backing plate
contacts the panel uniformly.
9. Torque the mounting clip screws to 2.3…2.6 N•m (20…23 lb•in) by
using the specified sequence.
The clips will loosen as the adjacent clip is tightened.
10. Repeat step 9
until all the mounting clips are at the specified torque.
IMPORTANT Make sure that the flat side of the backing plate faces away from the
panel, as shown in the drawing.
ATTENTION: Tighten the mounting clips to the specified torque to provide a
proper seal and to prevent damage to the product. Rockwell Automation
assumes no responsibility for water or chemical damage to the product or
other equipment within the enclosure because of improper installation.
Backing Plate
Mounting Clips
Panel
9-in. Torque Sequence
8 Clips
12.1-in. Torque Sequence
10 Clips
1
2
3
4
5
6
7
8
2
3
4
9
10
7
6
8
5
1

 Loading...