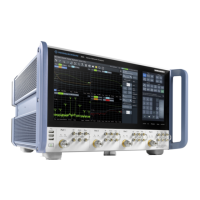
R&S ZVB Instrument Construction and Function Description
1145.1078.82 3.39 E-4
Disconnect the cables to the LCD, the DC/AC illumination converter, the key pad (keyboard), the
t
achogenerator and, if necessary, the network connection to the front module controller.
Note: When disconnecting cables, be especially careful with the cable to the keyboard. It is a
foil cable and can only be removed when the locking device on the foil-cable connector
is released.
Remove the front module controller (for instructions see “Replacing Front Module Controller A90“)
Place the instrument on its top and remove the instrument’s base cover (297) by undoing the
12.countersunk screws (299).
Undo the RF cabling from the reflectometers (165, 170, 175) to the LO divider (125) and to the
motherboard.
Release the 50-pin flat cable and disconnect from the reflectometers
Remove screws (151, 156, 161) and take out the reflectometers.
Undo RF cabling at the LO divider (125).
Disconnect the 12-pin flat cable from the LO divider
Remove screws (127) (2 in the strut, 4 in the rear panel) and take out the LO divider together with
plate (126)
Undo the screws holding the connectors on the rear panel:
• The 6 hexagonal nuts and washers for the BNC connectors.
• 2 hexagonal bolts (530, 540) each for the monitor interface and the user-control interface.
• 2 hexagonal screws (550) each for the USB interface and in the dummy panel (555).
Remove the 3 screws (144) each for the left and right side panels and the 2 screws (143) in the
center and take out both motherboard rails (140, 141).
Disconnect any cabling still on the motherboard (fan, floppy, IEC-bus, etc.).
Remove the 14 screws holding the motherboard (520) and take out the motherboard.
 Loading...


