56
Editing the Effects
Editing the Sampling Input Effects
Here’s how to edit the effects that are applied to the audio
input when you sample.
1.
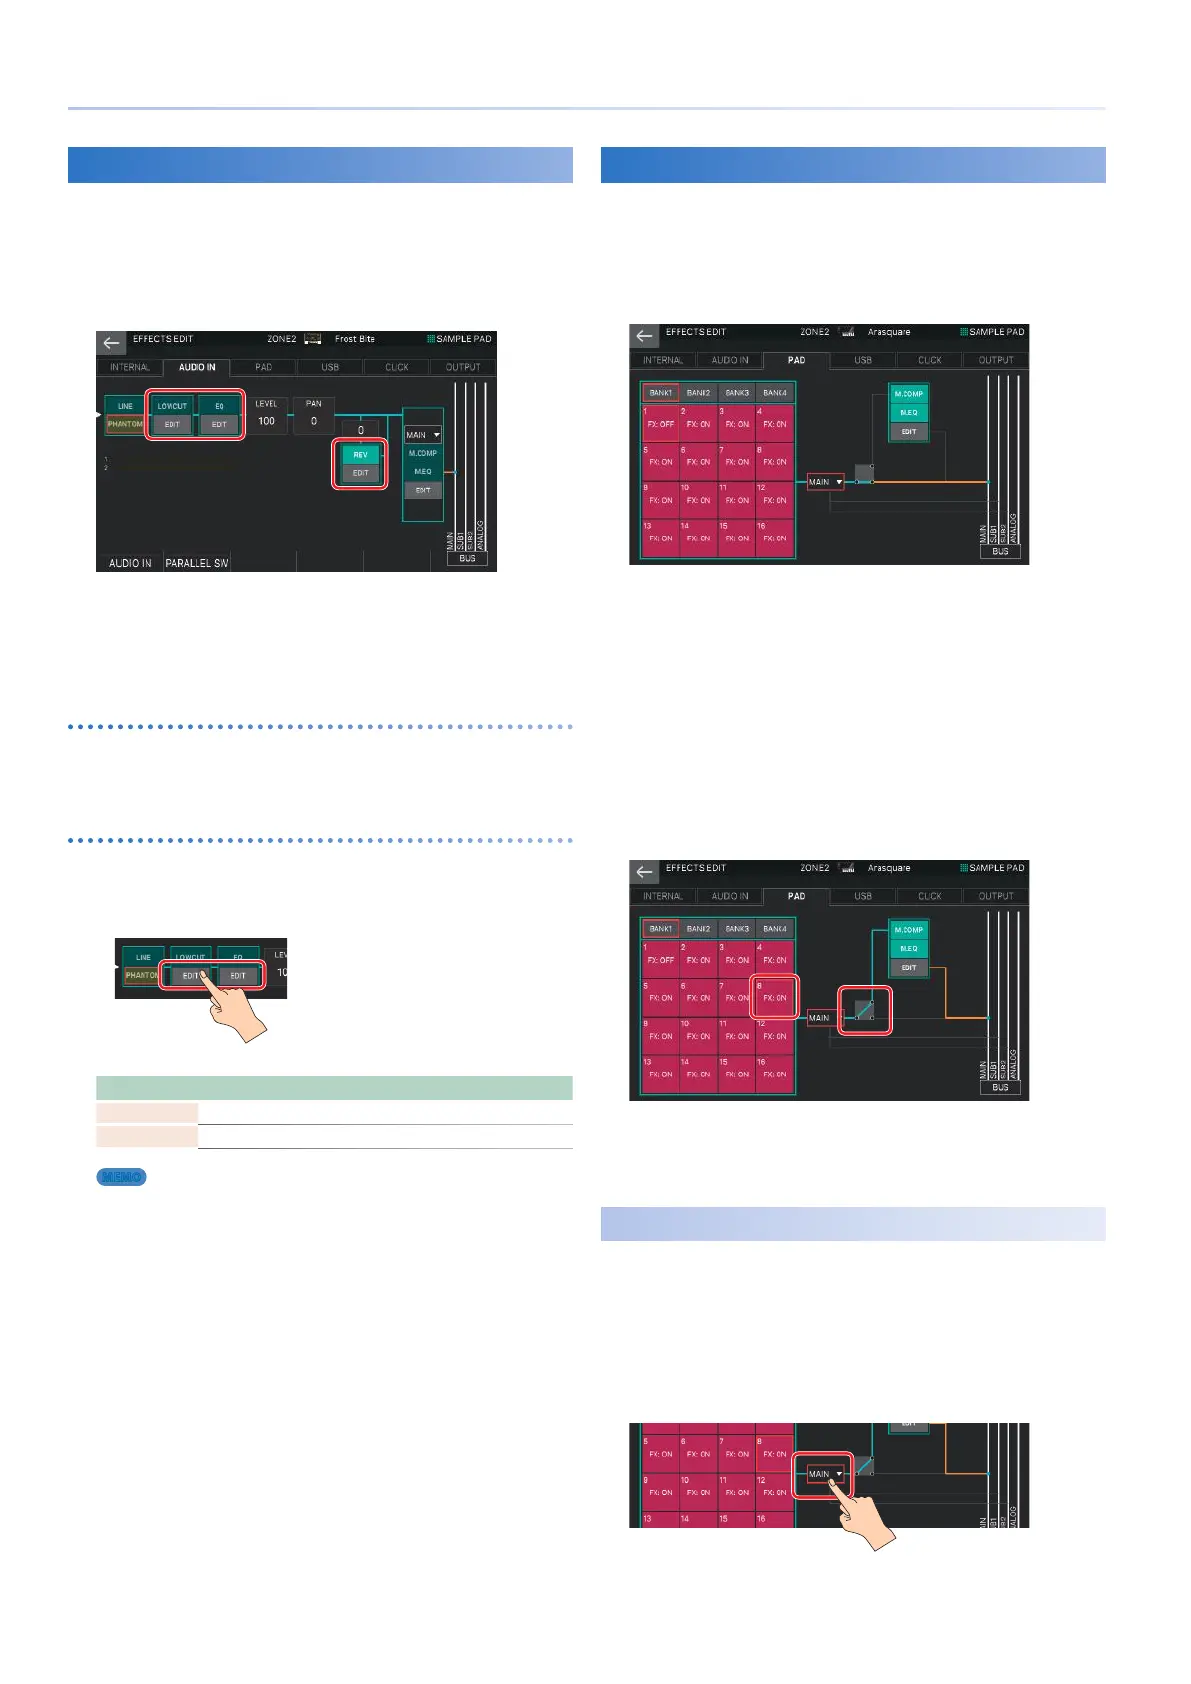
In the EFFECTS EDIT screen, touch the AUDIO
IN tab.
In this screen, you can turn the effects on/off, and edit the level,
pan, and output destination settings, as well as make various
sampling-related settings. For details on the parameters not
related to effects, refer to “Sampling” (p. 67).
Turning each effect on/off
2.
In the screen, touch <LOWCUT>, <EQ>, or
<REV> to turn each effect on/off.
Editing the parameters
1.
In the section that you want to edit, touch
<EDIT>.
The EFFECTS EDIT PRO screen appears.
Menu Explanation
[E1] knob Scrolls the cursor up/down.
[E6] knob Edits the parameter selected by the cursor.
MEMO
For details, refer to “Parameter Guide” (PDF).
Applying Effects to the Sampler
The sampled sounds are assigned to pads [1]–[16], and for each
pad you can specify whether it is connected to MASTER FX
(M.COMP, M.EQ).
1.
In the EFFECTS EDIT screen, touch the PAD tab.
In this screen, you can also specify the sample output destination
and make settings for M.COMP and M.EQ.
For details, refer to “Editing the System-Wide Effects” (p. 55).
2.
Touch one of <BANK1>–<BANK4> to select a
bank.
3.
Touch the box of the pad to which you want to
apply effects.
The cursor moves.
4.
Use the [VALUE] dial or the [DEC] [INC] buttons
to specify “FX:ON.”
In this example, BANK 1 Pad 8 is connected to MASTER FX.
5.
Repeat steps 2–4 to connect the desired pads
to MASTER FX.
Specifying the Sampler Output Destination
Here’s how to specify the output destination for the entire
sampler.
1.
In the EFFECTS EDIT screen, touch the PAD tab.
2.
Select the output destination for the entire
sampler (Sample Output Assign).
The output destination changes according to this setting.