97
How to Create a Group
Editing a Group
Even after creating a group, you can edit the structure of the
group in the GROUP screen.
Basic Operation in the GROUP Screen
1.
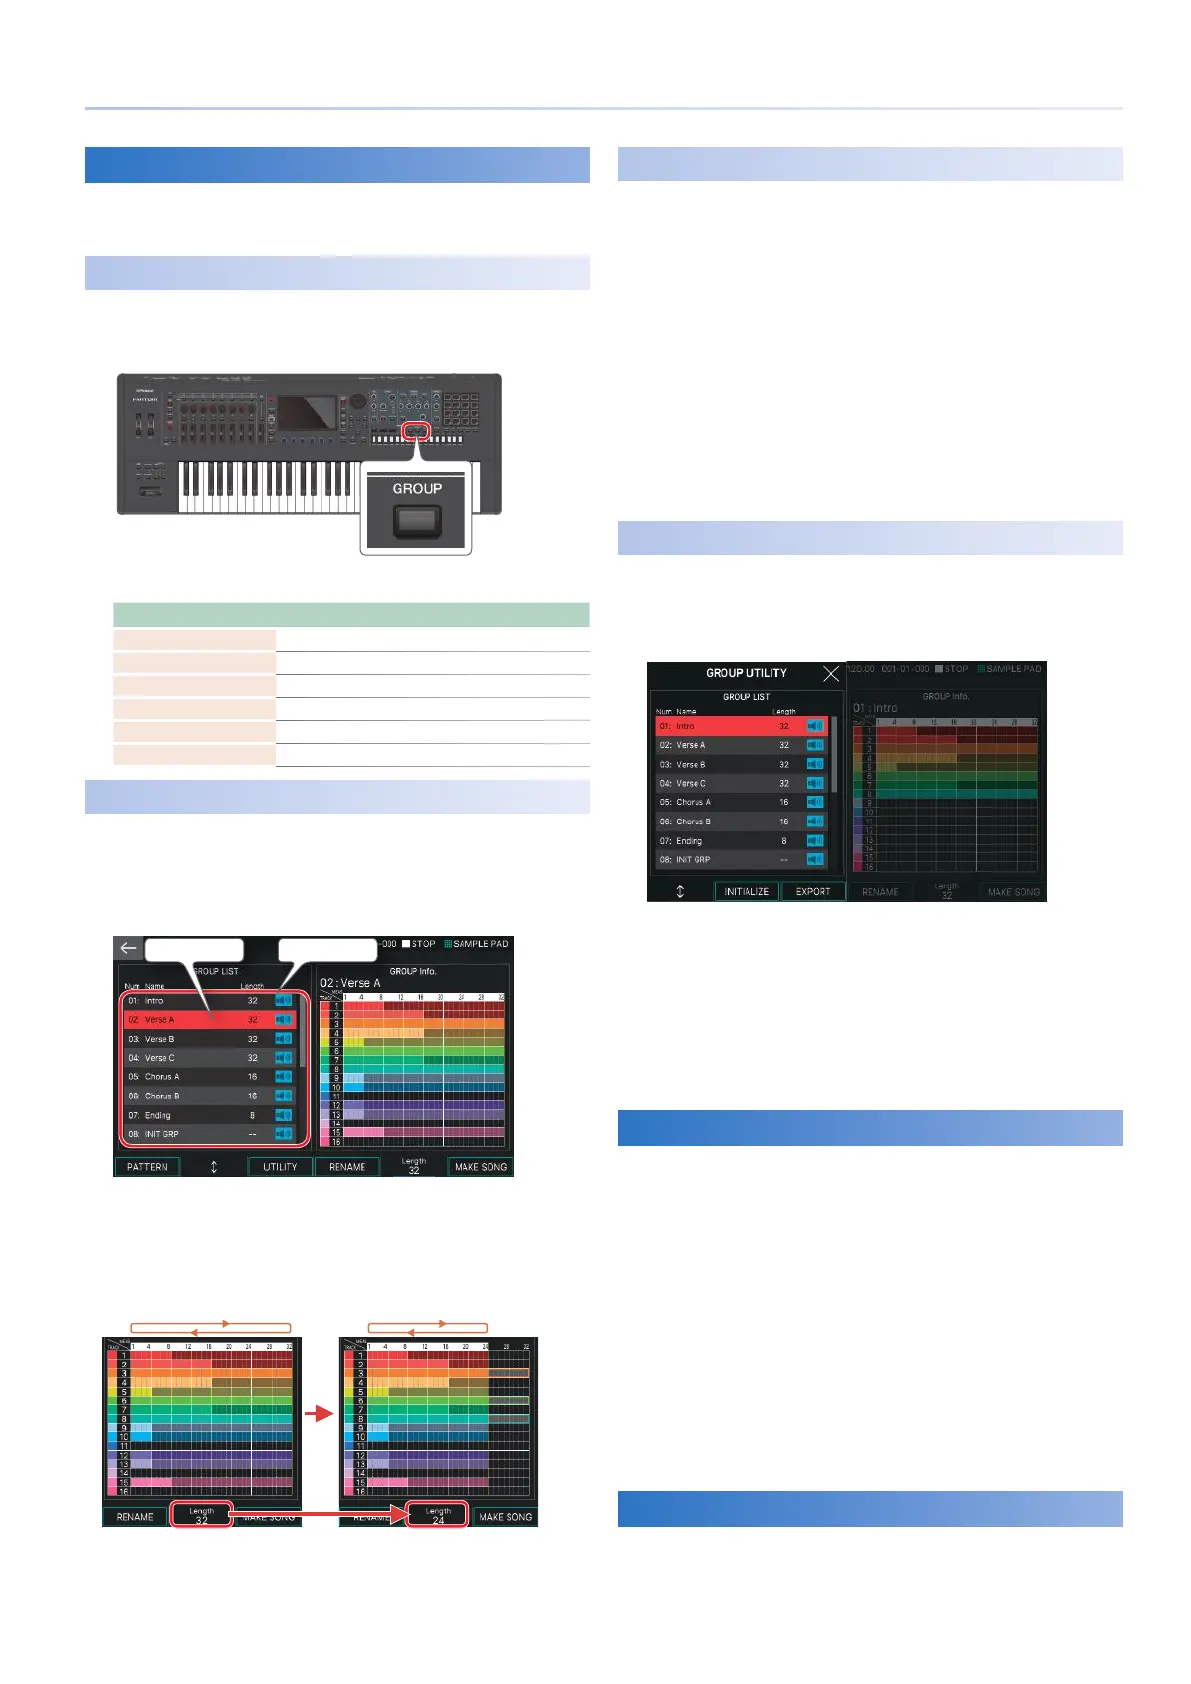
Press the [GROUP] button.
The GROUP screen appears.
2.
Select a function and edit the parameters.
Function Explanation
[E1] PATTERN Accesses the PATTERN screen.
[E2] knob Moves the cursor in GROUP LIST.
[E3] UTILITY Accesses the GROUP UTILITY screen.
[E4] RENAME Renames the group.
[E5] LENGTH Edits loop settings for the group.
[E6] MAKE SONG Accesses the MAKE SONG screen.
Specifying the Loop Settings (Length)
The loop length of each group (Length) can be specified
separately from the loop settings specified for a pattern. For
example, the playback might loop in eight-measure units in
the PATTERN screen, but you could halve this to make it loop in
four-measure units when played as a group.
Current group Group list
The right side of the screen is called the GROUP Info area. This
area shows the presence or absence of data for each track in the
current group, and the length of the current pattern for each
track.
1.
Use the [E5] knob to set the Length parameter.
Loop region Loop region
This changes the length for when the group is played.
The length is also shown in the GROUP Info. area. The area outside the
region specified by Length is grayed-out and is not played.
Naming a Group (RENAME)
You can assign a name to each group. Assigning an informative
name helps you tell the groups apart without needing to
specifically examine the content of each group.
1.
In the GROUP screen, select the group that
you want to rename, and then select [E4]
RENAME.
The RENAME screen appears.
2.
Edit the group name as described in the
explanation for the RENAME screen (p. 13).
3.
Select [E6] OK.
If you decide to cancel, choose [E5] CANCEL.
Initializing a Group (INITIALIZE)
Here’s how to initialize a group.
1.
In the GROUP screen, select [E3] UTILITY.
The GROUP UTILITY screen appears.
2.
Use the [E1] knob to select the group that you
want to initialize.
3.
Select [E2] INITIALIZE.
The group is initialized.
4.
Press the [EXIT] button to return to the GROUP
screen.
Exporting a Group as SMF (EXPORT)
Here’s how the patterns of a group in the currently selected
scene can be converted into SMF data and exported to a USB
flash drive.
1.
In the GROUP UTILITY screen, select [E3]
EXPORT.
The SEQ EXPORT screen appears.
2.
Make settings in the SEQ EXPORT screen
as described in steps 2–14 of “Exporting a
Pattern as SMF (EXPORT)” (p. 95). In this
case, select “GROUP” as the source.
3.
Press the [EXIT] button to return to the GROUP
UTILITY screen.
Saving a Group
The data of the groups you create is saved as a whole in the
current scene. If you want to keep the groups you create, save
the scene (p. 44).