4-1 Practicing Cutting Using the Test-use Material
Chapter 4: Performing Cutting
49
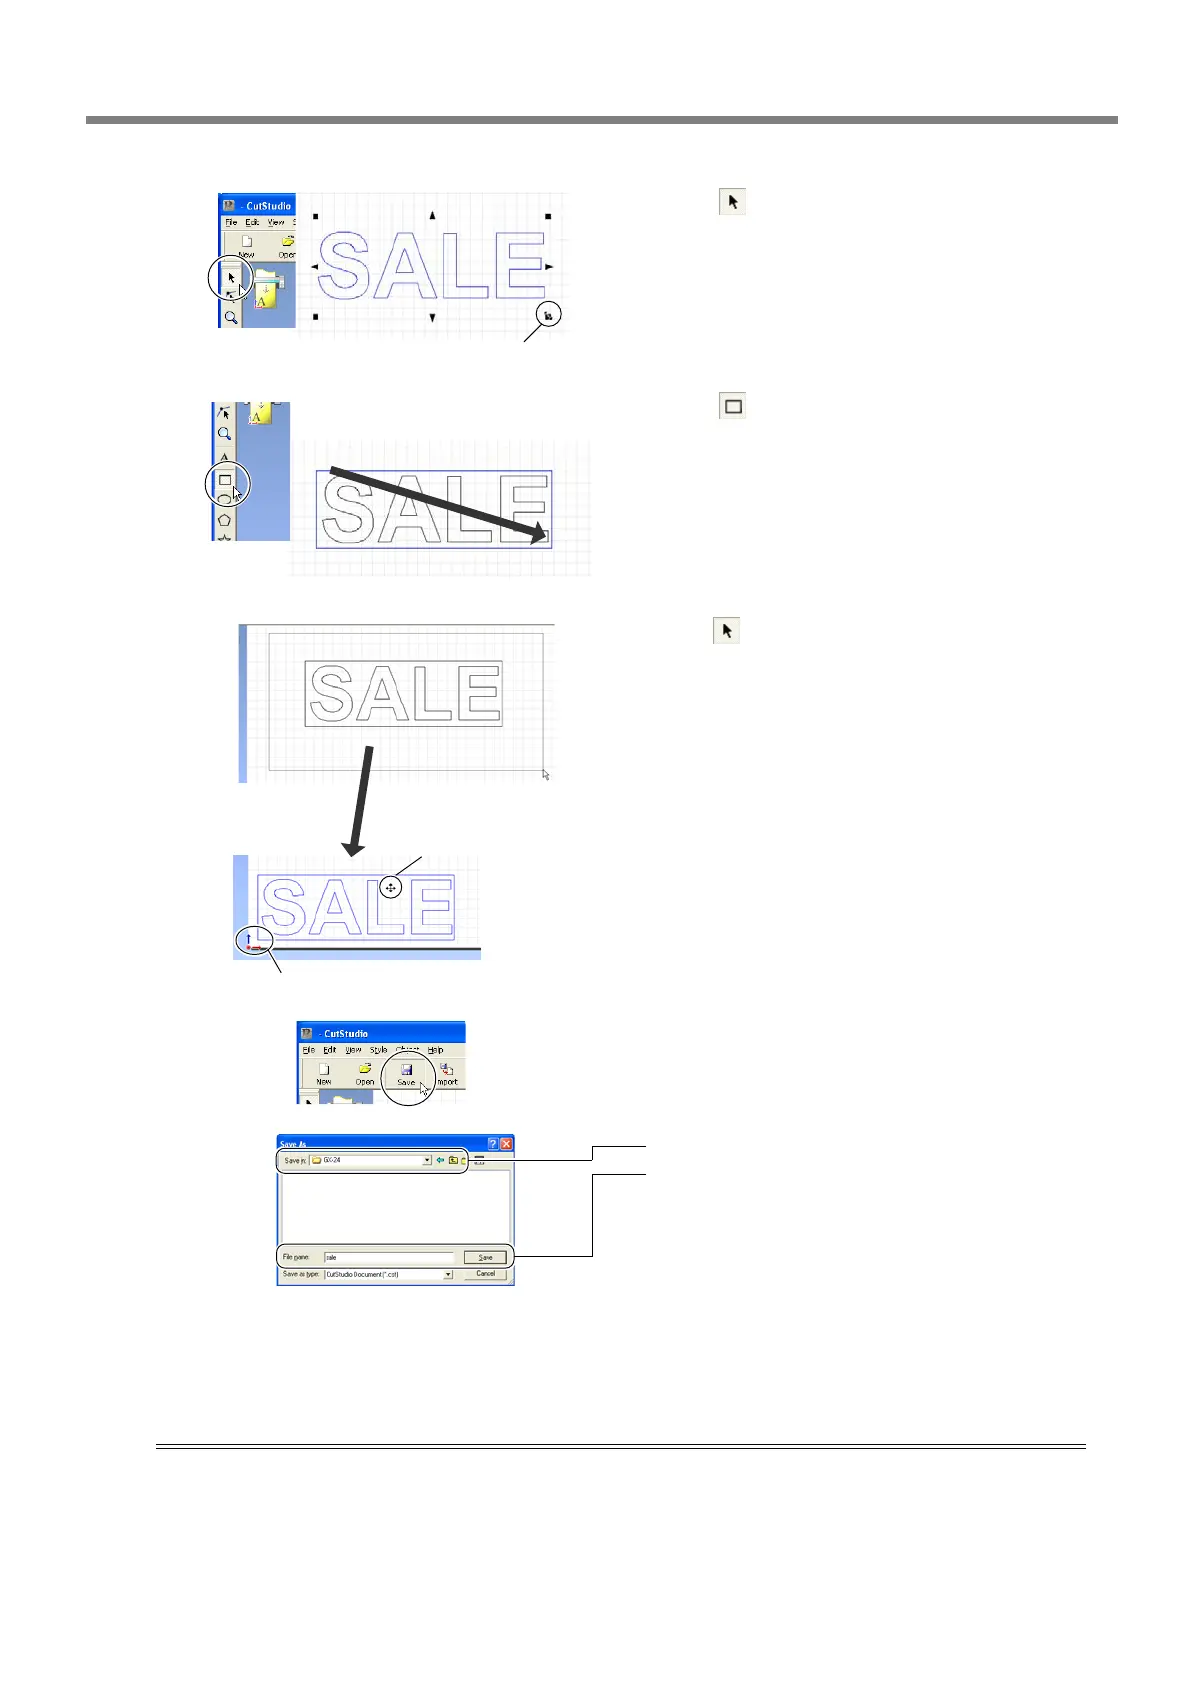
➌
Click [ ].
Displayed around the text are ■ and ▼ symbols.
Drag the ■ and ▼ symbols for the text box to
change the size of the text.
➍
Click [ ].
Draw a rectangle around the "SALE" text.
➎
Click [ ].
Select an area containing the text and the rect-
angle.
When you select this, the line turns blue.
Move the position to the bottom of the win-
dow, near the origin point.
➏
Click the [Save] button.
The [Save As] screen appears.
➐
For "Save in," choose the folder you want.
Enter the file name, then click [Save].
The data you created is saved.
After the data is prepared, go on to "Step 6: Perform Cutting."
☞
p 46 "Step 5: Create Cutting Data"
Important Note When Saving Data
The cutting range you set here is not saved. The next time you import data, go to the [Cutting Setup] menu and
redo the setting for the cutting range.
Click the upper-left corner, then drag to the
lower right to change to the needed size.
Click, then drag to the
required size.
Move the pointer to inside
the text. When the shape of
the pointer changes to a
cross, drag to move.
Origin point
 Loading...
