23
Connecting External Equipment
Performing with a Connected Pedal
Sustaining the Notes (Hold)
If a pedal switch (sold separately: DP series) is connected to the HOLD
jack, the sound is sustained as long as you continue pressing the pedal
even after you remove your hand from the keyboard.
Adding Expression to Your Performance
(Expression)
If an expression pedal (sold separately: EV-5) is connected to the
CTRL jack, you can use the pedal to modify the volume, making your
performance more expressive.
By assigning the desired function, you can also use the pedal to
perform other operations such as switching scenes.
&
“List of functions that can be assigned to the controllers” (p. 31)
Performing with a Connected Mic (Vocoder)
The “Vocoder” adds effects to a human voice. If you run your voice
through the vocoder, you can give it a toneless, robotic tone. Control
the pitch by playing the keyboard.
1. Connect a microphone to the rear panel MIC IN jack.
NOTE
The JUPITER-X supports dynamic microphones and electret
condenser microphone (plug-in power system). It does not support
condenser microphones.
2. Use the rear panel [MIC GAIN] knob to adjust the volume.
Make detailed adjustments to the MIC IN volume after you select
the sound.
Initially, set the knob to approximately the center position.
3. Press the [MODEL BANK] button.
You switch to tone select mode.
4. Press the [15] button.
* With the factory settings, “VOCODER” is assigned to the model bank of
the [15] button. You can change the model bank that is assigned. For
details, refer to “Reference Manual” (PDF).
5. Use the [2] knob to select a tone.
6. While playing the keyboard, vocalize into the microphone.
Use the [MIC GAIN] knob to make fine adjustments to the volume.
Adjusting the Mic Settings
Depending on the environment in which you’re performing, noise
from the surroundings might be picked up by the mic, causing the
vocoder to not work as you intend.
In this case, adjust the microphone sensitivity and the noise
suppressor (NS) settings, so that it is less likely to pickup noise.
1. Press the [MENU] button.
2. Use the [1] knob to select “SYSTEM”, and then press the
[ENTER] button.
You can also make this selection by using the PAGE [ ] [ ] buttons
instead of the [1] knob.
3. Use the [1] knob to select “MIC IN”, and then press the
[ENTER] button.
4. Use the [1] knob to select a parameter, and use the [2] knob
to edit the value.
For details on mic settings, refer to “MIC IN” (p. 29).
5. If you want to save the setting, execute the System Write
operation.
&
“Saving the System Settings (System Write)” (p. 27)
Preventing acoustic feedback
Acoustic feedback could be produced depending on the location of
microphones relative to built-in speakers (or the external speakers).
This can be remedied by:
5
Changing the orientation of the microphone(s).
5
Relocating microphone(s) at a greater distance from speakers.
5
Lowering volume levels.
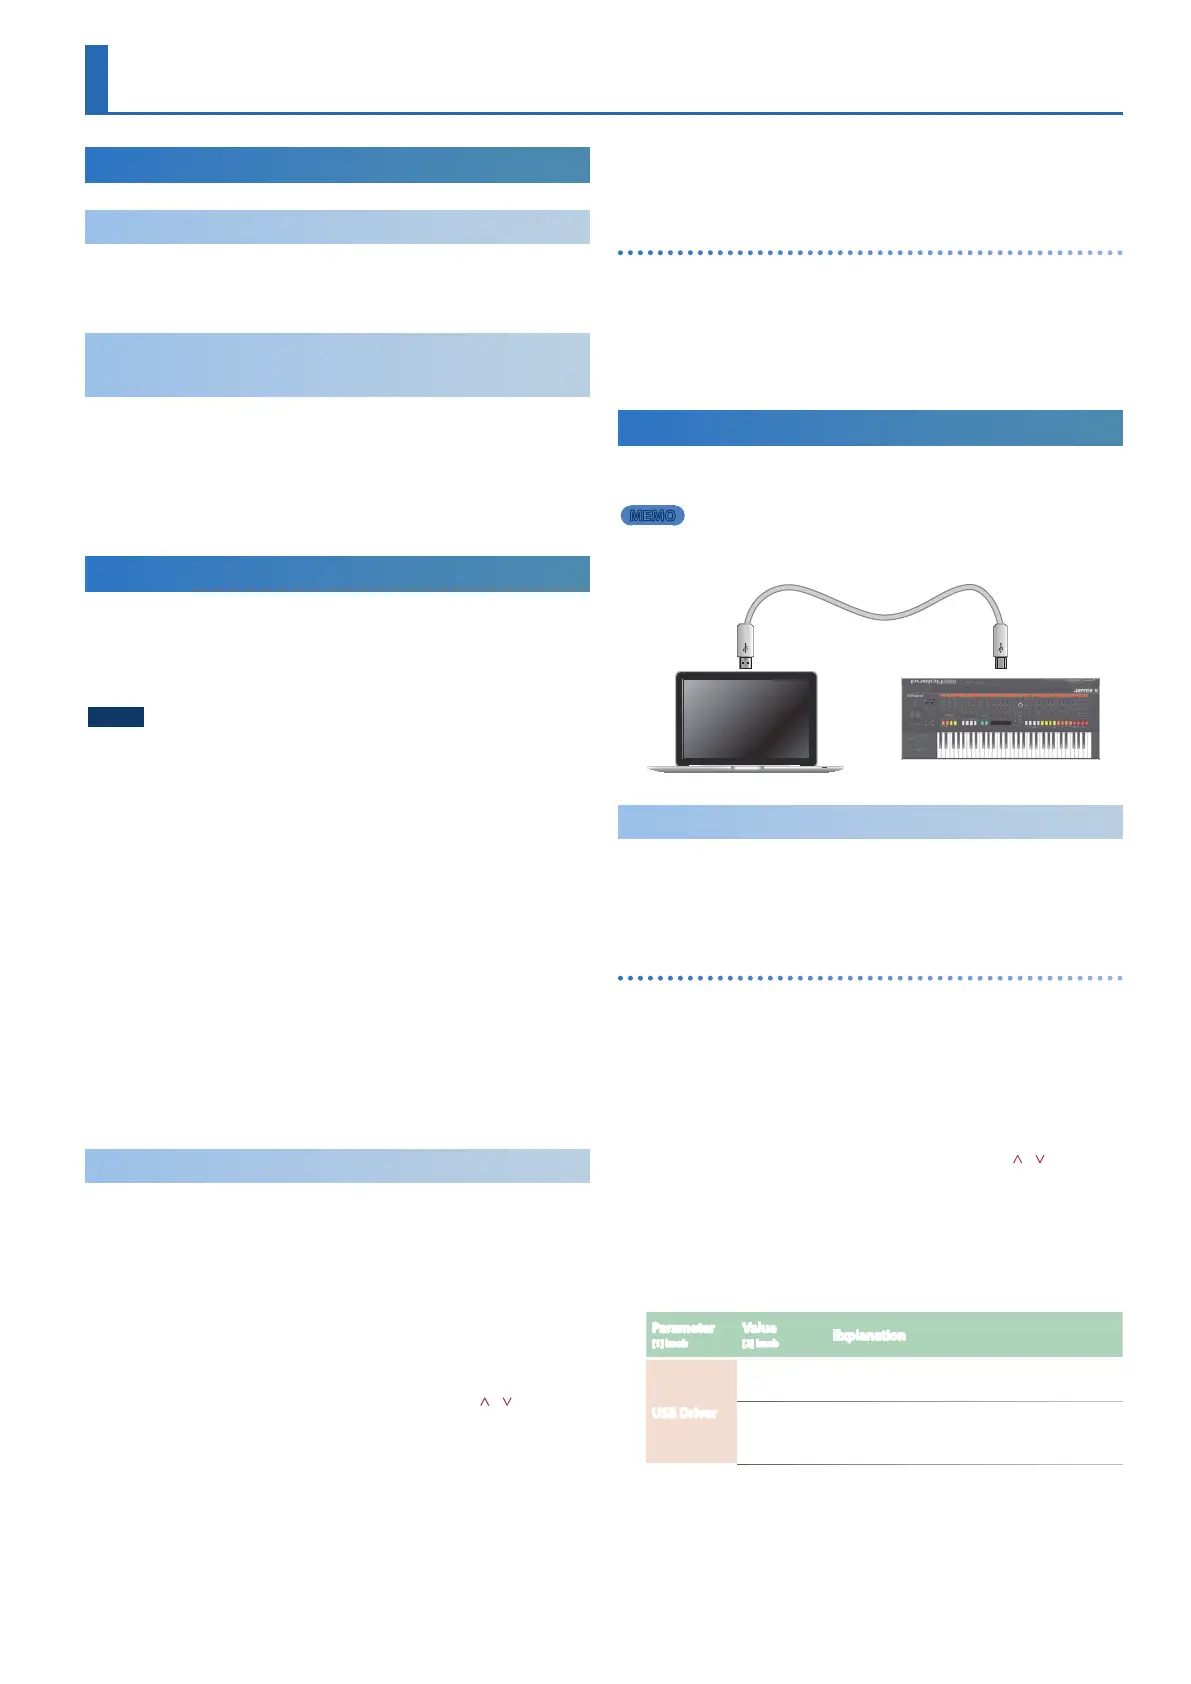
Connecting a Computer (USB COMPUTER Port)
MIDI messages can be exchanged with a computer via the JUPITER-X’s
USB COMPUTER Port.
MEMO
5
For details on operating requirements and supported operating systems,
refer to the Roland website.
USB cable
Installing the Dedicated Driver
In order to use the JUPITER-X, you’ll need to download the driver from
the following URL and install it on your computer.
For details on installation, refer to the Roland website.
&
https://www.roland.com/support/
USB driver settings
Here’s how to specify the USB driver that’s used when connecting the
JUPITER-X to your computer via the USB COMPUTER port.
1. Press the [MENU] button.
The setting screen appears.
2. Use the [1] knob to select “SYSTEM”, and then press the
[ENTER] button.
You can also make this selection by using the PAGE [ ] [ ] buttons
instead of the [1] knob.
3. Use the [1] knob to select “MIDI”, and then press the
[ENTER] button.
4. Use the [1] knob to select “USB Driver”.
5. Use the [2] knob to specify “VENDOR”.
Parameter
[1] knob
Value
[2] knob
Explanation
USB Driver
VENDOR
Choose this when using the USB driver that you
downloaded from the Roland website.
GENERIC
Choose this when using the USB driver that was
provided with your computer.
* Only MIDI can be used.
6. Save the setting.
&
“Saving the System Settings (System Write)” (p. 27)
7. Turn the JUPITER-X’s power off and on again.