4-12
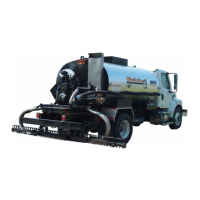
Rosco Maximizer 3B Asphalt Distributor
Specications
2. Calculate the correct torque wrench setting using
(see Equations in Section 4).
NOTE: The most straight forward method of determining
the correct torque setting is to multiply the
desired torque by the length of the wrench from
the center of the handle to the center of the drive
(L) divided by the length of the wrench from the
center of the handle to the crowfoot center (LA),
(Figure 4-1).
LA
L
Torque Wrench - Crowfoot
Figure 4-1
NOTE: Torque Wrench Setting = Desired Torque * L / LA
3. Ensure that the seal face and threads are clean
and in good condition. Do not lubricate coupling
threads.
Hydraulic Fittings
Tightening Flare Type Tube Fittings
1. Check the are and are seat for defects that might
cause leakage.
2. Align tube with tting before tightening.
3. Lubricate connection and hand tighten swivel nut
until snug.
Table 4-8. Torque Specications For Flare Type Tube Fittings
TUBE SIZE OD
NUT SIZE
(ACROSS
FLATS)
TORQUE VALUE
RECOMMENDED TURNS TO
TIGHTEN (AFTER FINGER
TIGHTENING)
(in) (in) (N•m) (lb-ft) (N•m) (lb-ft)
3/16 7/16 8 6 1 1/6
1/4 9/16 12 9 1 1/6
5/16 5/8 16 12 1 1/6
3/8 11/16 24 15 1 1/6
1/2 7/8 46 34 1 1/6
5/8 1 62 46 1 1/6
3/4 1 1/4 102 75 3/4 1/8
7/8 1 3/8 122 90 3/4 1/8
4. To prevent twisting the tube(s), use two wrenches.
Place one wrench on the connector body and with
the second, tighten the swivel nut to the torque
shown in Table 4-8. Torque Specications For
Flare Type Tube Fittings.
NOTE: The torque values shown are based on
lubricated connections as in assembly.
Full Torque Nut Coupling
Installation
The only completely reliable method of creating a
consistent leak free, long lasting connection is to ensure
that the coupling is brought to the proper torque.
The best method of ensuring a coupling is brought to the
proper torque is to use a torque wrench with crowfoot.
To ensure the proper torque is met, use the ats method
of torque verication. Flats method may be used alone
in situations where a torque wrench is inaccessible or
unavailable.
There are 7 steps involved in proper coupling
installation:
1. Determine the correct torque value for your
coupling.
NOTE: Only use the torque values specied from
the manufacturer, do not use SAE torque
recommendations.
The minimum torque values are adequate for
sealing in most applications, and the maximum
torque values should never be exceeded.
Return to
Last Viewed
Return to
Thumb Index

 Loading...