ROTAX 125 MAX evo, Junior MAX evo, Mini MAX evo, Micro MAX evo
6. Komplettieren der Trägerplatte
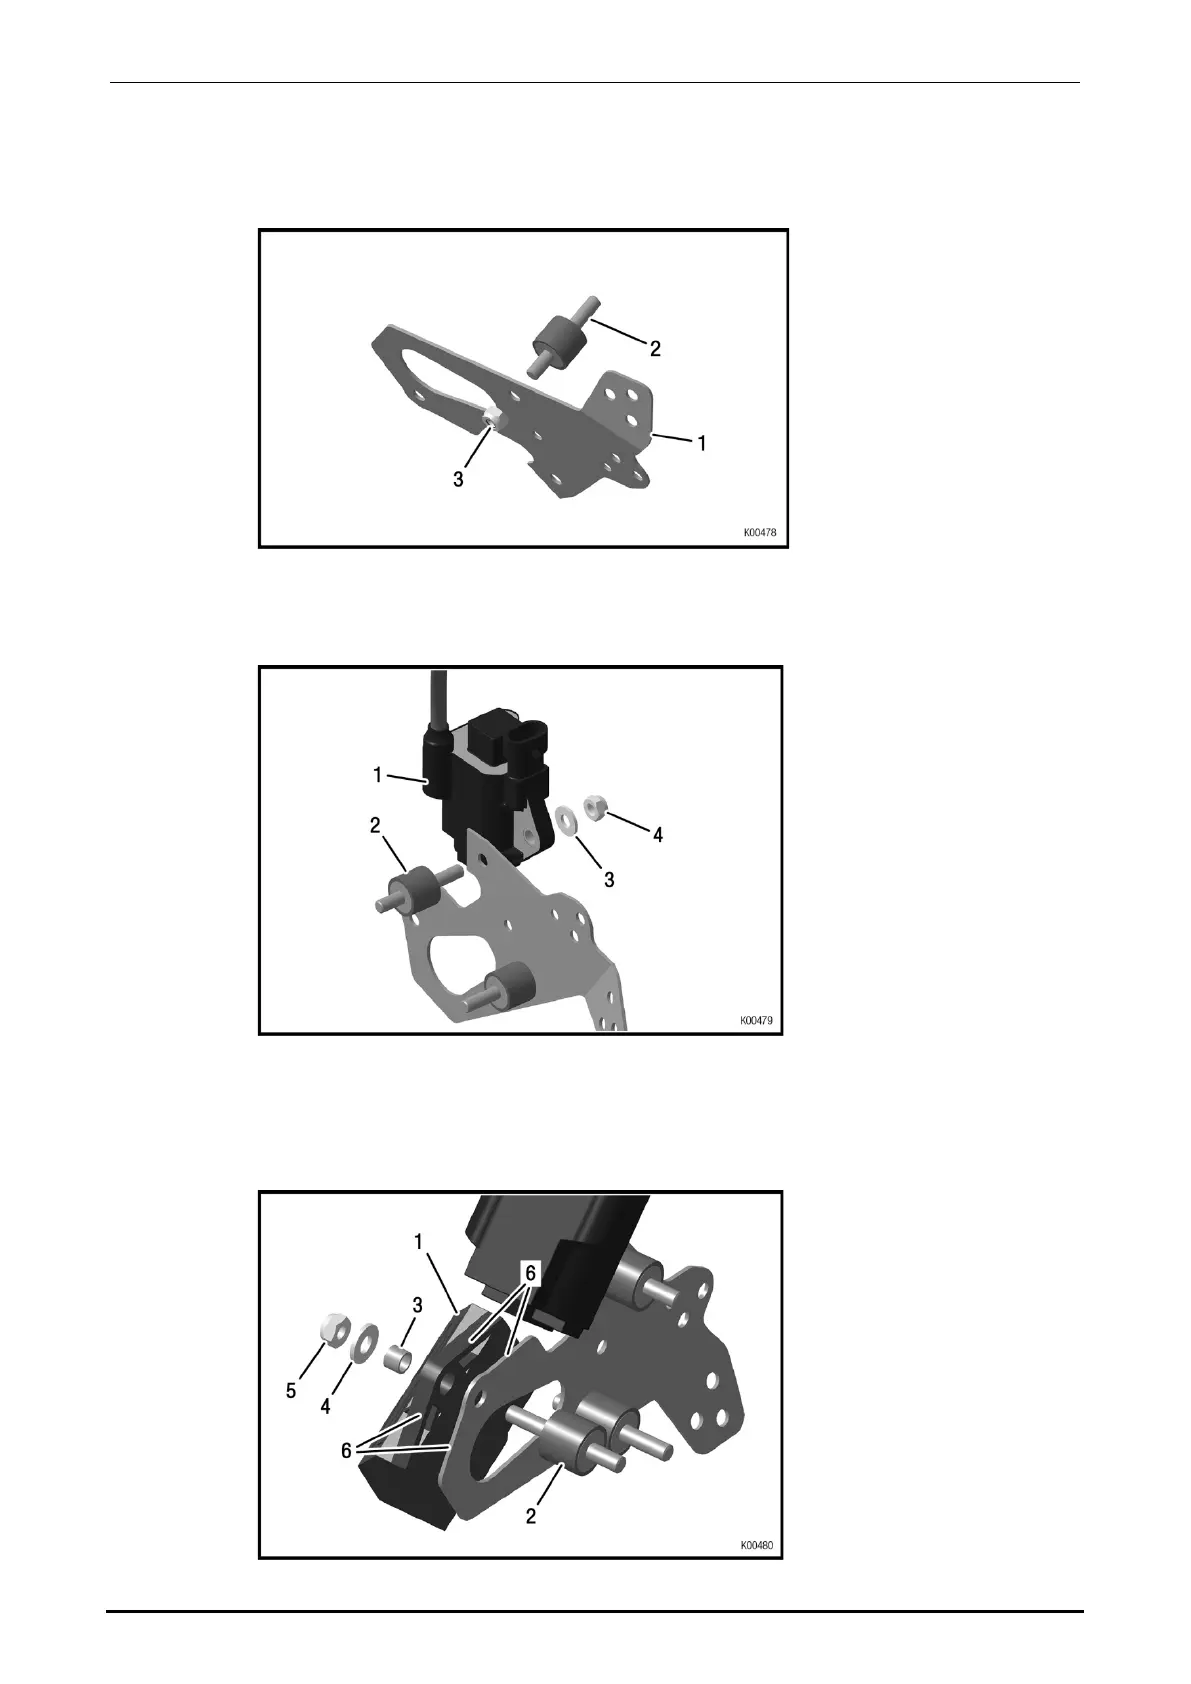
Rundpuffer M6 (Pos. 2) mit kurzer Gewindeseite mittels Sicherungsmutter M6 (Pos.
3) auf die Trägerplatte (Pos. 1) montieren.
Bild 13
Zündspule (Pos. 1) mit Rundpuffer M6 (Pos. 2), Scheibe (Pos. 3) und
Sicherungsmutter M6 (Pos. 4) auf die Trägerplatte montieren.
Hinweis: Die lange Gewindeseite des Rundpuffers benutzen.
Bild 14
ECU (Pos. 1) mit Rundpuffer M6 (Pos. 2), Distanzscheibe (Pos. 3), Scheibe (Pos. 4)
und Sicherungsmutter M6 (Pos. 5) auf die Trägerplatte montieren.
Hinweis: Die lange Gewindeseite des Rundpuffers benutzen.
Hinweis: ECU und Trägerplatte haben die gleiche Form in diesem Bereich (Pos. 6).
Bild 15
Seite/Page 13/55
Ausgabe/Edition 07/2016
 Loading...


