3 x Installation
31
FA ROTEX Solaris - 08/2007
Notes on pipe installation
• Run the connection pipe with a continuous gradient between the solar panels and the storage tank.
• Install and connect the pipe to the lower coupling of the Solaris Sanicube as described in Chapter 3.3.
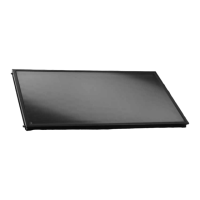
• Connect the solar panel array alternately and align it so that the bottom return flow coupling is located at the lowest point
of the solar panel array.
1. Remove three roof tiles at each intended roof penetration points (one or two tile rows below the lower solar panel edge).
2. Run the connection pipe up to the roof penetration point and attach it.
3. A slit can be made in the roof heat insulation underneath the roof penetration box or it can be cut back, so that there is
sufficient space for the return flow pipe (VA 18 Solar) to be pulled out and correctly angled in relation to the roof penetration
box (Fig. 3-72).
4. Run the connection pipes through the roof at the points provided. To ensure the necessary uninterrupted thermal insulation
(also within the roof structure), the insulation must be resealed at the penetration points (e.g. with adhesive tape).
5. Remove the thermal insulating sleeves on the connection pipes so that the pipes can be passed through the roof ducts
(Fig. 3-72).
6. Pull the feed pipe (at the top of the solar panel/VA 15Solar) or return flow pipe (at the bottom of the solar panel/VA 18 Solar)
through the M32 screw connection of the relevant roof duct. Following this, push the equipotential bonding terminal/solar
panel temperature sensor cable from the inside through the relevant M16 screw connection (Fig. 3-73).
CAUTION!
Leaking vapour barriers can lead to building damage.
• Reseal the vapour barrier from the inside at the penetration points of the connection pipes and cable.
CAUTION!
If plastic pipes are damaged, there is risk of them breaking.
• When cutting through the thermal insulation, never damage the outer surface of the VA Solar pipes.
Fig. 3-72 Shorten the plastic connection
pipe to the required length
Fig. 3-73 Run the pipe and the cable
through the roof duct
Fig. 3-74 Install the roof duct