EasyManuals Logo

Saleae Logic 8 User Manual

Default Icon
69 pages
To Next Page IconTo Next Page
To Previous Page IconTo Previous Page
Page #44 background imageLoading...
Page #44 background image
Page 44 of 69
Timing markers can be used to measure elapsed time between any two locations in your data. By default,
the Annotations sidebar will contain a Timing Marker annotation.
To place a timing marker, first press the A1 or A2 buttons.
Move your mouse to the desired location and click to place the marker.
To cancel placing a timing marker, right-click.
You can also place timing markers with the keyboard's 1 and 2 keys.
To place additional markers, click the Plus button on the Annotations panel and select Timing Marker
Pair.
To zoom to a particular timing marker pair, click its icon, which appears at the left side of the Annotation
panel.

Table of Contents

Questions and Answers:

Question and Answer IconNeed help?

Do you have a question about the Saleae Logic 8 and is the answer not in the manual?
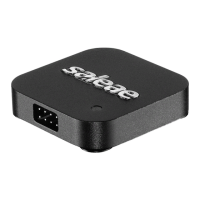
Saleae Logic 8 Specifications

General IconGeneral
Channels8
Digital Sample Rate100 MS/s
Analog Sample Rate10 MS/s
Analog Bandwidth5 MHz
Analog Resolution12 bits
Input Impedance1 MΩ || 10 pF
ConnectivityUSB 2.0
Operating System CompatibilityWindows, macOS, Linux
Power SupplyUSB Powered
Logic Level1.2V to 5.5V
Digital Voltage Range0V to 5.5V
Supported ProtocolsI2C, SPI, UART, CAN

Related product manuals