16 EB 8355-1 EN
Mounting on control valves
1. Fasten the clamp (1.2) to the actuator
stem, making sure that the fastening
screw rests in the groove of the actuator
stem.
2. Fasten the associated pick-up lever D1 or
D2(with355/700cm²actuators)tothe
feedback lever of the positioner.
3. Securetheintermediateplate(15)with
the gasket facing towards the actuator
yoke.
4. Position the positioner such that the pick-
up lever slides in line over the pin (1.1)
of the clamp (1.2). Fasten the positioner
totheintermediateplate(15).
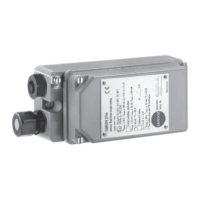
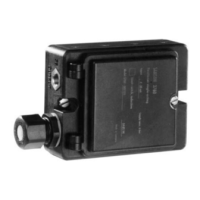
5. Mountcover(16).
6. Check whether the correct range spring
hasbeeninstalledaslistedinTable4!
Range spring 1 is installed as standard.
If necessary, replace it with range spring
2includedintheaccessoriesandxitat
the outer hook-in holes.
Actuators with 240, 350, 355 and 700cm²
diaphragm areas
7. Makesurethatthetipofthegasket(16)
projecting from the side of the connec-
tionblock(Fig.2,middle)ispositioned
to match the actuator symbol for the ac-
tuator's fail-safe action "actuator stem
extends" or "actuator stem retracts".
If this is not the case, unscrew the three
fastening screws and lift off the cover.
Turnthegasket(16)by180°andre-in-
sert it.
The old connection block version requires
the switch plate (13) to be turned to align
the actuator symbol with the arrow mark-
ing.
8. Place the connection block with the asso-
ciated gaskets against the positioner and
the actuator yoke. Fasten it using the
screw.
For actuators with fail-safe action "actua-
tor stem retracts", additionally mount the
external signal pressure pipe.
Actuator (120cm²)
The signal pressure is transmitted to the dia-
phragm chamber over the switchover plate
(Fig.2andFig.3,bottom).
7. Removescrewplugonthebackofthe
positioner(Fig.4)andsealtheside
signal pressure output with the stopper
included in the accessories.
8. Mount the positioner so that the hole in
theintermediateplate(15)coversthe
seal in the hole of the actuator yoke.
9. Align the switchover plate with the corre-
sponding actuator symbol. Fasten it to
the actuator yoke.
If a solenoid valve or a similar device is ad-
ditionally mounted onto a 120cm² actuator,
do not remove the M3 screw plug at the
back of positioner. In this case, the signal
pressure must be transmitted from the signal
pressure output to the actuator over an addi-
tional connecting plate (Table2). The swi-
tchover plate is not used in this case.
NOTICE
!