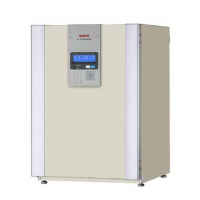
- 80 -
zRemoval of MCO-HP on the way of decontamination
# Operation Key Display/Remark
1 Turn the unit off and on. Power switch “H2O2 Decontamination”
2 When ‘Warming up’ is displayed, press
MENU key and select ‘about’ and press
ENTER key.
MENU
ENTER
To avoid the device turning back
to resolution process, ensure to
press “MENU” key and select
‘about’ and press “ENTER” key
when ‘Warming up’ is displayed.
3 Remove MCO-HP and press MENU key
and ENTER key.
MENU
ENTER
“Top Screen”
4 Ensure electric lock should be unlocked. Ensure outer door should be
opened.
(3) Automatic CO
2
Density Calibration Add-on Kit (MCO-SG)
zSetting of Standard CO
2
and O
2
density
# Operation Key Display
1 ----- “Top Screen”
2 Press MENU key. MENU “MENU” window
3 Select Tool and press ENTER key. ENTER “Select Tool”
4 Select “Standard Gas setting” on page 2.
Press ENTER key.
ENTER “Standard Gas Setting” screen
5 Input standard gas density by numeric
keys.
Numeric key
6 Press MENU key. MENU “MENU” window
7 Select ‘OK’ and press ENTER key. ENTER
zCO
2
and O
2
density calibration
# Operation Key Display/Remark
1 ----- “Top Screen”
2 Press MENU key. MENU “MENU” window
3 Select Tool and press ENTER key. ENTER “Select Tool”
4 Select “Standard Gas calibration” on the
2
nd
page of “Select Tool” screen.
Press ENTER key.
ENTER “Standard Gas Calibration” screen
(System check starts)
After passing system check,
confirmation screen is shown to
start calibration.
5 Select ‘OK’ in “MENU” window and press
ENTER key to start CO
2
calibration.
ENTER
6 After CO
2
calibration is complete,
“Top Screen” is shown.
 Loading...