Do you have a question about the Sanyo PLC-WTC500AL and is the answer not in the manual?
Important safety warnings and guidelines for operating the projector safely.
Warnings about electric shock, opening the unit, and proper handling.
Recycling systems and disposal information for EU users.
Importance of ventilation and precautions to prevent overheating.
Guidance on filter cleaning and replacement for optimal performance.
Guidance on correct projector placement to prevent accidents.
Avoidance of specific tilting and placement angles for safe operation.
Safety advice for mounting the projector securely from the ceiling.
Proper methods for carrying and transporting the projector safely.
Specific warnings about handling the lens and projector body.
FCC compliance statement for digital device operation and interference.
Specifications for power cords in US, Canada, and UK, including safety warnings.
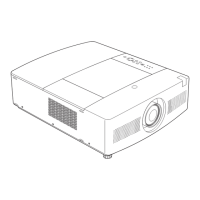
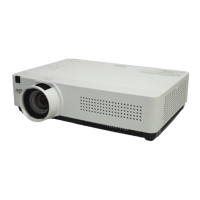
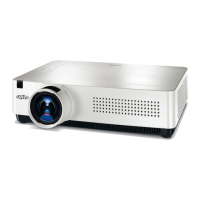
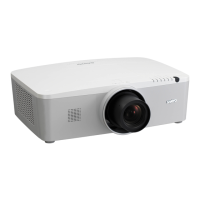
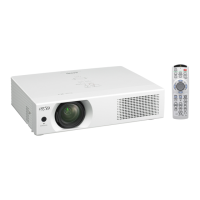
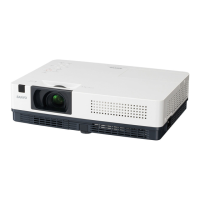
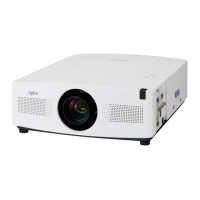
Identification of components on the front panel of the projector.
Identification of components on the back panel of the projector.
Identification of components on the bottom panel of the projector.
Detailed description of HDMI, Computer, Audio, Monitor, and BNC input/output terminals.
Description of USB, R/C, and Control Port connectors for peripheral interaction.
Explanation of all indicators and buttons located on the projector's top panel.
Identification and function of main buttons on the remote control.
In-depth explanation of various remote control buttons and their operations.
Step-by-step guide for inserting batteries into the remote control.
Information on where the remote receivers are located and the effective operating range.
How to connect and use the remote control via a wired connection.
Instructions on how to change and initialize remote control codes for interference prevention.
Using adjustable feet to control projector height and tilt angle.
Step-by-step guide for safely removing and installing the projector lens.
How to connect computers via HDMI, DVI, VGA, and serial cables.
Guide for connecting various video sources like VCRs, DVD players, and game consoles.
How to connect audio sources to the projector and output audio.
Instructions on connecting the projector to AC power, including regional plug types.
Step-by-step guide to power on the projector, including initial display and PIN code entry.
Information on what a PIN code is and precautions for managing it.
Procedures for safely shutting down the projector, including cooling time.
How to access and navigate the projector's on-screen menu system.
Overview of the menu bar layout and its different categories.
How to use the top control for lens adjustments like zoom, focus, and shift.
How to use the shutter button to block light and its management.
Adjusting volume and muting sound via direct operation or menu.
Using Freeze, Auto PC, Info, Zoom, Focus, and Screen size functions.
Using PIP, PIP Volume, P-TIMER, and Keystone adjustment via remote.
Activating and using the laser pointer feature with the remote control.
Using the remote control to display a spotlight or pointer on the screen.
How to use the remote control as a wireless mouse for computer control.
Using INPUT buttons on the remote to switch between input signals.
Using the INPUT button on the projector's top control to cycle through inputs.
Selecting input ports and signal formats (RGB, HDMI, Video, Component, S-Video).
Automatic or manual selection of video systems (PAL, SECAM, NTSC) for AV inputs.
How the projector automatically tunes to computer signals using Multi-scan and Auto PC Adjustment.
Manually selecting computer system modes when automatic tuning is insufficient.
Using the AUTO PC button or menu for automatic image adjustment.
Detailed adjustment of Fine sync, Total dots, Horizontal, and Vertical positions.
Modifying display area (H/V) and resetting PC adjustment data.
Saving custom PC settings to memory modes and clearing data.
Choosing preset image modes for different viewing conditions.
Fine-tuning contrast, brightness, and color intensity for optimal picture quality.
Setting tint and adjusting white balance for accurate color representation.
Fine-tuning sharpness, gamma for contrast, and noise reduction for smoother images.
Options for progressive scan display modes (Active, Still, Film).
Resetting all image adjustment settings to their default values.
Saving customized image settings to user memory slots.
Correcting keystone distortion and storing settings.
Settings for ceiling mounting and rear projection display.
Selecting Normal, True, Full, or Custom screen sizes for computer input.
Using Digital Zoom +/- to enlarge or reduce image size and panning.
Selecting Normal, Zoom, Natural Wide, Wide, Full, or Custom screen sizes for video input.
Choosing the display language for the on-screen menus.
Customizing screen logos, including capture and PIN lock functions.
Capturing projected images for use as custom startup logos.
Preventing unauthorized changes to screen logos using a PIN code.
Setting a new PIN code for logo security and managing lock status.
Setting up and operating the Picture in Picture mode for dual video display.
Choosing a background display when no input signal is detected.
Choosing how to use the projector's two lamps (Lamp1, Lamp2, or Lamp1/2) and timer settings.
Adjusting screen brightness (Auto, High, Eco) and managing lamp life modes.
Instructions for filter control and initiating filter replacement.
Customizing pointer size and pattern for screen emphasis.
Setting remote control codes and selecting IR receiver locations.
Managing on-screen displays, countdowns, and other visual indicators.
Configuring projector behavior in standby mode (Eco vs. Network).
Settings for reducing power consumption and automatic lamp turn-off.
Adjusting fan operation based on projector installation angle to prevent malfunctions.
Configuring shutter operation protection and automatic shutdown management.
Configuring HDMI input for optimal image and audio output.
Locking projector control buttons to prevent unauthorized access.
Setting PIN codes to prevent unauthorized projector operation.
Instructions for changing the PIN code and important security notes.
Using test patterns for setup and viewing warning logs for fault diagnosis.
Setting filter replacement timers and managing scroll counters.
Restoring all projector settings to factory default values.
Understanding filter warnings and icons, and the importance of timely replacement.
Detailed procedure for replacing the filter cartridge and ordering replacements.
Procedures to reset filter and scroll counters after replacement.
How the projector manages and switches between the two lamps automatically.
Understanding lamp status indicators and when lamp replacement is needed.
Safety warnings and detailed steps for replacing projection lamps.
Critical safety instructions for handling high-pressure projection lamps to prevent injury.
Interpreting warning indicators (Temp, Filter) and projector status (Power, Shutter).
Proper methods for cleaning the projector lens to maintain image quality.
Guidelines for cleaning the projector body, including safety notes on solvents.
Solutions for projector not powering on or displaying an image.
Troubleshooting steps for out-of-focus images or distortion.
Resolving problems with brightness, color, image orientation, and sound.
Troubleshooting issues with Auto PC, Power Management, and setting retention.
Solutions for capture errors, remote control issues, and blinking indicators.
Warning about high voltages and advice on contacting service centers.
Visual guide showing navigation paths for input selection.
Visual guide for navigating System and Image adjustment menus.
Visual guide for navigating PC adjustment and screen settings menus.
Visual guide for navigating Information, Sound, and Remote Control menus.
Comprehensive visual guide to all setting options and their hierarchy.
Understanding indicator lights during normal operation, stand-by, and cooling.
Interpreting indicator lights when the projector detects abnormal temperature or lamp issues.
Understanding indicators related to filter status and shutter control issues.
List of supported resolutions, H-Freq, and V-Freq for analog computer signals.
List of supported resolutions, H-Freq, and V-Freq for digital computer signals.
Chart showing enabled and disabled PIP combinations based on input signals.
Details on projector dimensions, weight, panel resolution, and signal compatibility.
Information on lens, interface ports, and audio output.
Details on power requirements, operating conditions, and remote control features.
List of items included with the projector, such as manuals and cables.
List of available optional parts like lenses and cables for purchase.
Information on projector compliance with PJLink Standard Class 1 for network control.
Pinout details for the analog RGB input/output terminal.
Pinout details for USB and serial control port connectors.
Pinout details for the HDMI terminal.
Space to record PIN codes for security and projector operation.
Diagrams and measurements of the projector's physical size and ceiling mount hole pattern.
| Matrix size | 0.95 \ |
|---|---|
| Matrix type | 3-panel (p-Si TFT active) |
| Projection distance | - m |
| Vertical scan range | 50 - 100 Hz |
| Horizontal scan range | 15 - 100 kHz |
| Projection technology | LCD |
| Contrast ratio (typical) | 3000:1 |
| Screen size compatibility | 30 - 300 \ |
| Projector native resolution | WXGA (1280x800) |
| Projector brightness (economic mode) | 4000 ANSI lumens |
| Audio input | 2 |
| Aspect ratio | 16:10 |
| Dimensions (WxDxH) | 451 x 550 x 175 mm |
| Focal length range | - mm |
| HDCP | No |
| Noise level | 36 dB |
| Noise level (economic mode) | 32 dB |
| Dot clock scanning frequency | 140 MHz |
| Lamp type | NSH |
| Lamp power | 330 W |
| Lamps quantity | 2 lamp(s) |
| Light source type | Lamp |
| Service life of light source | 2500 h |
| Service life of light source (economic mode) | 3000 h |
| USB connector type | USB Type-B |
| Serial interface type | RS-232 |
| USB 2.0 ports quantity | USB 2.0 ports have a data transmission speed of 480 Mbps, and are backwards compatible with USB 1.1 ports. You can connect all kinds of peripheral devices to them. |
| Supported video modes | 1080i, 480i, 480p, 576i, 576p, 720p |
| Analog signal format system | NTSC, NTSC 4.43, PAL, PAL M, PAL N, SECAM |
| Supported graphics resolutions | 720 x 400, 1280 x 1024 (SXGA), 1280 x 768 (WXGA), 1280 x 800 (WXGA), 640 x 480 (VGA), 800 x 600 (SVGA) |
| RMS rated power | 6 W |
| Product color | White |
| Power source | AC |
| AC input voltage | 100 - 240 V |
| AC input frequency | 50 - 60 Hz |
| Power consumption (standby) | - W |
| Power consumption (typical) | 440 W |
| Power consumption (economy mode) | 400 W |
| Storage temperature (T-T) | -10 - 60 °C |
| Operating temperature (T-T) | 5 - 40 °C |
| Depth | 550 mm |
|---|---|
| Width | 451 mm |
| Height | 175 mm |
| Weight | 14700 g |