-6-
ANALOG OUT
INPUT 3
INPUT 1
INPUT 2
ANALOG IN
DIGITAL (DVI-D)
VIDEO/Y Cb/Pb Cr/Pr
G B R H/V V
VIDEO/Y Cb/Pb Cr/Pr
S-VIDEO
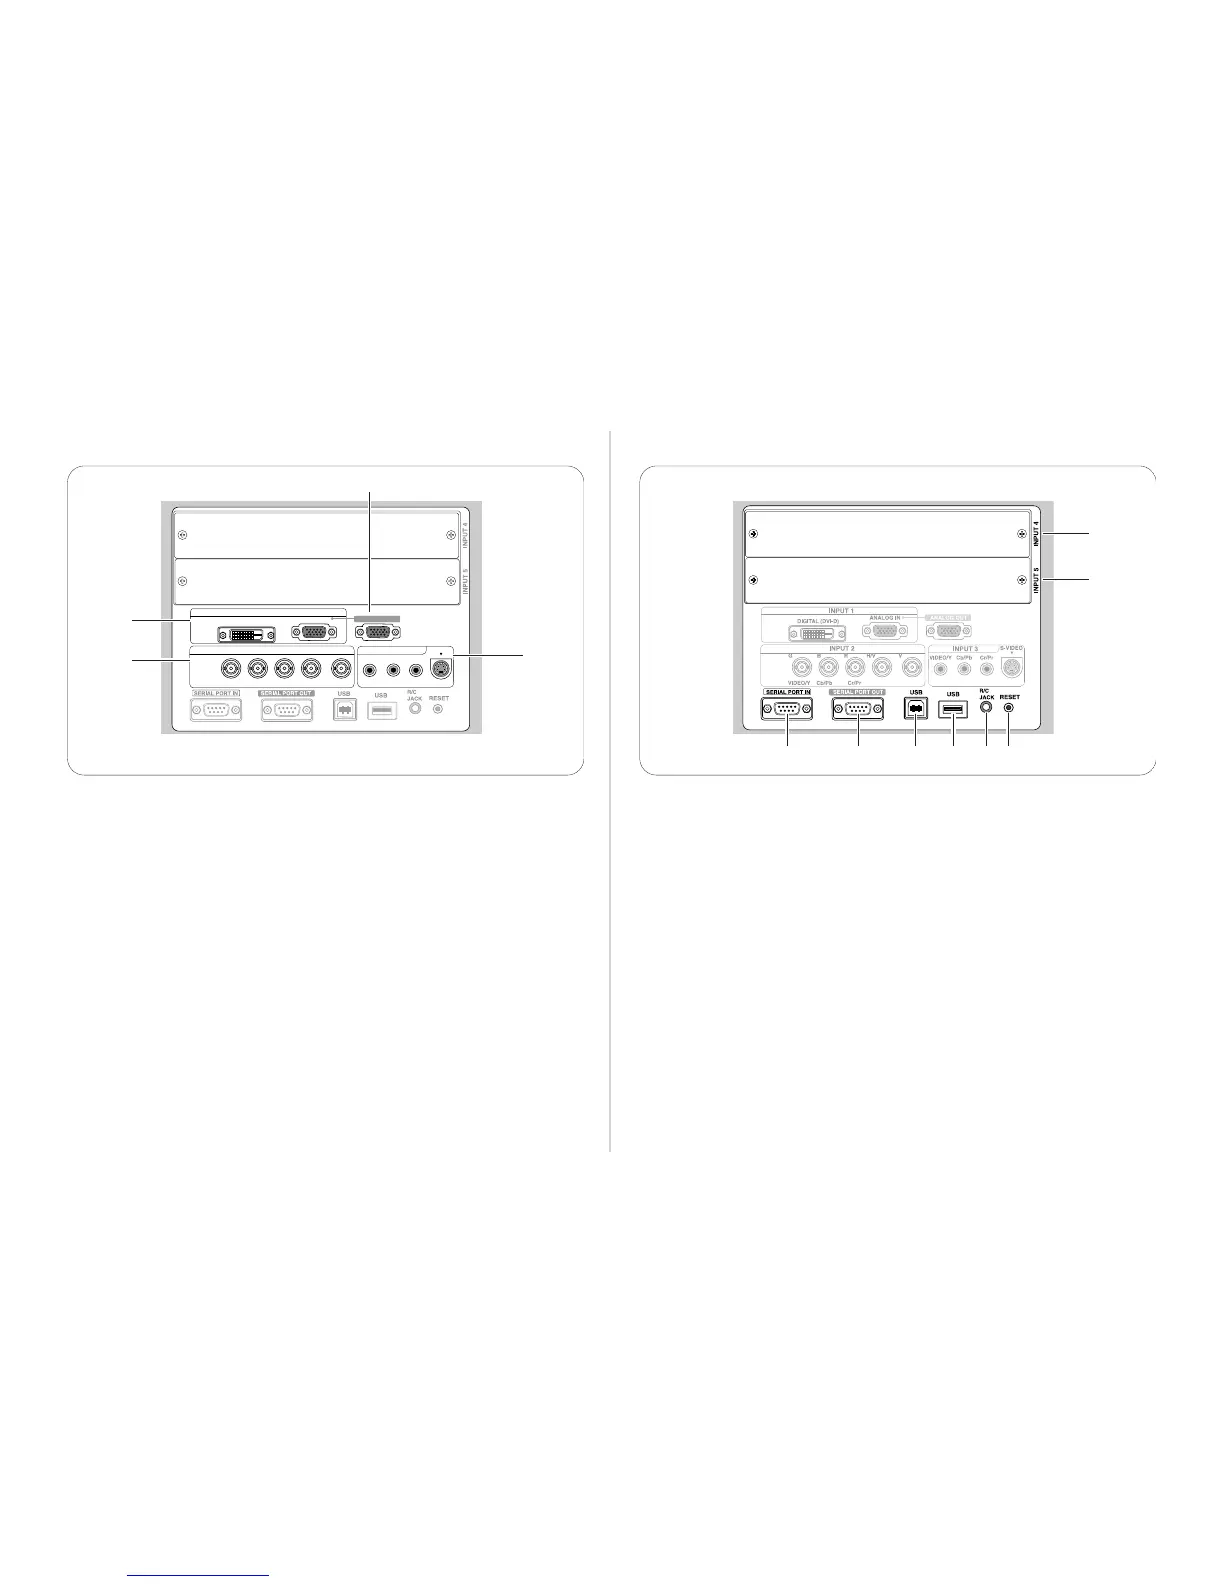
Te r m inals
q
w
e
r
e INPUT 3 terminals
VIDEO/Y, Cb/Pb, and Cr/Pr
Connect video or component output (Y, Cb/Pb,
and Cr/Pr) signal from video equipment to these
jacks with a video cable (RCA-type).
S-VIDEO
Connect S-Video output signal from
video
equipment to this jack.
r INPUT 2 terminals
VIDEO/Y, Cb/Pb, and Cr/Pr
Connect video or component output (Y, Cb/Pb,
and Cr/Pr) signal from video equipment to these
jacks with a video cable (BNC-type).
G, B, R, H/V, and V
Connect RGB output signal from
a computer with a
computer cable (5 BNC-type) to these jacks.
w ANALOG OUT
This terminal can be used for analog signal output
incoming through the ANALOG IN terminal
(INPUT 1). Connect this terminal to the other
monitor with a VGA cable.
q INPUT 1 terminals
DIGITAL (DVI-D) (HDCP compatible)
Connect digital output signal from a computer or
video equipment to this terminal with a DVI-D
cable.
ANALOG IN
Connect analog output signal from a computer or
a
video equipment (Component or RGB Scart) to this
terminal with a VGA cable, Scart-VGA, or Component-
VGA cable.
A built-in micro processor that controls this unit may occasionally
malfunction and needs to be reset. This can be done by pressing
the RESET button with a pen, which will shut down and restart the
unit. Do not use the RESET function excessively.
q
erty
u SERIAL PORT IN
When controling the projector from a computer,
connect the computer to this terminal with a serial
cross cable (commercially available).
t USB (Series B)
This port is used for the projector maintenance.
y SERIAL PORT OUT
This terminal outputs signal from SERIAL PORT
IN. When controling more than two projectors
from a computer, connect the other projector to
this terminal with a serial cross cable
(commercially available).
e R/C JACK
Connect the remote control to this jack with the
supplied remote control cable to use the remote
control as wired.
✽
✽
r USB
Connect a USB mouse (commercially available) to
control the On-Screen Menu.
w
w INPUT 5 (Vacant for Optional Interface Board)
An optional interface board can be installed into
this slot. This input accepts digital signals only.
u
q INPUT 4 (Vacant for Optional Interface Board)
An optional interface board can be installed into
this slot.

 Loading...


