English
-5-
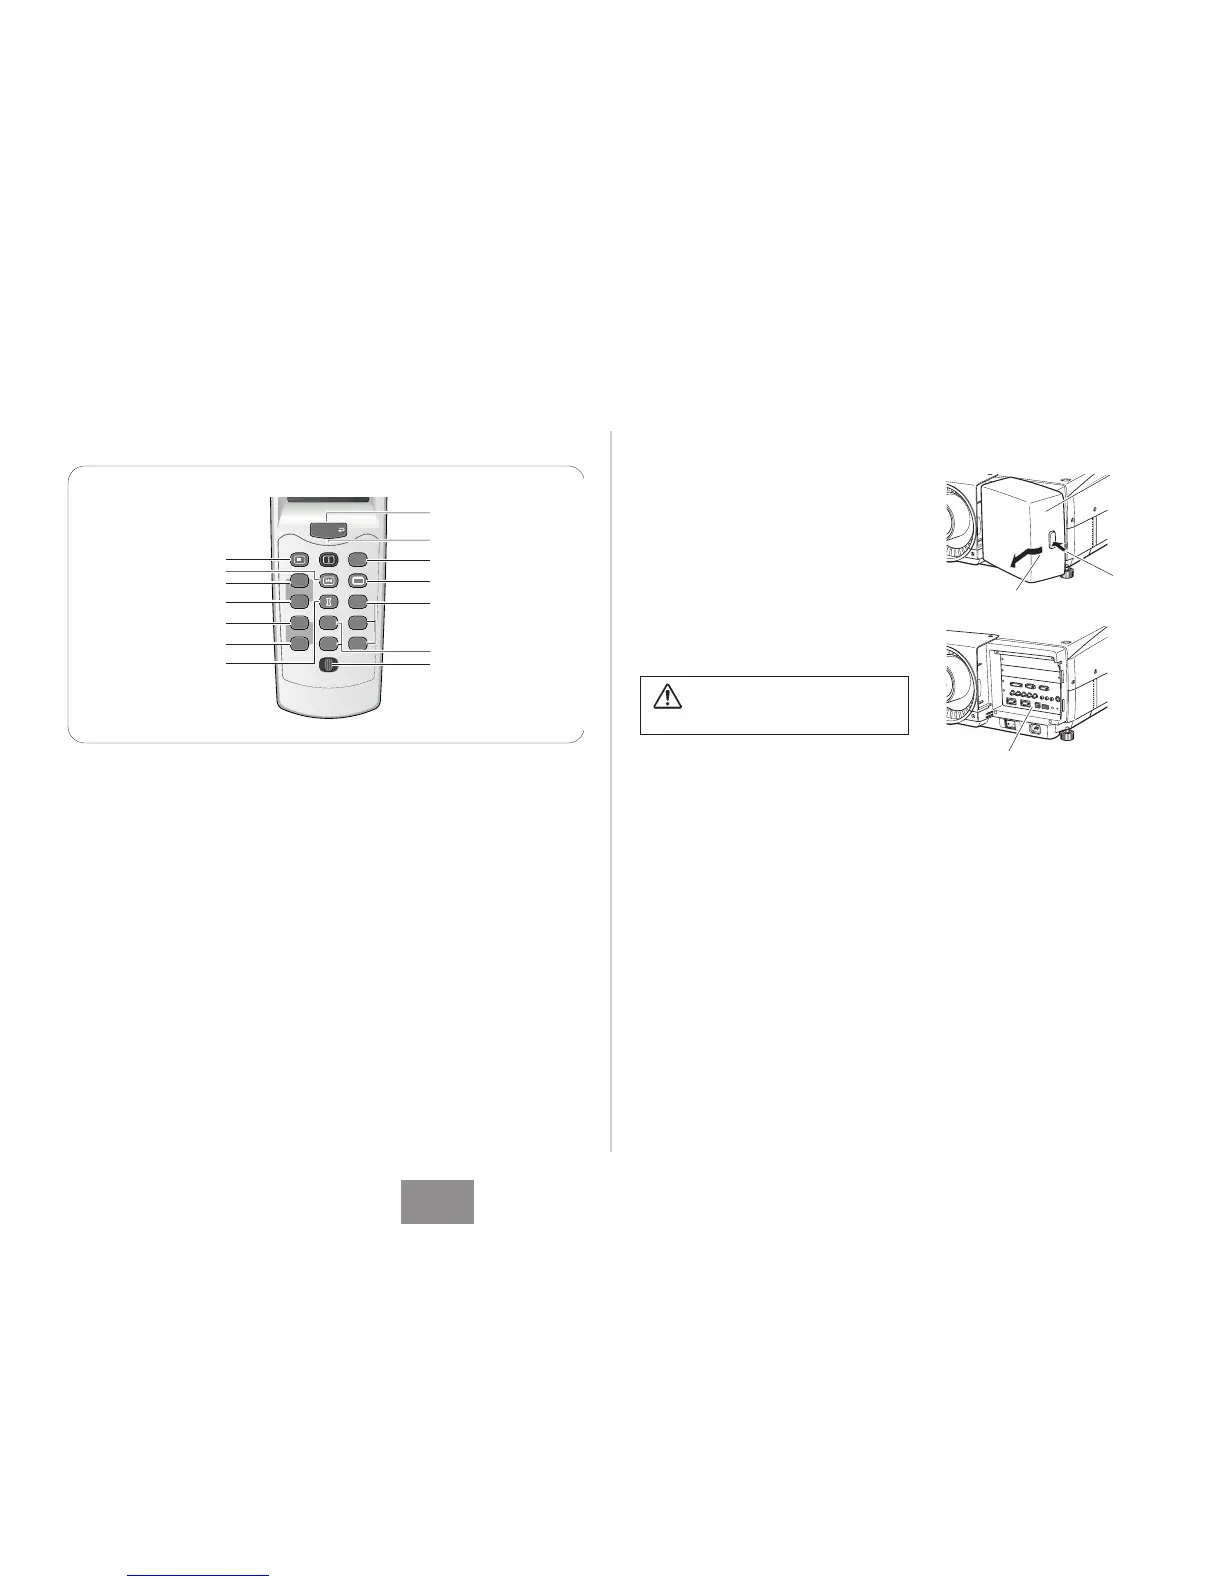
!1 SCREEN button
Selects the screen size.
!2 INPUT 1-3 buttons
Selects the input source (INPUT 1-INPUT 3).
!0 AUTO PC button
Operates the Auto PC adjustment.
q MENU button
Opens or closes the On-Screen Menu.
w FREEZE button
Freezes the projected picture.
!4 REMOTE RESET/ON/ALL-OFF switch
When using the remote control, set this switch to
“ON.” Set it to “ALL OFF” for power saving
when it is not used. Slide this switch to “RESET”
by holding down the CH and ID buttons at the
same time to initialize the Remote Control ID and
CH.
u P-TIMER button
Operates the P-Timer function.
MENU
q
e
!0
!1
t
y
o
!3
i
r
u
!4
w
!2
e and r buttons are unusable.
t CH button
Switches the Remote Control Channel (CH).
y ID button
Switches the Remote Control ID.
i CANCEL button
Cancels the selection and returns to the previous
menu.
o INFO button
Displays the projector information.
!3 INPUT 4-5 buttons
Selects the input source (INPUT 4-INPUT 5).
Terminals for connecting the AC power cord and other
equipment are located in the front part of the projector for
easy setup. The terminal area is covered with a front
cover to protect from dust and dirt, and hide messy cable
connections.
Remove and replace the front cover by following the
procedure below:
To remove the front cover, push the button A on right
side of the front cover and pull the cover forward.
To put back the front cover to the projector, insert the left
part of the cover into the projector and then push the
entire cover. Make sure that the front cover is locked with
the button A and fitted on the projector.
Pull this part forward by
pushing button A.
A
Caution
Do not push the front cover hard or subject it
to excessive shock. Doing so may damage the
cover.
Terminals
Front cover
Connection Terminals

 Loading...


