EasyManuals Logo

Sanyo PLC-XL51A Service Manual

Sanyo PLC-XL51A
146 pages
To Next Page IconTo Next Page
To Previous Page IconTo Previous Page
Page #22 background imageLoading...
Page #22 background image
- 22 -
Mechanical disassemblies
3
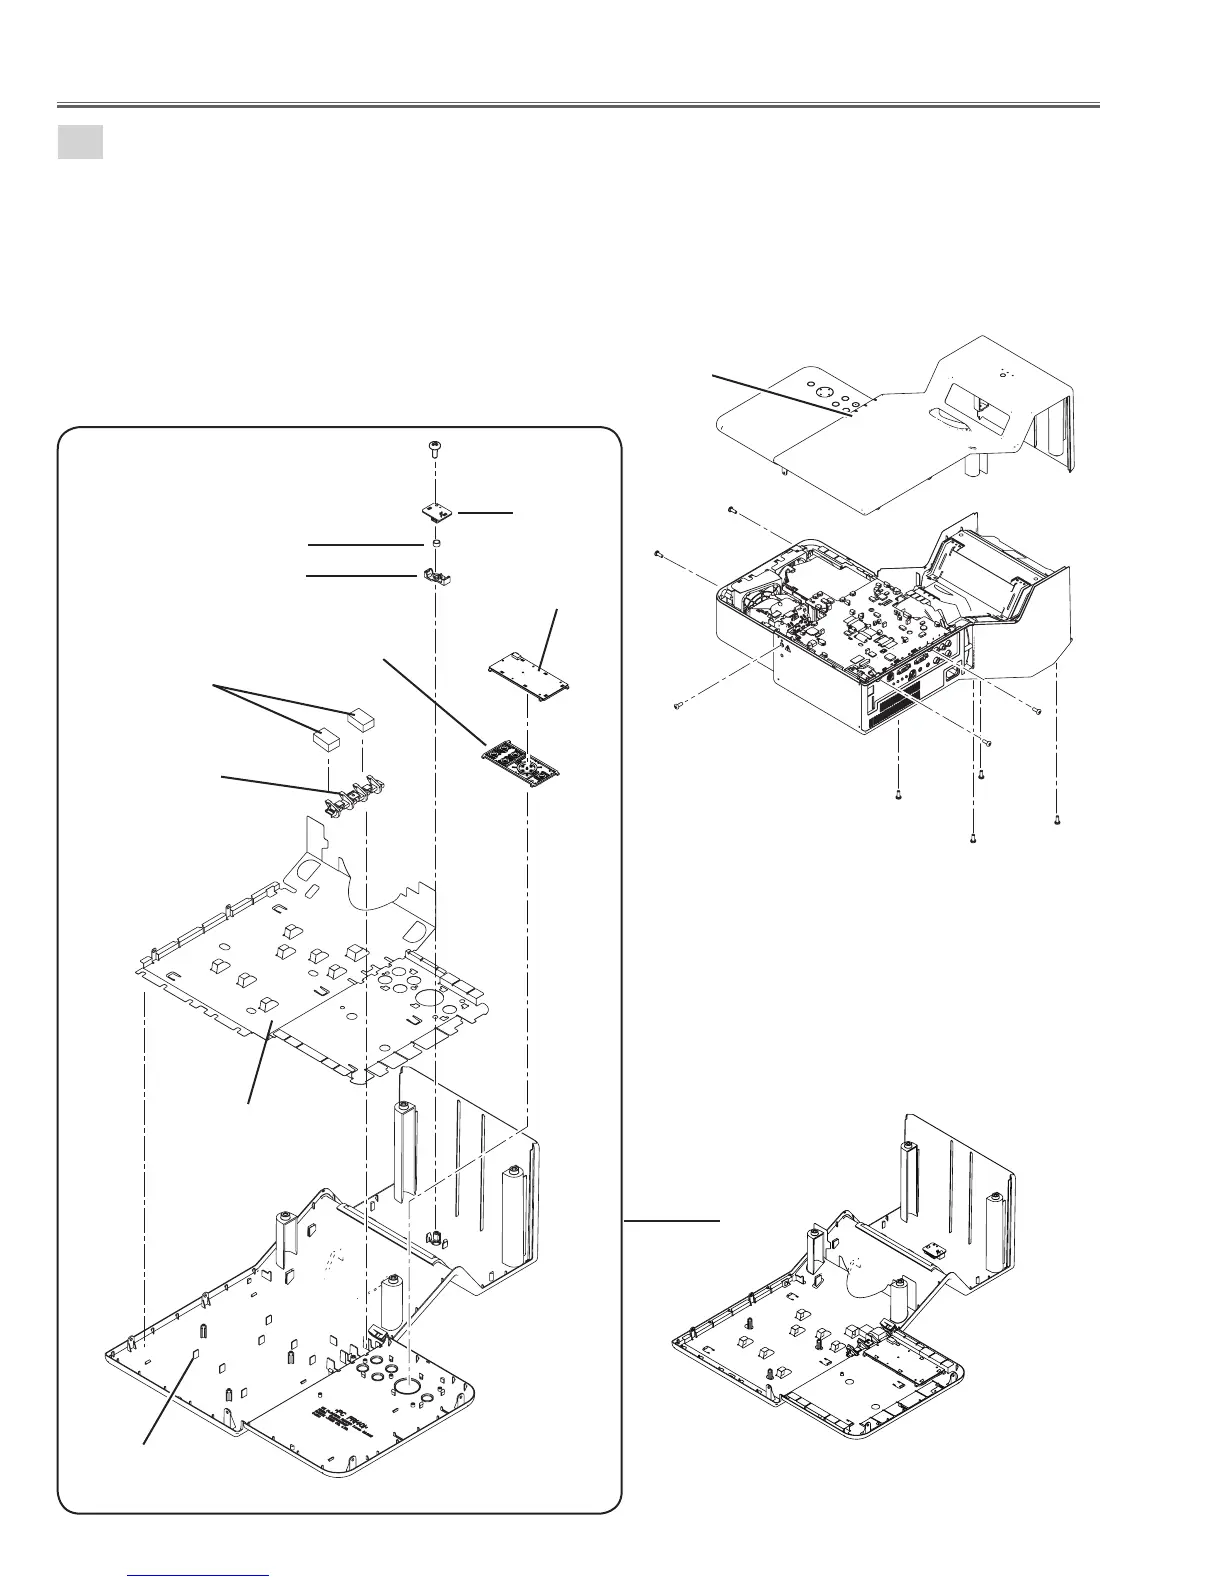
Cabinet top ass'y removal.
1. Remove the 9 screws-A(M3x8) and remove the Cabinet top ass'y.
2. Remove the screw-B(T3x8), remove the R/C board, R/C pipe and remove the Decoration R/C.
3. Remove the Control board and Control Button.
4. Remove the Spacer, Decoration Inray LED and Shield top.
B
Cabinet Top ass'y
A
A
A
A
A
A
A
A
A
Cabinet Top ass'y
Shield Top
R/C Board
R/C pipe
Dec. R/C
Spacer
Dec. Inray LED
Cabinet Top
Control
Board
Control
Button

Table of Contents

Other manuals for Sanyo PLC-XL51A

Questions and Answers:

Question and Answer IconNeed help?

Do you have a question about the Sanyo PLC-XL51A and is the answer not in the manual?

Sanyo PLC-XL51A Specifications

General IconGeneral
BrandSanyo
ModelPLC-XL51A
CategoryProjector
LanguageEnglish

Related product manuals