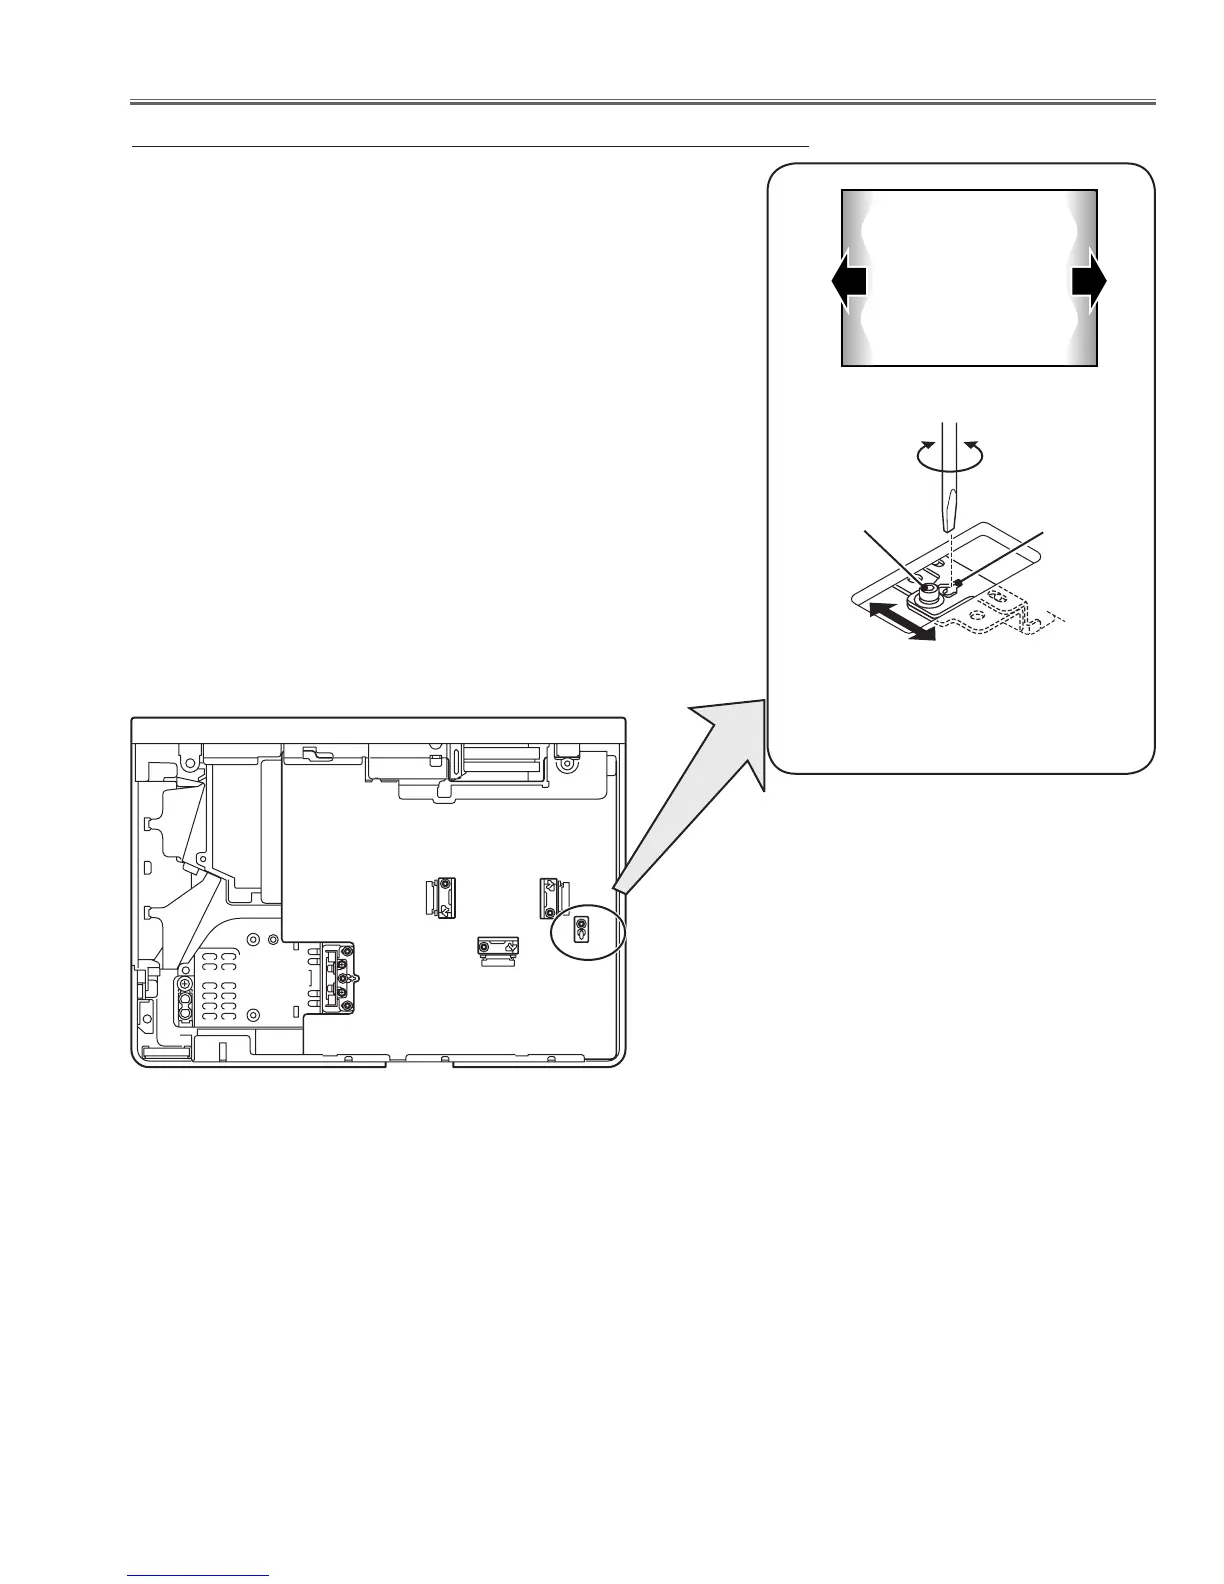
EasyManuals Logo

Sanyo PLC-XU101 Service Manual

Sanyo PLC-XU101
108 pages
To Next Page IconTo Next Page
To Previous Page IconTo Previous Page
Page #25 background imageLoading...
Page #25 background image
-25-
Fig.3
A
Slot B
a
b
b
Moving of slot B
a
White
1 Turn the projector on by a state of without FPC cables.
2 Project all of lights on the screen.
3 Adjust the adjustment base of relay lens assy to make color unifor-
mity in white.
If the shading appears on the left or right of the screen as shown in
Fig.3, loosen 1 screw A, and adjust the slot B to make color unifor-
mity in white by using a slot screwdriver.
4 Tighten the screw A to fix the relay lens unit.
Relay lens-Out adjustment
Optical Adjustments

Table of Contents

Other manuals for Sanyo PLC-XU101

Questions and Answers:

Question and Answer IconNeed help?

Do you have a question about the Sanyo PLC-XU101 and is the answer not in the manual?

Sanyo PLC-XU101 Specifications

General IconGeneral
Matrix size0.8 \
Vertical scan range50 - 100 Hz
Horizontal scan range15 - 100 kHz
Projection technologyLCD
Contrast ratio (typical)500:1
Screen size compatibility33 - 300 \
Projector native resolutionXGA (1024x768)
Keystone correction, vertical±40 °
OutputD-Sub15 x 1
Video inRCA x 1
Audio inputYes
Aspect ratio4:3
Dimensions (WxDxH)334 x 232 x 78 mm
Connectivity technologyWired
Lamp power275 W
Light source typeLamp
Noise level29 dB
Dot clock scanning frequency140 MHz
Audio (L/R) in2
Headphone outputs1
Display resolution786 x 432 pixels
Power consumption (typical)385 W
Weight and Dimensions IconWeight and Dimensions
Weight3500 g

Related product manuals