20
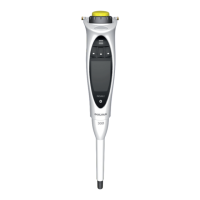
Models 10 µl and 120 µl
– Unscrew the tip ejector collar counter clockwise and remove it
– Unscrew the tip cone locking ring counter clockwise and carefully remove it
– Unscrew the exposed piston counter clockwise
– Clean the tip ejector collar, tip cone locking ring, tip cone and piston with
cleaning solution or similar and lint-free cloth
– Rinse with distilled water if needed and let the parts dry
– Install the piston by screwing it clockwise, do not overtighten
– Put a thin layer of autoclavable grease (cat. no. 731141) on the piston
– Carefully place the tip cone and attach it by screwing the tip cone locking
ring clockwise
– Place the Safe-Cone Filter with forceps (Safe-Cone Filter in models >10 μl)
– Turn the pipette ON
Models 300 µl and 1000 µl
– Unscrew the tip ejector collar counter clockwise and remove it
– Unscrew the tip cone locking ring counter clockwise and carefully remove it
– Unscrew the exposed piston counter clockwise
– Clean the tip ejector collar, tip cone locking ring, tip cone and piston with
cleaning solution or similar and lint-free cloth
– Rinse with distilled water if needed and let the parts dry
– Install the piston by screwing it clockwise, do not overtighten
– Put a thin layer of autoclavable grease (cat. no. 731141) around the seal
– Carefully place the tip cone on the piston attach it by screwing the tip cone
locking ring clockwise
– Attach the tip ejector collar by screwing it clockwise
– Place the Safe-Cone Filter with forceps
– Turn the pipette ON
Model 5 ml
– Unscrew the tip ejector collar counter clockwise and remove it
– Unscrew the tip cone counter clockwise and remove it
– Unscrew the exposed piston counter clockwise
– Clean the tip ejector collar, tip cone locking ring, tip cone and piston with
mild detergent or similar and lint-free cloth
– Rinse with distilled water if needed and let the parts dry
– Install the piston by screwing it clockwise, do not over tighten
– Put a thin layer of autoclavable grease (cat. no. 731141) on the seal and the
interior of the tip cone, avoid excess grease
– Carefully place the tip cone on the piston and screw clockwise
– Attach the tip ejector collar by screwing it clockwise
– Place the Safe-Cone Filter with forceps
– Turn the pipette ON
Model 10 ml
– Unscrew the tip ejector collar counter clockwise and remove it

 Loading...


