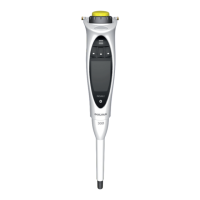
21
– Hold from tip cone with your finger and open bayonet locking by turning
bayonet locking ring clockwise until it stops, remove tip cone.
– Unscrew the exposed piston counter clockwise
– Clean the tip ejector collar, tip cone locking ring, tip cone and piston with
cleaning solution or similar and lint-free cloth
– Rinse with distilled water if needed and let the parts dry
– Install the piston by screwing it clockwise, do not overtighten
– Put a thin layer of autoclavable grease (cat. no. 731141) on the seal and the
interior of the tip cone, avoid excess grease
– Carefully place the tip cone on the piston, hold the tip cone and turn
bayonet locking ring counterclockwise until it stops to lock the tip cone
– Make sure that the tip cone is properly tightened, do not overtighten.
– Attach the tip ejector collar by screwing it clockwise
– Place the Safe-Cone Filter with forceps
– Turn the pipette ON
NOTE! It is always necessary to check the performance of the pipette after
cleaning or maintenance.
4.1.2 Multichannel pipettes
Outer surface:
Clean any visible dirt with cleaning solution or similar and lint-free cloth and
wipe dry
Lower part:
Opening of the lower part of the multichannel pipettes should always be
done by an authorised Sartorius service provider. Please contact your nearest
Sartorius service provider or distributor.
4.2 Sterilising
The Sartorius Biohit electronic pipettes can be sterilised by autoclaving, UV
or by using disinfection or decontamination liquids such as Biohit Proline
Biocontrol decontamination fluid, 70% ethanol, 60% isopropanol, mild
detergent or similar. Always make sure of the chemical compatibility between
the materials of the pipette and the disinfectant or decontamination liquid.
Always follow the autoclaving instructions below.
4.2.1 Autoclaving
Lower parts of Sartorius Biohit electronic pipettes are autoclavable excluding
multichannel 1200 μl.
Please see the autoclaving symbol printed on the lower part of the
multichannel pipettes to make sure the lower part is autoclavable.
Autoclaving instructions
1. Remove the Safe-Cone Filter if attached.
2. Unscrew the lower part by turning the connecting collar and the
dispensing head counterclockwise until it comes off.
3. Sterilise the part at 121°C, 1 bar overpressure for 20 minutes.
4. Let the parts cool and dry before reassembling.
NOTE! Multichannel pipette’s lower parts can be autoclaved as one unit or
separately as individual parts.
4.2.2 UV sterilising
Sartorius Biohit electronic pipettes are manufactured using UV-resistant
materials. The UV-resistance of the products has been tested under continuous
Autoclavable
lower parts
excl. 1200 μl models

 Loading...