Step Key (or instruction) Display/output
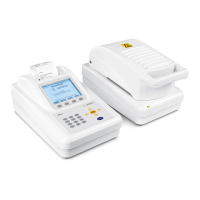
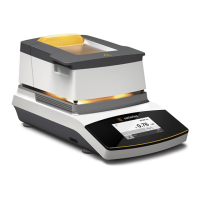
9. Open the hinged cover Open the LMA200PM Prompt (green background):
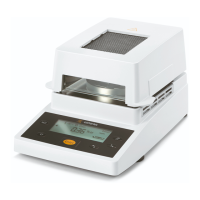
Remove the pads Add sample to pad
10. Add sample Trickle ketchup onto glass fiber pad
Spread ketchup evenly
Place the second pad on the ketchup
11. Insert sample Place pads with ketchup on the If the sample weight is within the
sample retainer tolerance limits:
An acoustic signal (beep) is emitted
The bar graph is green
Close cover or press Start
If the sample weight is not within
tolerance limits:
No acoustic signal is emitted
The bar graph is orange or red
Change sample amount as needed Remove some ketchup from the pad, or
add more ketchup
12. Continue analysis Close the analyzer cover The status line briefly shows
the following:
Determining initial weight value...
The header is printed. Example:
–––––––––––––––––––––––––––––––––––––––––
28.11.2007 16:41:46
Sartorius Microwave Moisture Analyzer
LMA200PM-000EU Rel. 01.00.00
Serial no. 12345678
–––––––––––––––––––––––––––––––––––––––––
Prg. Ketchup
Mode: Standard | Process: R Standard
Level: 30 %
End: Automatic
Initial weight: + 2.125 g
–––––––––––––––––––––––––––––––––––––––––
During analysis, the status line shows
the following (yellow background):
Analysis in progress...
At the end of analysis, the status line briefly
shows the following (yellow background):
Determining final weight...
The analysis result is printed. Example:
–––––––––––––––––––––––––––––––––––––––––
00:40 + 0.752 g + 64.63 %M
–––––––––––––––––––––––––––––––––––––––––
After the end of analysis, the prompt line
shows the following (green background):
Run completed; remove sample
The bar graph line shows the percentage
of solids in the initial weight.
The measured value line shows, for example:
Moisture + 64.63 %M
13. Remove the sample Raise the analyzer cover The cooling fan continues to run.
Remove the pads with the sample. The cooling fan shuts off automatically.
14. Begin next analysis Tap the Analyze button Continue from Step 4 above.
Cooling fans switch off.
15. End the analysis series. Press the
key Starting screen
26