6. Care and Maintenance
Service
To ensure the continued accuracy of your balance, we recommend
scheduling regular servicing at least once a year.
Sartorius Service offers different service contracts with maintenance
intervals that are tailored to your needs.
A calibration certificate should always be issued as part of every
maintenance session. Safety inspections of the AC adaptor and
its connections must be performed at appropriate intervals by a
qualified electrician (e.g. every 2 years).
Repairs
Repair work must only be carried out by trained
service technicians. The device must be unplugged
during repair work. Unplug from the mains power.
In addition, the measurement accuracy of your
balance may be affected and serious risks to the user
may occur. Contact Sartorius Service or a Sartorius
dealer for proper repairs.
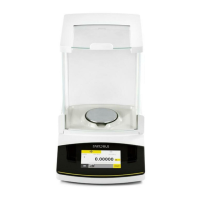
Cleaning the Balance
Cleaning the Control Panel
Switch the display to standby mode to avoid modifying the settings
for operation during cleaning.
t Touch the Menu key to switch to the application
selection.
t If you then touch j, the display goes off.
t To switch the display back on again:
Touch
j
at the bottom left of the display.
Cleaning the Balance Housing
Contaminated equipment:
Health risk posed by product contamination due
to product deposits and collection of residue with
microbial contamination.
Health risk posed by biological or microbiological
substances. Observe cleaning specifications.
Examine the cleaning results closely.
Disconnect from the power supply:
Disconnect the AC adaptor from the power supply.
If necessary, disconnect the data cable connected to
the balance.
Never open the balance or the AC adaptor. The parts
contained in these cannot be cleaned, repaired or
replaced by the operator.
− Make sure that no liquid or dust gets into the balance or the
AC adaptor.
− Never use cleaning agents that contain solvents or abrasive
ingredients, which can ultimately damage the equipment.
Do not clean the following parts with acetone or
aggressive cleaning agents:
Control panel, mains plug, data interface, labels,
verified seal and all other plastic parts.
Detaching the Draft Shield / Weighing
Pan
t Follow the instructions in Chapter
„Detaching the Draft Shield /
Weighing Pan“ auf Seite 7.
t Follow the instructions in Chapter
„Packing the Balance“ auf Seite 7.
If required, remove the rear wall for
cleaning.
t Press the locking mechanism above
the rear wall upwards and remove
the rear wall.
t Clean the housing / the panels and then dry the balance with
a soft cloth.
t After cleaning put together the components in reverse order:
− Reinsert the rear wall. Ensure that this engages in the locking
mechanism above the rear wall.
− Observe the notes in the Chapter “Getting Started –
Installing the Balance” 4.
7. Disposal
The packaging is made from environmentally-
friendly materials that can be used as secondary
raw materials. Packaging that is no longer
needed can be disposed of in Germany free of
charge via the VfW dual system (contract number
D-59101-2009-1129).
Otherwise, you dispose of the material at the local waste
management facility according to the applicable regulations.
The device, including accessories and batteries, must not be disposed
of in general household waste and must be recycled similar to
electrical and electronic devices. For disposal or recycling, please
contact our service staff on-site. In addition, the partners listed on
the following website can be used for disposals within the EU:
1. Select http://www.sartorius.com.
2. Click “Service”.
3. Select “Information on Disposal”.
4. Addresses for local Sartorius disposal contacts can be found in
the PDF files given on this webpage.
Sartorius will not take back equipment contaminated
with hazardous materials (ABC contamination) –
either for repair or disposal.
Service address for disposal:
Please refer to our website (www.sartorius.com) or contact the
Sartorius Service Center for more detailed information regarding
repair service addresses or the disposal of your device.
8 Installation and Operating Instructions Manual Secura
®
, Quintix
®
 Loading...