INSTALLATION GUIDE
23
Power Strip
5.3 Controller Installation, Meto-Logic, continued
9. Attach the Blue TDU cable from the connector panel harness to the controller's
TDU port as shown in
Figure 5-16. Make sure th
e connector is securely seated.
10. Confirm that the controller voltage selector switch is set to the 230V position.
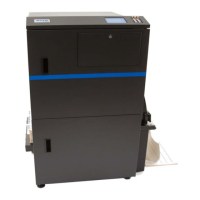
11. Place the Controller back into the lower printer compartment with the front of the controller facing the
front door.
Connector Panel
Meto-Logic
Controller
Power
Strip
!
WARNING
!
Before connecting the Controller power cord, confirm that the Controller
power supply voltage selector switch is set to the 230V position.
Switched
Un-Switched
Figure 5-17
Main
Power Supply
TOTAL 200-240V,
50-60Hz,3.5A
AC Outputs
AC Input
Power Switch
On
Off
 Loading...