Optional Battery Installation & Charging
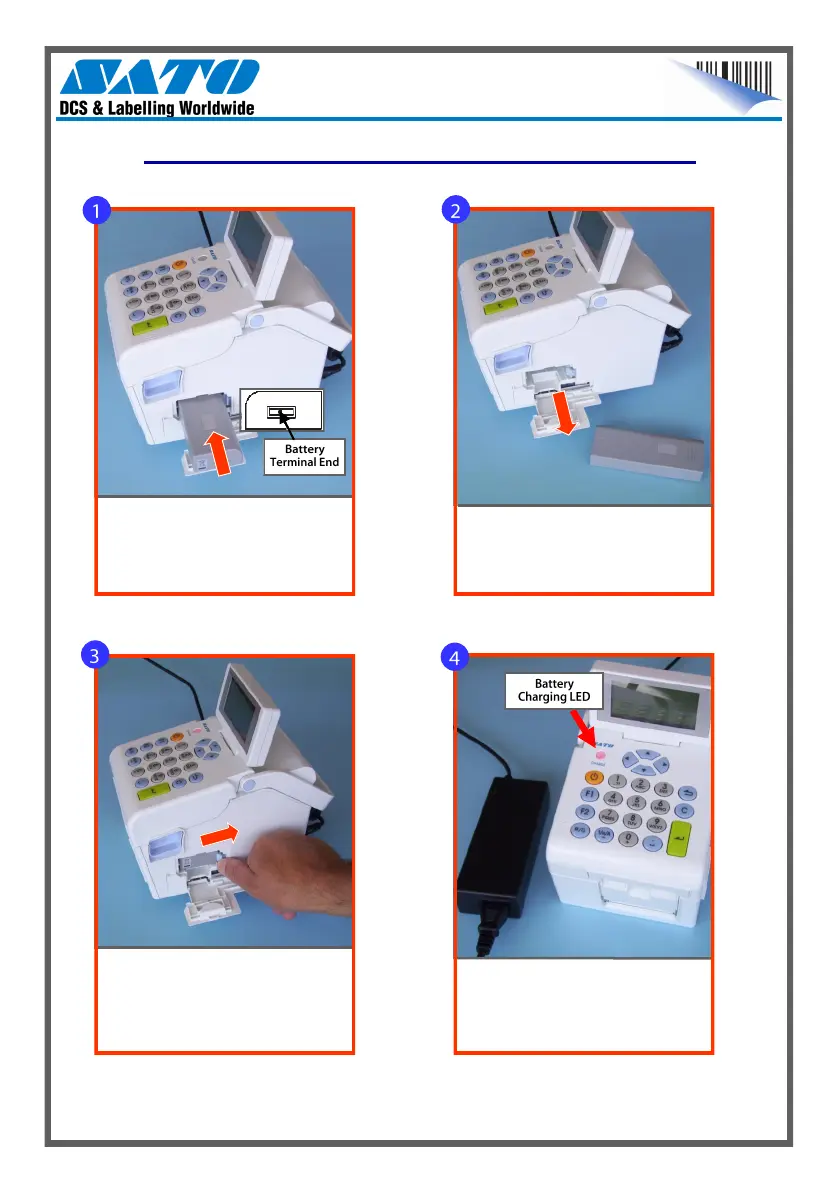
Put the terminal end of the battery
into the compartment first.
Push the battery inwards until it is
locked in place by the Blue Locking
Tab. Close the battery cover.
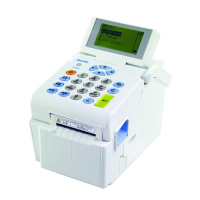
Removing the Battery
Fitting the Battery
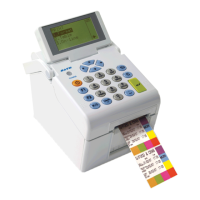
Charging the Battery
Connect the AC Power Adaptor to the
printer and to the mains power supply.
The charge LED will illuminate to
indicate charging and go out when the
battery is fully charged.
AN EXHAUSTED BATTERY WILL NEED ABOUT 6
HOURS TO ACHIEVE FULL CHARGE.
The battery can now be removed.
Lower the Battery Compartment
Cover on the right-hand side of the
printer.
Slide the Blue Locking Tab to release
the battery.
1
15