Savant Low Voltage Keypad Deployment Guide 14 of 22
Copyright © 2019 Savant Systems, LLC
009-1731-00 | 190401
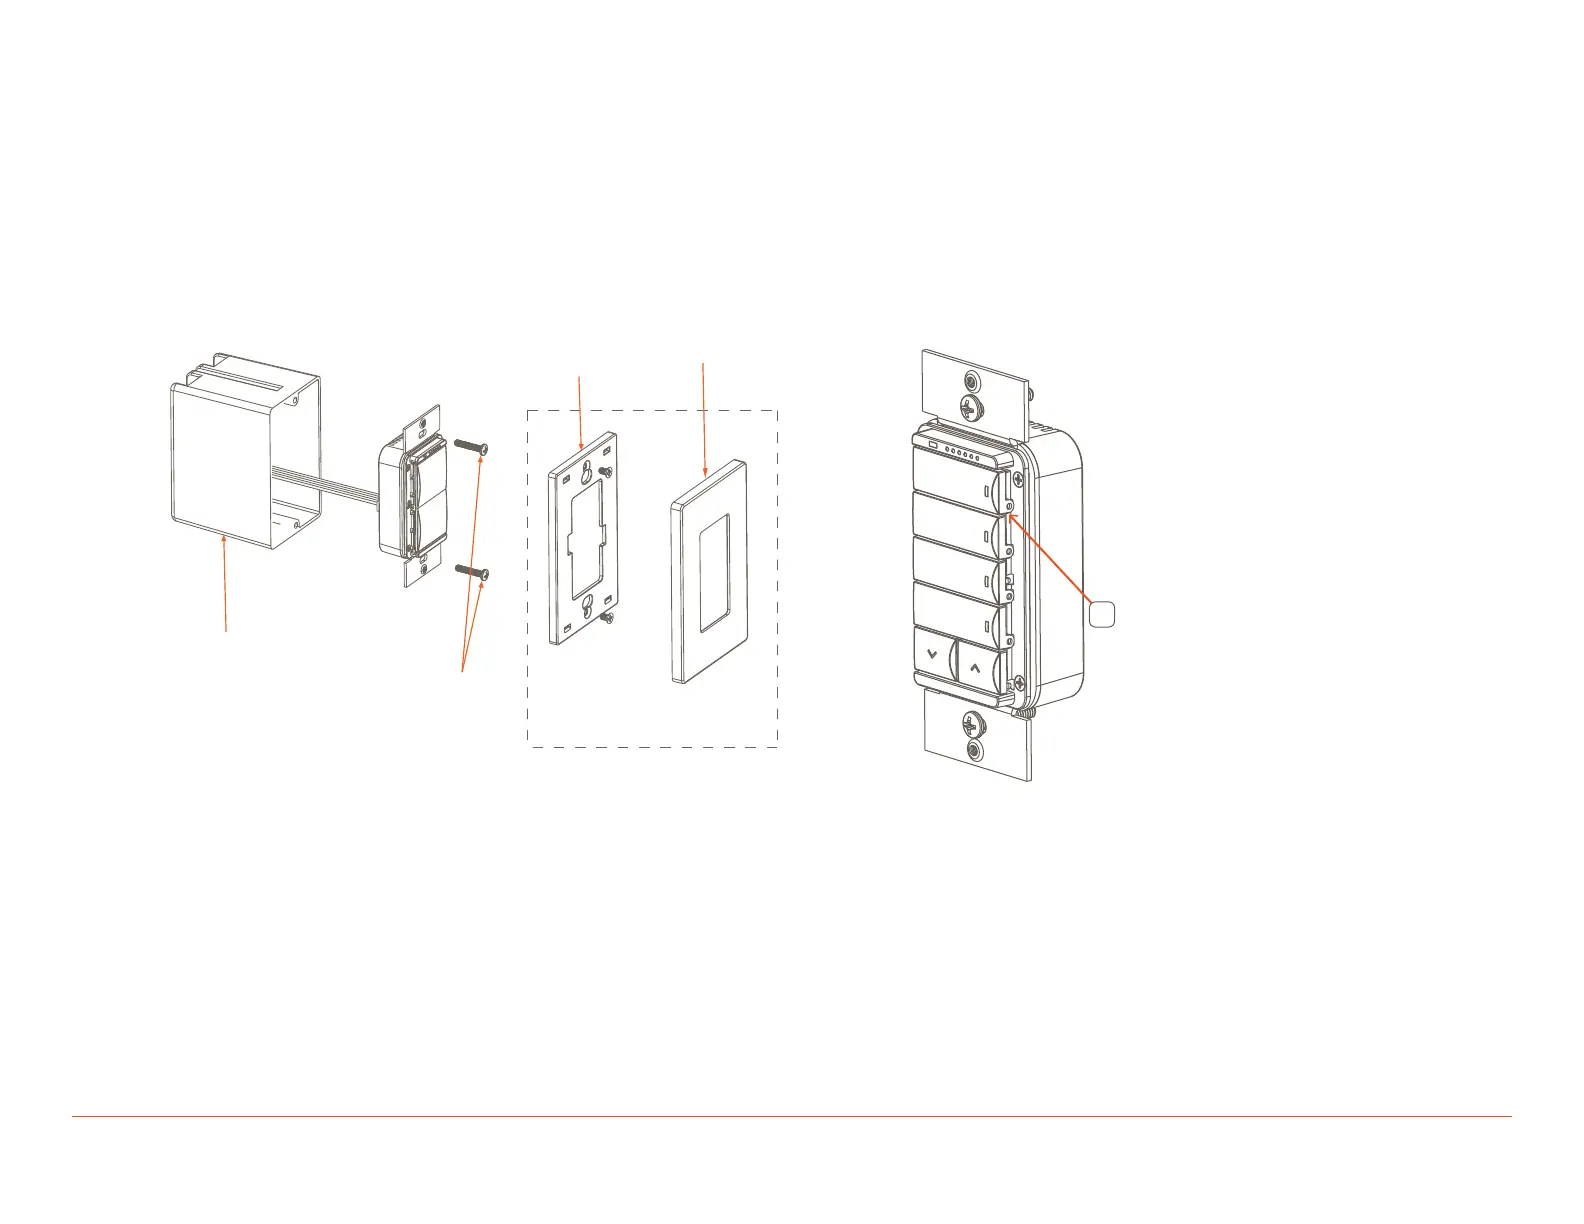
3.3. Keypads
All three Echo Low-Voltage keypad models install the same way.
1. Disconnect power from the Low Voltage Keypad Controller (SKL
or Keypad Link).
2. Connect the wires to the Echo Keypad.
3. Insert the Echo Keypad into the electrical switch box and secure
with the 6-32 flat head screws provided. DO NOT use a powered
screw driver. A powered screw driver can over tighten the
screws.
4. Re-establish power at the Keypad Link module.
Wall Plate and Adapter
Sold Separately
Wall Plate
Adapter
Wall Plate
Mounting
Screws
Electrical
Switch Box
3.4. Changing Buttons
This section aects the Echo Configurable Keypads and Echo Dial
keypads. The buttons have two hinge points for capture at the base.
This hinge point allows for the button press feel. The same removal and
installation process can between used across the single and double
buttons.
Button Removal
1. Using a flathead screw driver apply light pressure outward on one
of the hinge points. Place the screw drive between the hinge base
and the plastic holder.
1
2. Once the button has been lifted o one hinge, the button can
be pulled out. If not able to pull out easily, apply light outward
pressure on the opposite hinge of the button.
Button Installation
1. Place the button at an angle so that the hinge is capture by the
holder. The button will sit at an angle o the keyframe.
2. Once the hinge is captured, apply light pressure and snap the
button into place.
 Loading...