14
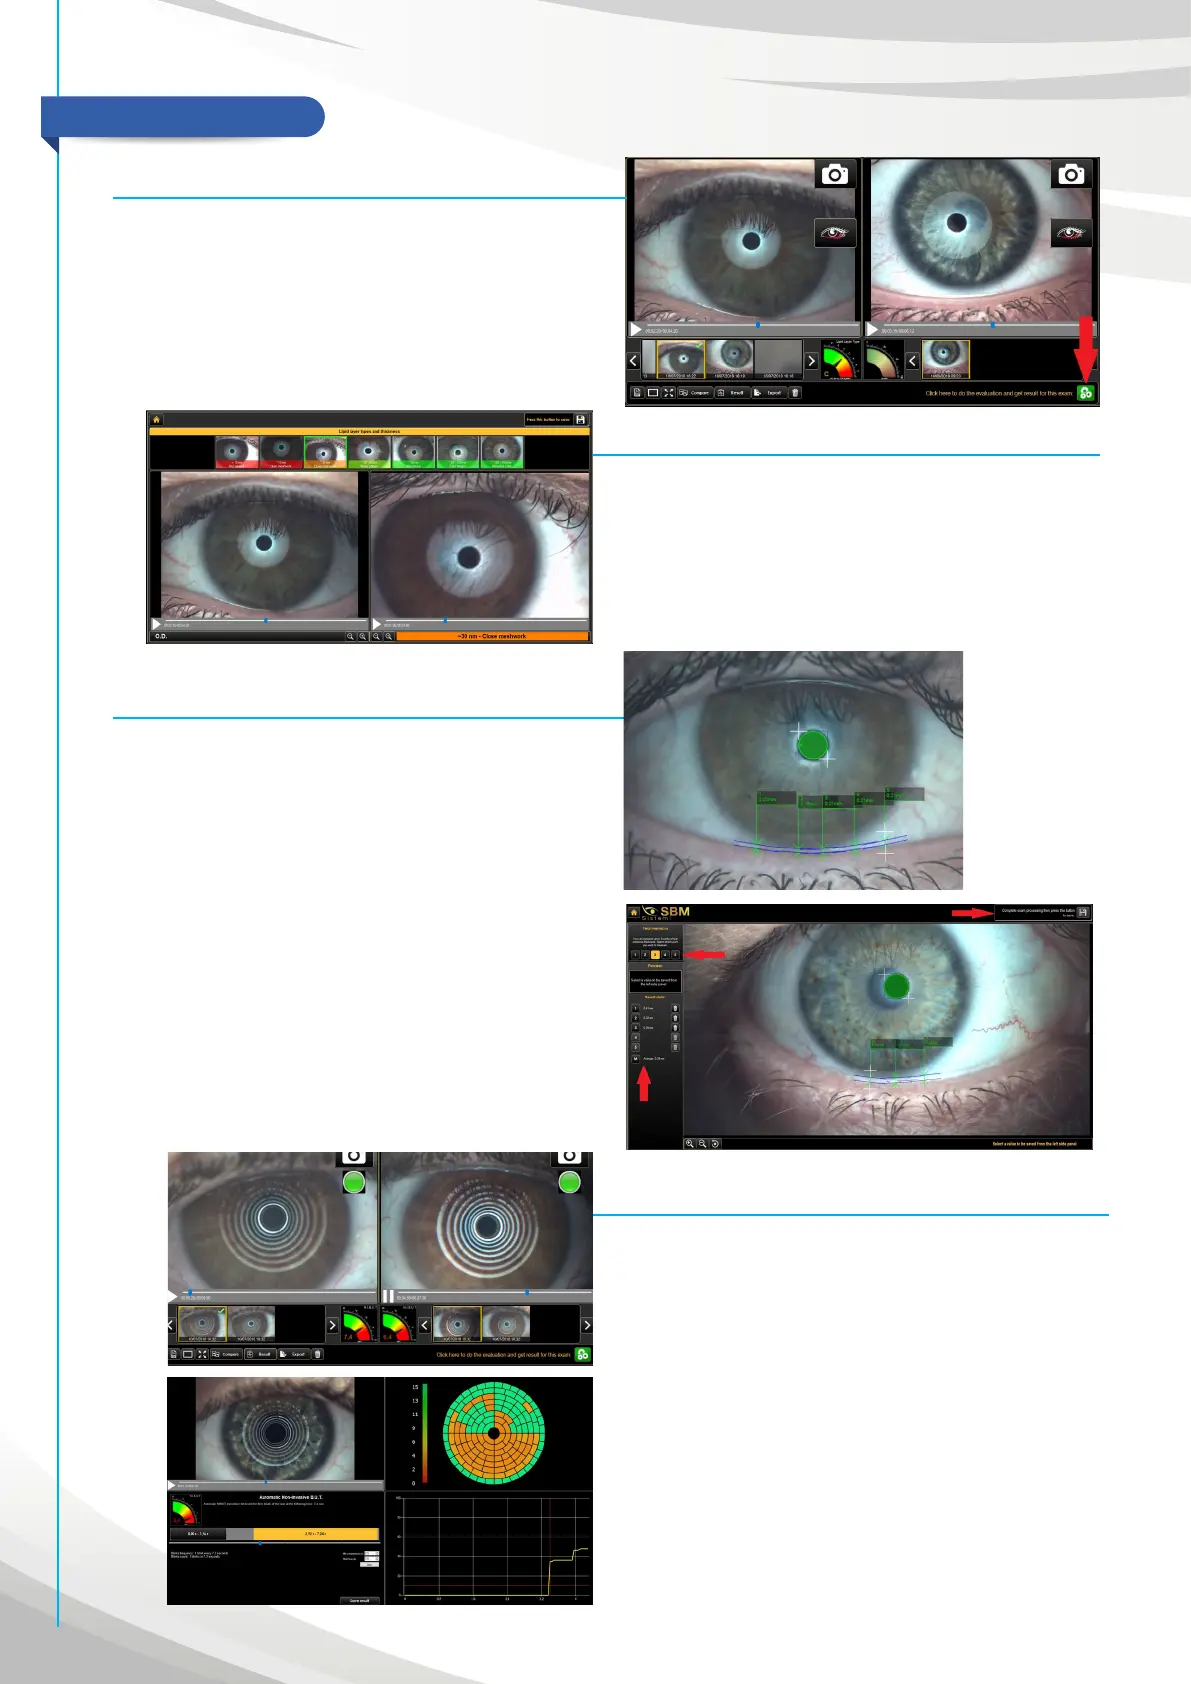
Tear meniscus (Fig. 8 - 8.1)
“In the image capture screen, take a photo of the patient’s eye
using the main cone. Focus on the lower tear meniscus moving
the base (you can understand to be on focus when you see the
black line on thear meniscus, which is the reflection of the iris).
Take the picture and close the acquiring screen with CLOSE on the
top. The software will bring to the exam view. Now, push on the
green button to analyse the exam.
You can choose to measure five dierent heights of thear
meniscus. (fig. 8.1). To do this, click on the numbers between
1 and 5 on the left side. After that, click with the mouse on the
borders of tear meniscus. When you have finished to measure, you
can choose to save one value selecting a number in “Result data”
section. If you prefer, you can also save the average of heights.
Then save with the floppy button on the top. To view the results,
go on patients section and choose “TEAR MENISCUS”.
MAIN EXAMS
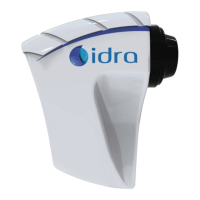
Interferometry (Fig. 7)
Using the images capture screen, record a video of the patient’s
eye with the main cone inserted in the instrument and asking to
blink three-four times to the patient. To record a good video, go
on focus on the iris moving the base and then move backward of
2mm to focus properly on the LIPID LAYER (the iris will be not on
focus). The circle of light has to be around 5mm (it depends by the
distance from the eye). Now, you can record the video using the
red button on the left, or with the space bar, or with the foot pedal
included in the supply.
AUTO-N.I.B.U.T. (Fig.9)
In the capture screen, record a video (with red button, the space
bar or the foot pedal), removing the main cone and inserting the
Placido’s one (with concentric circles). Then push on start to do
exam. Go close as much as possible to the patient eye and use
the manual or auto focus to focus on the pattern projected on the
cornea (closer you are wider will be the projection).
With the evaluation button the software processes recorded video
to study automatically the break-up time, the number of blinks,
topography of the tear film and the graph to understand the trand
of all breakings (fig.9.1)
You will find on the top of the screen the 7 comparison categories
to start easily the analysis. If the fringes are white: compare the
exams with categories 1 to 4. If the fringes are colored (as shown
in the picture): compare the exam with categories 4 to 7. After
selecting the correspondent category, save with the disk on the
top right hand side.