15
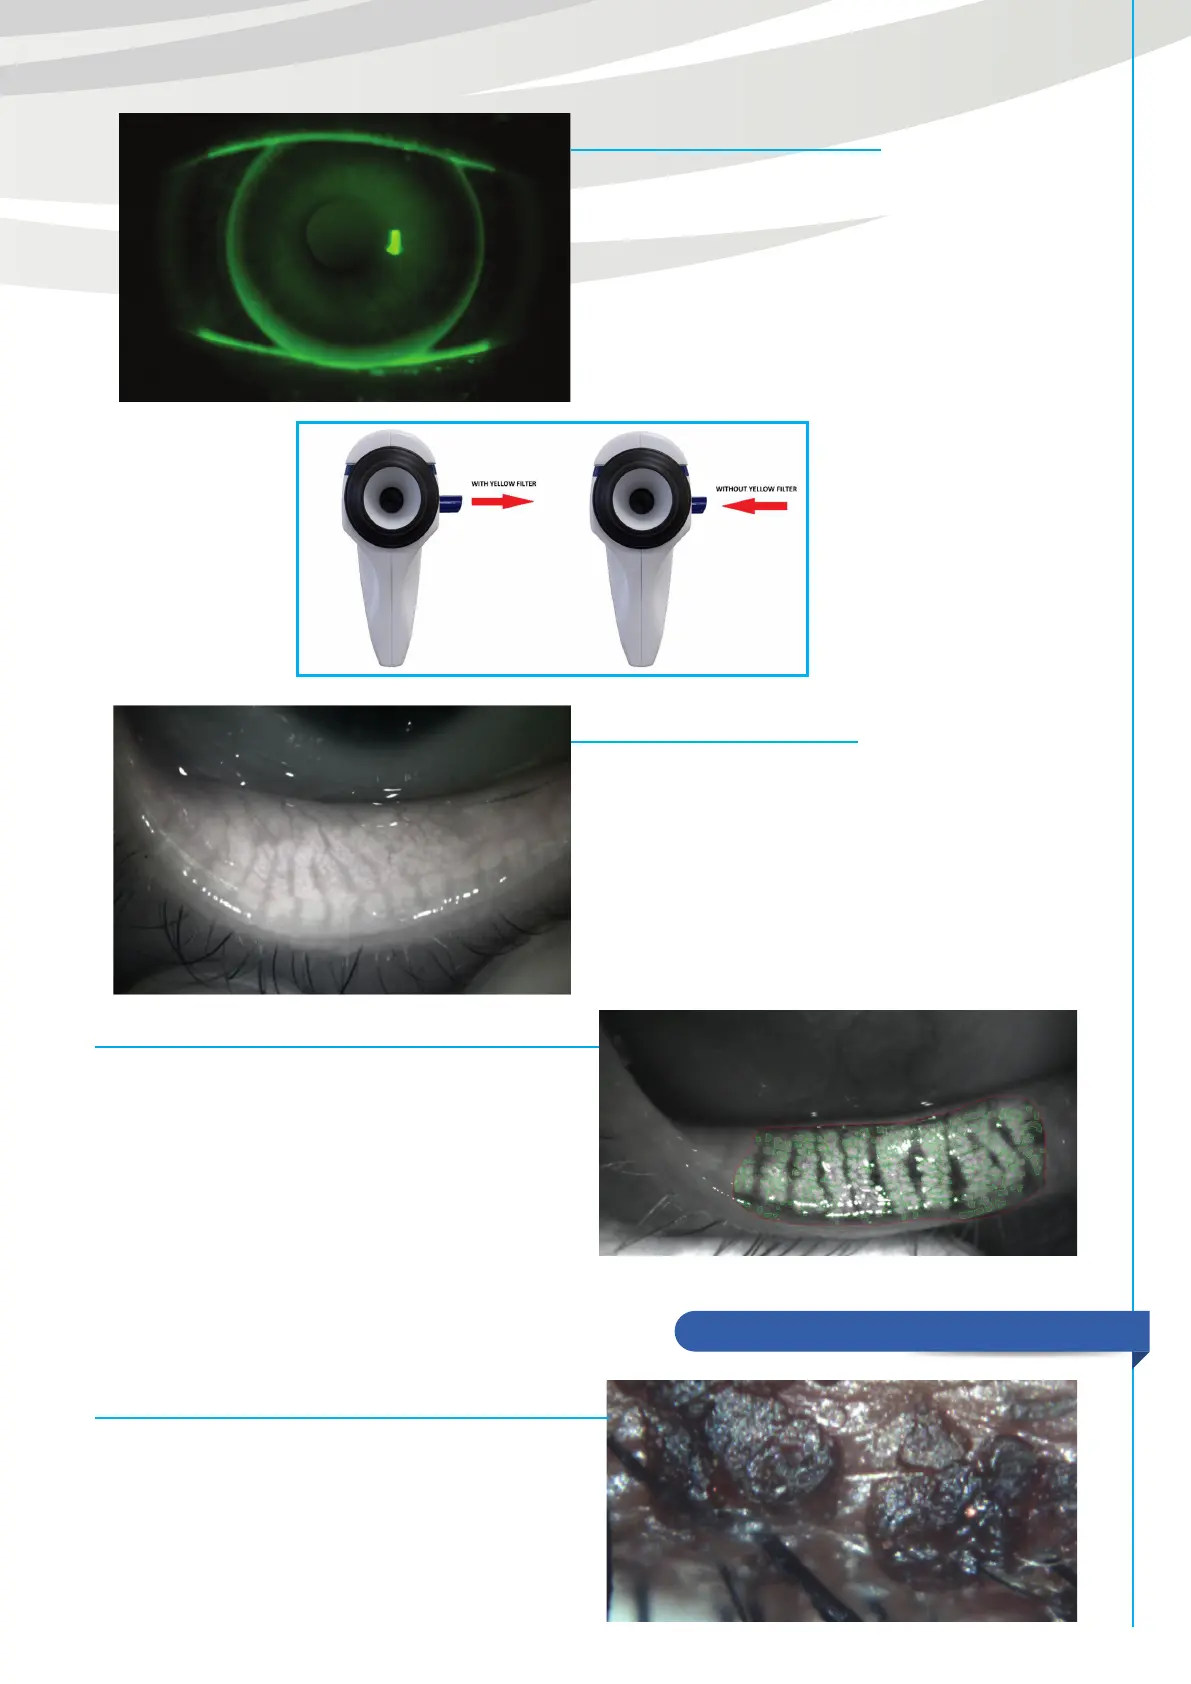
Meibography (Fig. 12)
Remove the cone to use infrared light only. In the
acquisition screen, take a picture of meibomian
glands turning the upper or lower eyelids with a
cotton but or the fingers (be sure that the lid is turned
and not just pulled down).
Move the instrument to get on focus to have a wider
view. Take the picture (with white button on left side,
with the space bar o with the foot pedal) and close
the actual screen with CLOSE.
(Fig. 12.1)
After taking the picture, select the green button on
the bottom right to process the image.
To perform the glands analysis, draw with the mouse
the lid area margins and press “>”. The detection of
the loss area is done automatically by the instrument.
Otherwise, it is possible to select semi- automatic or
manual detection. At the end of the procedure will
be shown the image with the lids and glands area
highlighted with red and green color (Fig. 12.1). Now
you can save the measure to return on the exams screen.
ADDITIONAL EXAMINATIONS
Fig. 11
Blepharitis (Fig. 13)
If you choose “Blepharitis” from the screen “New
Exam”, it’s possible to take a picture with white
lights by focusing on the eyelashes and the eyelid
rhyme. To take it, IDRA executes a magnification
that allows to study in a perfect way the situation.
The results can be compared with the right grading
scale.
B.U.T. (Fig. 10)
It is done with blue lights which turn on automatically
after selecting the exam. Remove the main cone to
light up completely the eyes and insert the yellow
filter (Fig.11). Then record a video asking the patient
to keep the eyes open for as long as possible.
Once you executed a B.U.T. examination you can
use the timer tool on the video playback screen to
calculate the break-up time of the tear film.