17
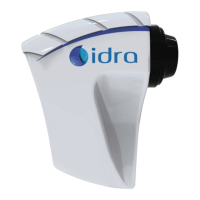
Follow strictly the instructions on the left side of the screen.
1) The acquisition will automatically start simulating SCOTOPIC light. It is necessary to ask the patient to look
inside the device, to focus four bright spots and center them with the reference circle (fig. 15 b).
Then, acquire the image through space bar or foot pedal.
2) After taking picture of eyes in scotopic vision, MESOPIC light will automatically turn on.
Follow instructions as in point 1.
3) Finally, PHOTOPIC light will switch on. Follow instructions as in point 1.
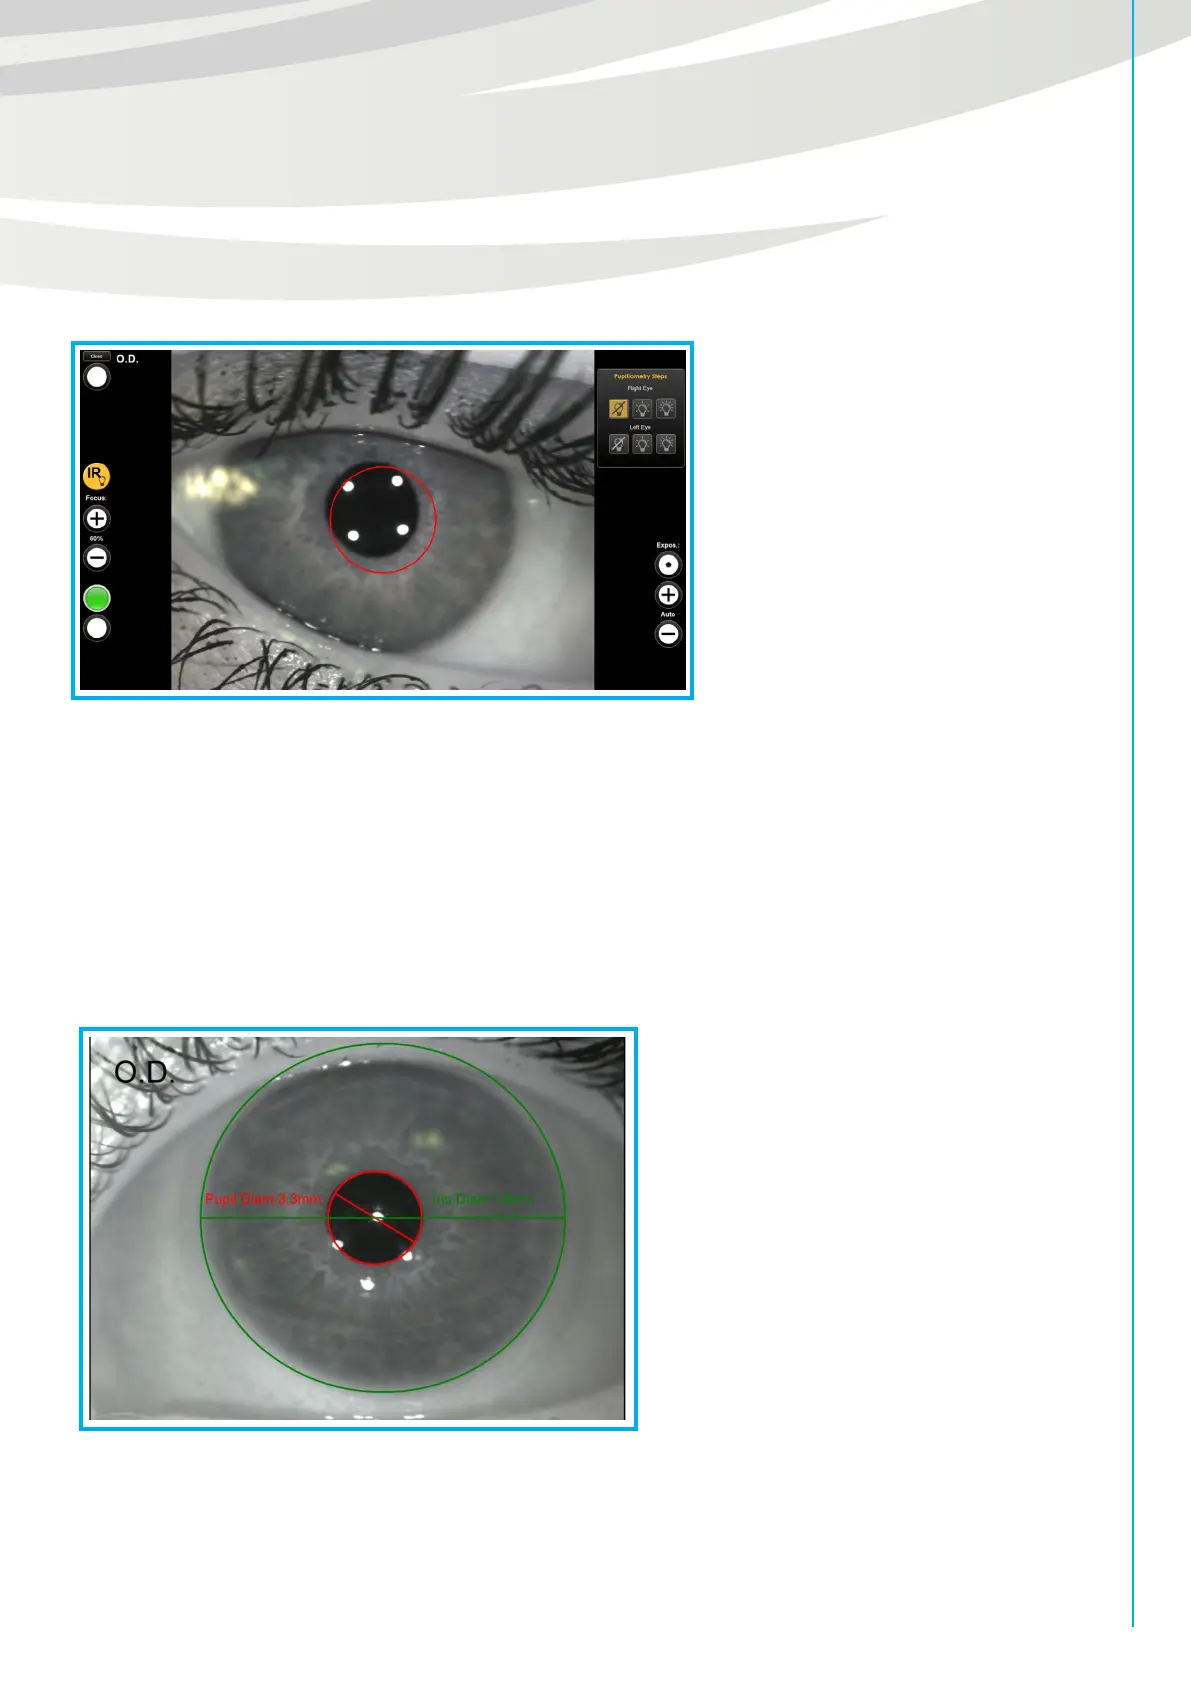
Now it’s possible to evaluate the acquisitions, following the instructions on the left:
1) with the first acquisition you obtain the pupillary diameter in scotopic vision and the diameter of the iris
(WTW).
Use the white cursors of two circles to align them with the iris edges and the pupil edges, then proceed as
shown in the software (fig. 15 c).
2) Now, elaborate the second image to have pupillary diameter in mesopic vision,
3) Finally, move white cursors in the third image positioning the circle on the pupillary edges to obtain pupillary
diameter in photopic vision.
Then, save the results.
Fig. 15 b
Fig. 15 c