Assembly
210.00 | PZN-plus | Assembly and Operating Manual | en | 389374 41
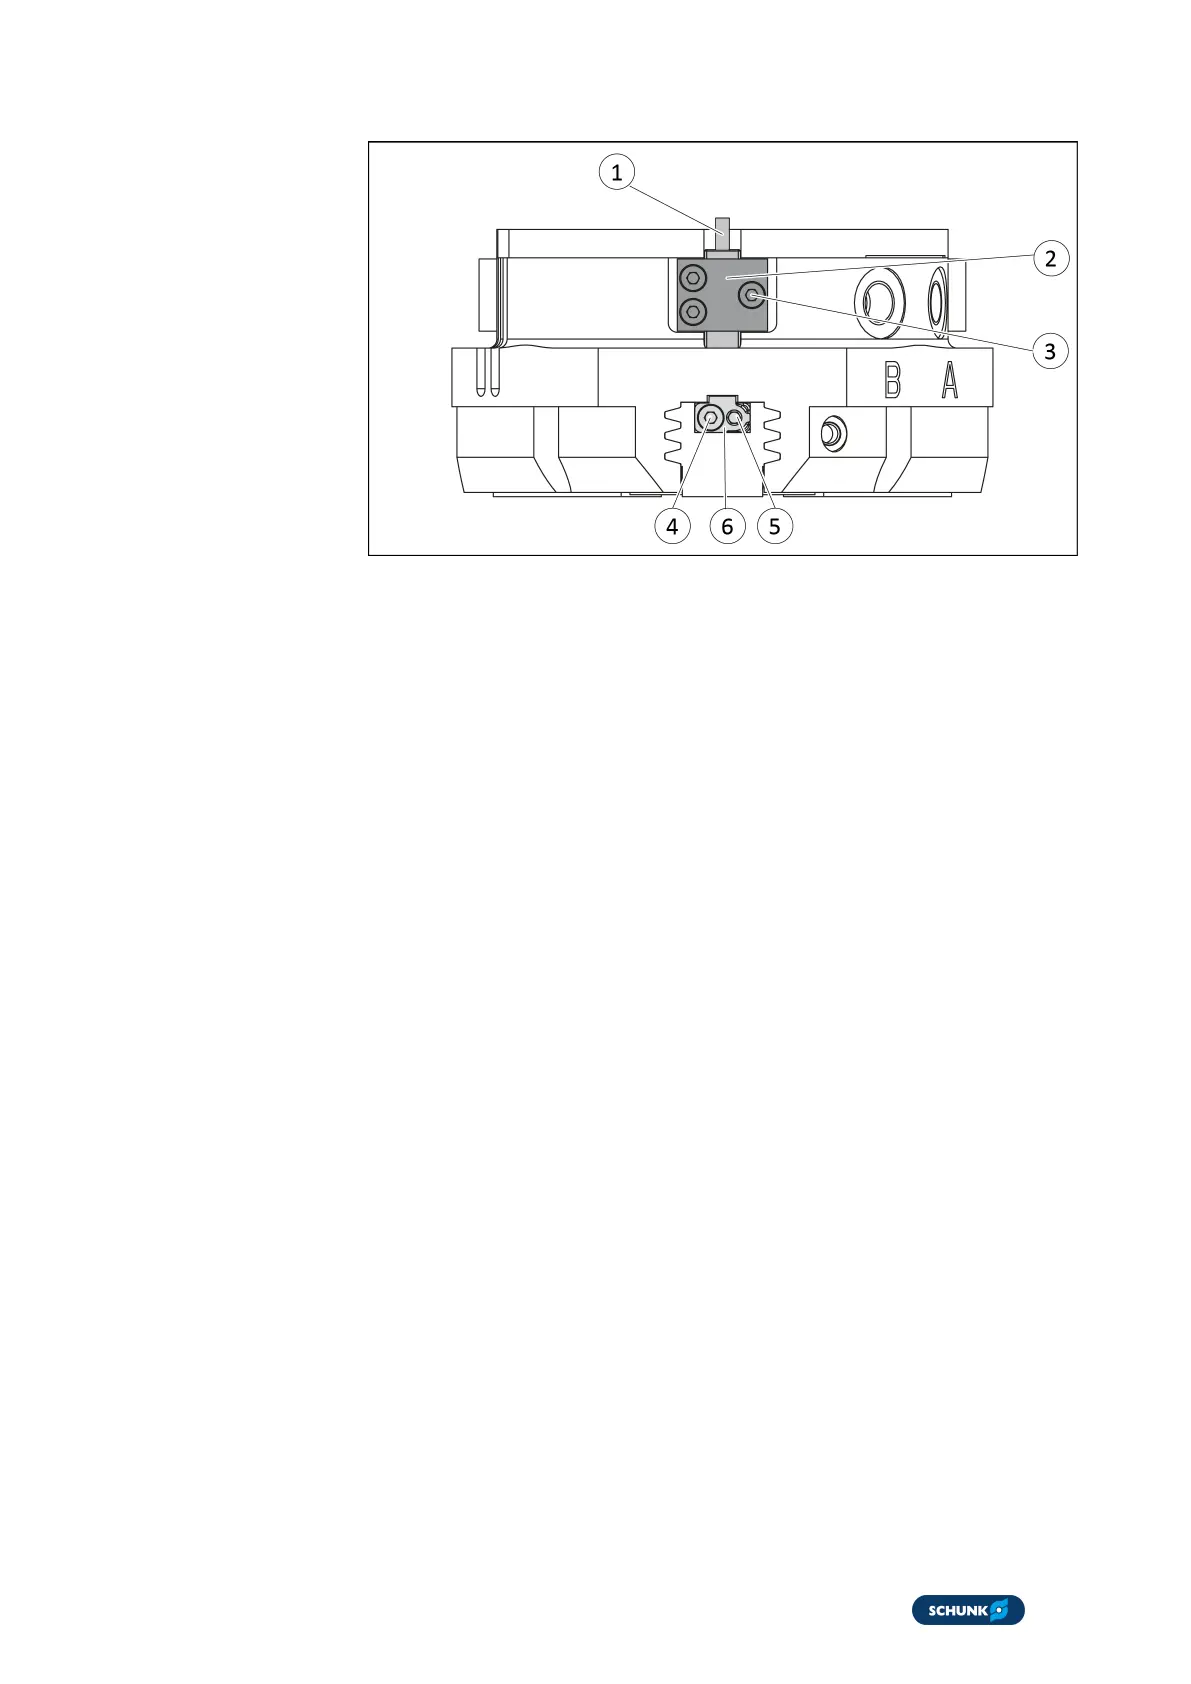
1. Move product to the "gripper open" position.
2. Loosen screw(4) and remove control cam(6) for the inductive
monitoring from the base jaw.
3. Remove screw(5) from the base jaw.
4. Apply adhesive to the top and sides of the control cam(6)
from the mounting kit.
ð Make sure that there is no adhesive on the bottom of the
control cam(6), which comes into contact with the
sensor.
ð SCHUNK recommends the adhesive Loctite 290 or 638.
5. Slide control cam(6) into the base jaw to the stop.
ð Ensure that the higher front side of the control cam(6) is
pointing outwards.
6. IMPORTANT!The control cam(6) must no longer move after it
is screwed on.
Screw the control cam(6) to the base jaw using the screw(5).
ð Secure the screw(5) with medium-strength locking
liquid.
7. Slide the sensor(1) to the stop into the bracket(2).
8. Tighten the screw(3) on the bracket(2).
Tightening torque: 0.2 Nm
9. Adjust sensor(1), see the Sensor Assembly and Operating
Manual.
Variant Dust-tight:
Screw in set-screw into the side cover.