Mounting / connection / programming of the AFS3 138 PMI
20 01.00|1372106_AFS3 138 PMI_AFS3 138 MMS |en
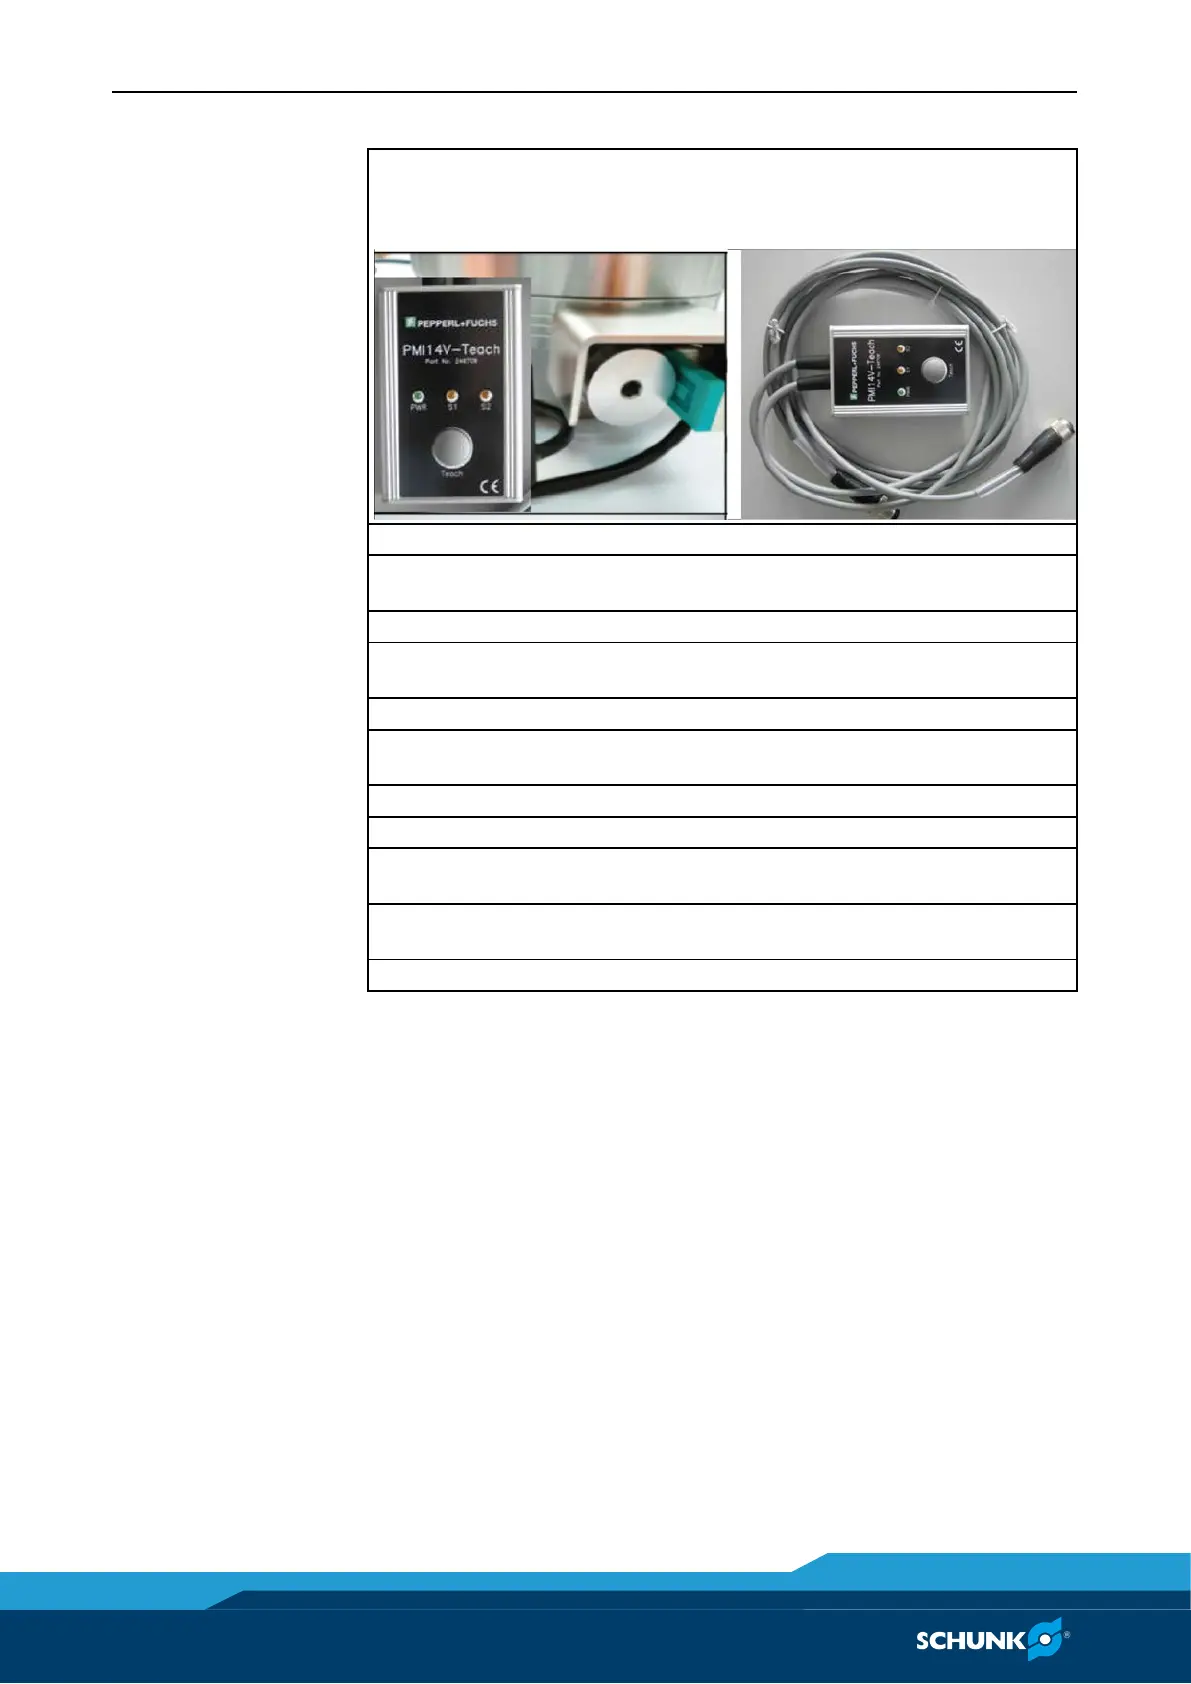
The switching positions are taught in with the teaching device (ID
no.:
9988354)
Connect sensor to teaching device
Press the "Teach" button on the teaching device for 1.5 s (until
LED S2 flashes)
Put the clamping module in open status
Press the button on the teaching device (LED S2 illuminates and
stays lit briefly)
Clamp the clamping pallets with turbo function
Press the "Teach" button on the teaching device (LED S1
illuminates and stays lit briefly; then LED S1 and LED S2 flash)
Close clamping module (without clamping pins or clamping
pallets)
Press the button on the teaching device (LED S1 and S2 illuminate
and stay lit briefly)
Switch positions have been taught in and stored
Note:
An unsuccessful teach-in process (e.g. in the case of a teach-in
attempt beyond the range of measurement) is indicated by the
LED flashing rapidly (for 1.5 s). The previous switching limits are
kept.
• By pressing the key for 6.5 seconds, the sensor can be reset to
the factory settings.
• If the power supply is disconnected or the key is not pressed for
more than six minutes during the programming process, the
programming process is stopped without changing the previous
limits.
• Programming is generally only possible in the first six minutes
after switching on the sensor. The programming is then
blocked.
To re-enable programming, the sensor must be disconnected
briefly from the power supply.