4-3
© 2017 SeaStar Solutions i7700 Installation Supplement, Rev. B
Figure 4-5. Override decal locations (shaded).
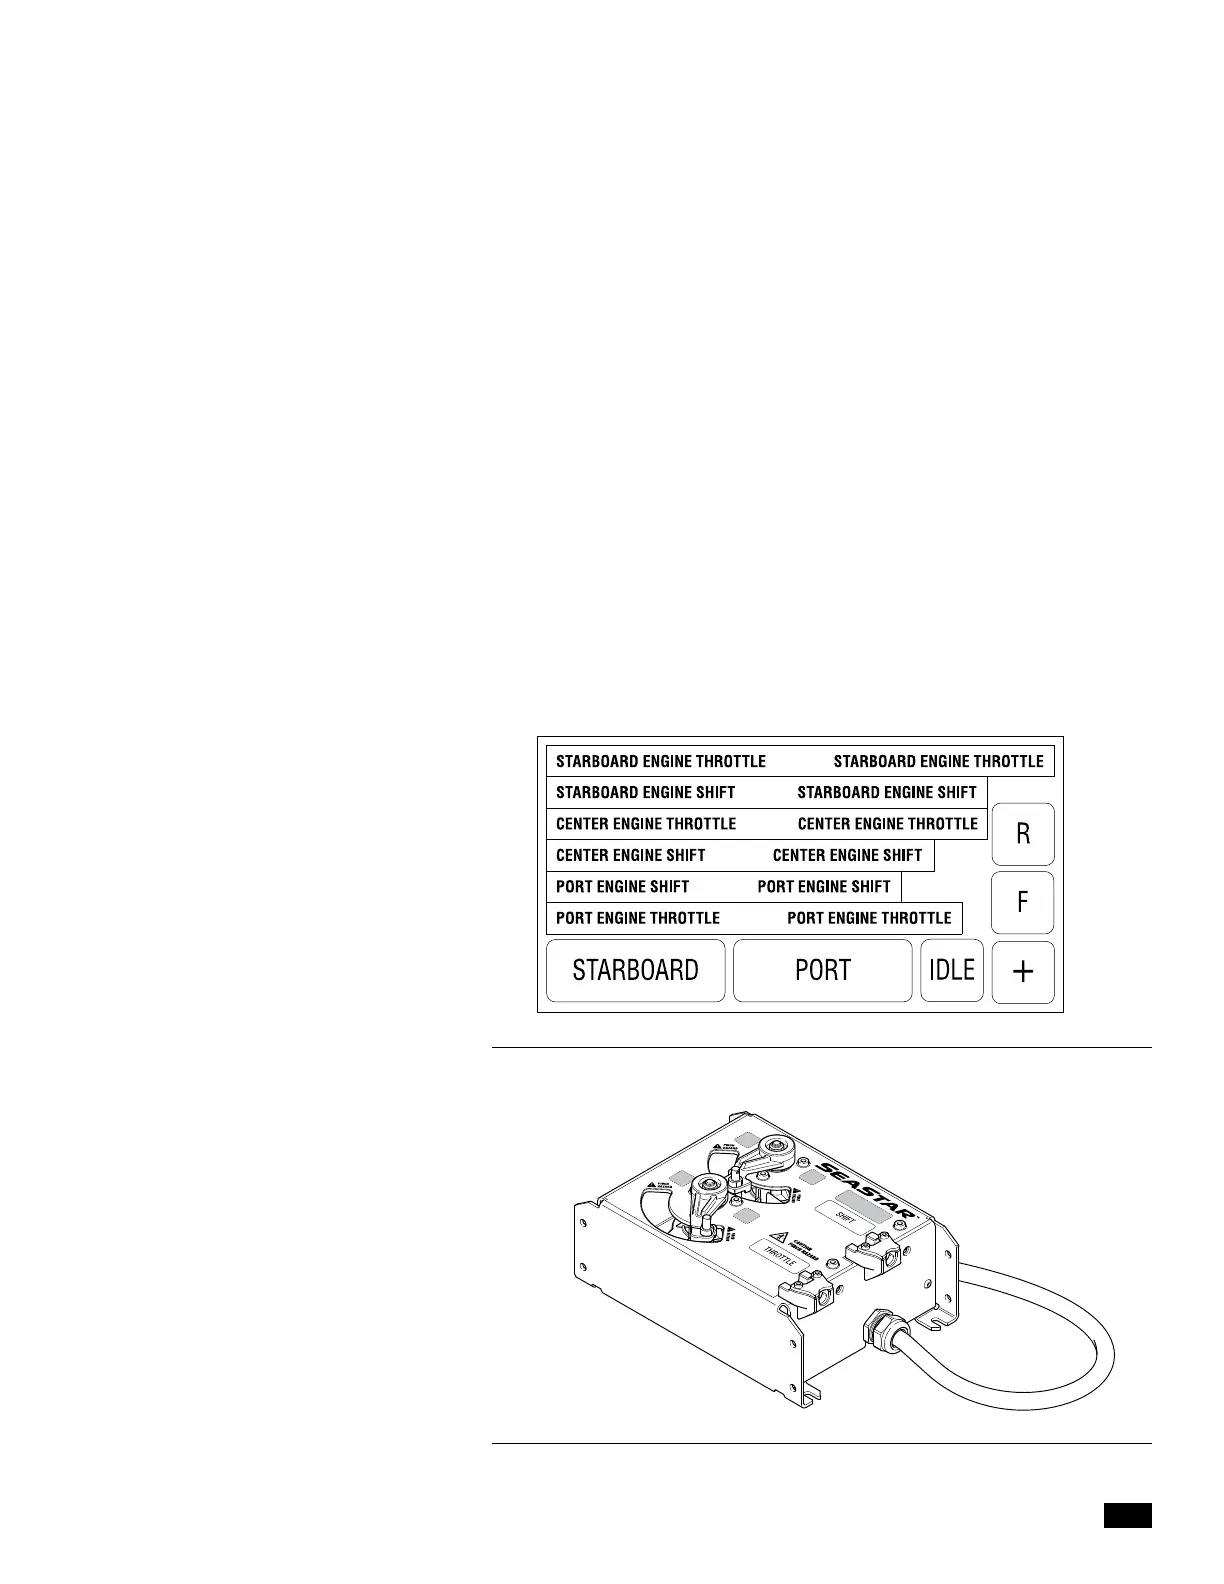
Figure 4-4. Actuator decal sheet.
9. Increase the throttle on each of the control head levers from
idle to full throttle and check that the throttle actuators
advance and return accordingly. Place both levers back in the
neutral position.
10.
Apply the manual override decals (figure 4-4) to the actuator
chassis label in the dashed boxes provided (figure 4-5).
a. Use ‘Starboard’ and ‘Port’ to indicate which actuator
controls which engine.
b. Place the ‘Idle’ and ‘+’ decals on the throttle actuators to
indicate which direction moves the throttle to idle and which
direction increases throttle.
c. Place the ‘R’ and ‘F’ decals on the shift actuators to indicate
the shift direction for each gear.
11.
Exit the setup. You will be prompted to cycle the system power
to save the changes.
12. At this point you need to install the actuator cables. See the
i7700 Installation Manual.

 Loading...