www.selbit.pl
- 8 -
Point – 7
Prepared cables connections and casing assembly of the controller.
After creation of the all required connections next step is to connect them with the
controller’s main plate.
In the back casing please screw in two PG chokes facing nuts from the inside. Please lead
through mounted chokes follows cables:
- through the biggest one, wires of the head saw contactors steering (two pairs of the cables
from steering buttons)
- though middle one, cable of the rotating encoder
- though choke which is the nearest of the casing middle, power cable 12 V (connection
SEC 12 V from the transformer TSS8/001).
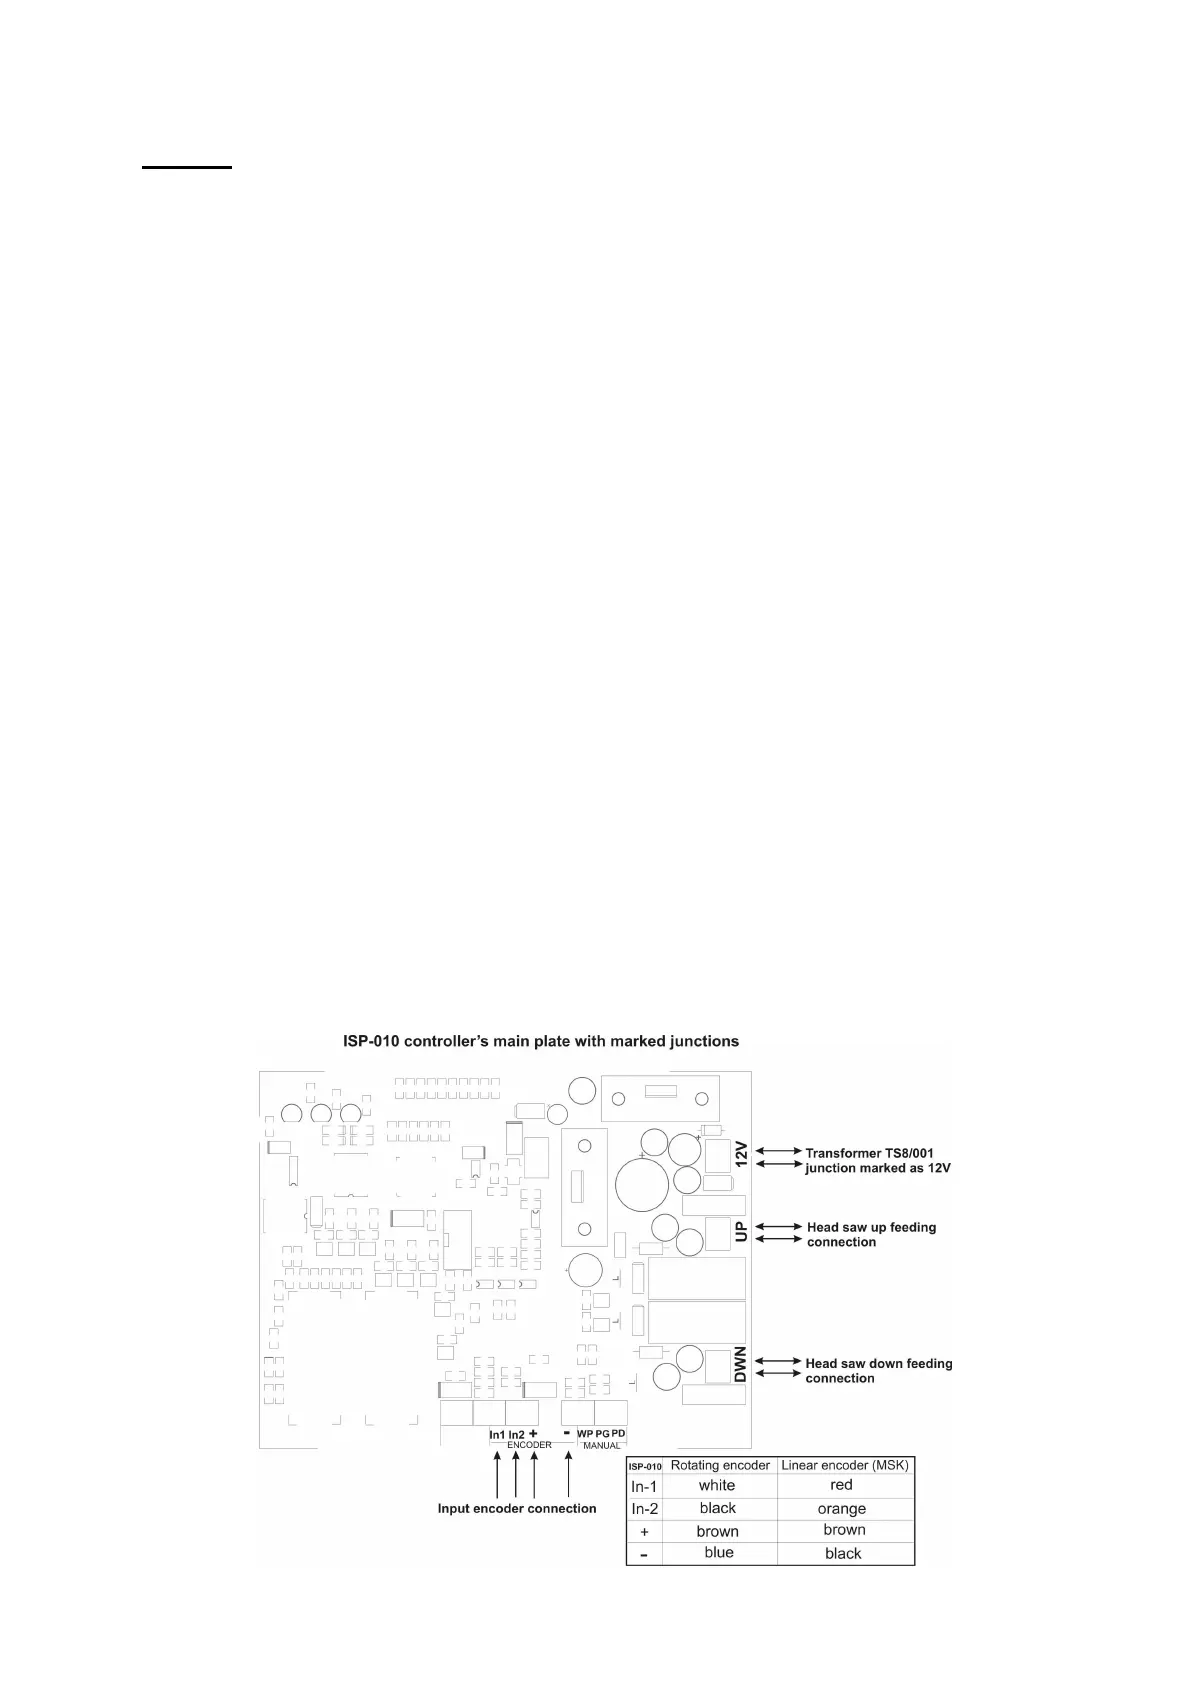
Please connect power cable 12 V (with prepared cables’ tips) to the junction marked as 12
V on the controller’s main plate.
Contactors steering wires connect with junctions on the controller’s main plate as follow:
- no. 1 pair of cables of the down feeding with junction marked as DWN
- no. 2 pair of the up feeding with junction marked as UP.
Rotating encoder’s connection:
Encoder cables please connect with junctions marked ENCODER as follow:
- brown cable with (+) plus controller’s connection
- blue cable with (-) minus controller’s connection
- white cable with IN-1 connection
- black cable with IN-2 connection.
Magnetic encoder’s connection MSK-320 in chain sawing frame machine:
Magnetic encoder cables please connect with junctions marked ENCODER as follow:
- brown cable of MSK-320 with controller’s junction marked as (+) plus
- black cable of MSK-320 with controller’s junction marked as (-) minus
- red cable of MSK-320 with controller’s junction marked as IN-1
- orange cable of MSK-320 with controller’s junction marked as IN-2