ENGLISH - 10
5. Software Upgrade
※ USB 2.0 standard has to be only used for upgrade
※ Use FAT32 format USB only
NOTE
Transfer software program to a USB root folder (not belonging to any other folder) in an empty USB
i.
ii.
1.
Once upgrade is completed, controller starts to reboot5.
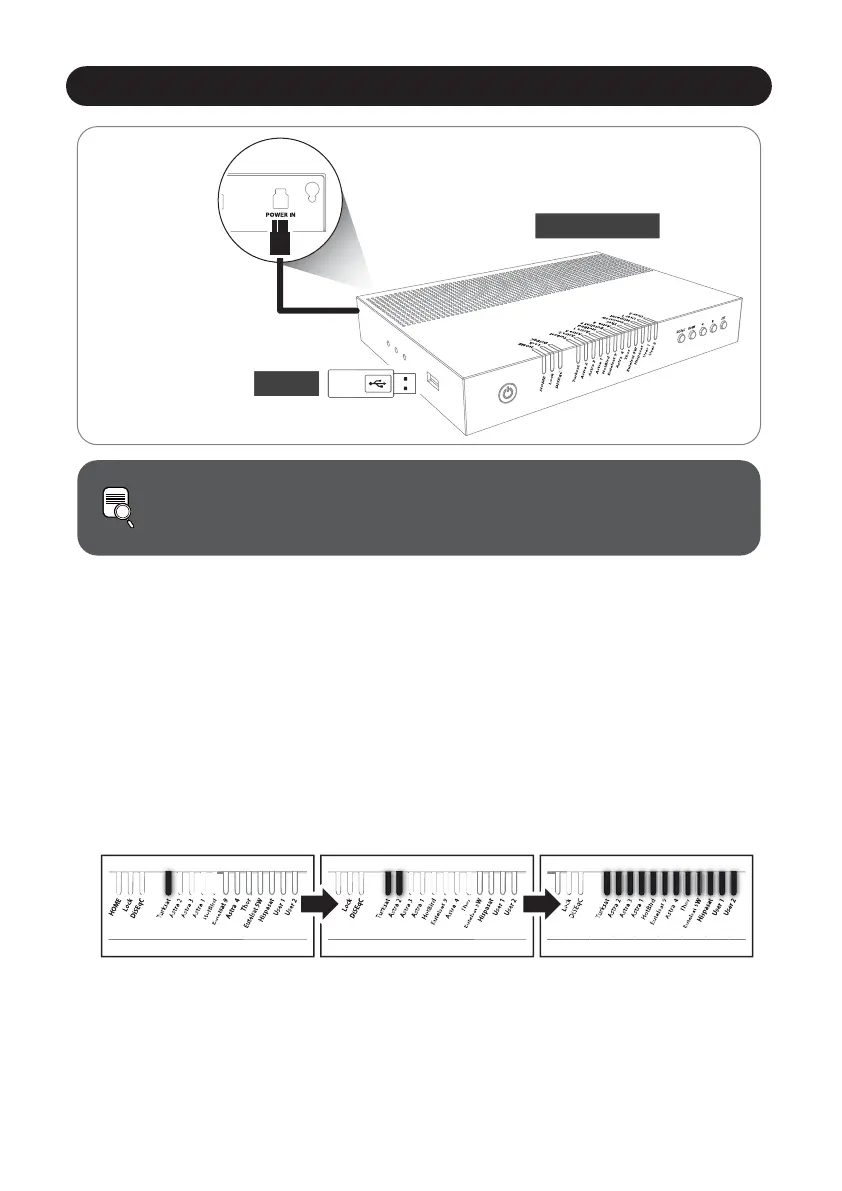
Ensure that the unit is turned off and plug the USB into USB port of controller
Press and hold SET button then turn on the power
During upgrade process, satellite LEDs are lit in sequence
2.
3.
4.
Please go to website www.selfsat.com to download upgrade program (software)
In case a controller does not recognize the USB drive, take the USB out and plug into a PC.
Right click USB folder, go to “Properties” and check if the “File system” is FAT32.
If not, right click USB folder again, go to “Format” and re-setup a file system to FAT32
CONTROLLER
For example :
Power input cable
USB