11
Chapter 1: Installation
INSTALLATION
This section provides information on:
t0QFSBUJOHFOWJSPONFOU
t*OTUBMMBUJPO
t$POOFDUJOHTFOTPST#BUUFSZCBDLVQNPEVMF
t/FUXPSL$POGJHVSBUJPO
PARTS REQUIRED
t1IJMMJQT4DSFXESJWFS
t$BU1BUDI$BCMF
t/FUXPSL)VC4XJUDIPS3PVUFSUIBUTVQQPSUTPS#"4&5
t$PNQVUFSX/FUXPSL$POOFDUJPO
OPERATING ENVIRONMENT
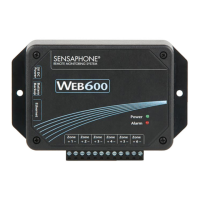
Before you install the Web600 be sure that your operating environment meets the physical requirements
of the equipment.
Operating Temperature: 32º–122º Fahrenheit (0º–50º C)
)VNJEJUZ o3)OPODPOEFOTJOH
1PXFS 7"$)[PVUMFUXJUIJO
WALL MOUNT INSTALLATION
The Web600 can be wall mounted using the included dry wall anchors and screws. Follow the steps
below:
1) Install two drywall anchors (if necessary) 5” apart. Attach the Web600 using the two #6 tapping
screws.
2) Attach sensors to the zone terminals.
1MVHUIFQPXFSBEBQUPSJOUPB7"$)[PVUMFU
4) Connect a CAT5 cable to the Ethernet port and connect to a 10/100 network hub, switch or router.
TABLETOP INSTALLATION
The Web600 can be installed on a tabletop or shelf. Follow the steps below:
1) Attach the four self-adhesive rubber feet to the four corners on the bottom of the Web600.
2) Place the unit on a tabletop or shelf.
3) Attach sensors to the input terminals.
1MVHUIFQPXFSBEBQUPSJOUPB7"$)[PVUMFU
5) Connect a CAT5 cable to the Ethernet port and connect to a 10/100 network hub, switch or router.