Doc No. 006-0211-00 Rev AK Page 22 of 33
APPENDIX 1
TROUBLESHOOTING
Sensor to Surface Communication Troubleshooting
The definitive method for troubleshooting installation problems is to separate the
downhole equipment from the surface equipment, including the junction box and surface
cable.
Troubleshooting Steps
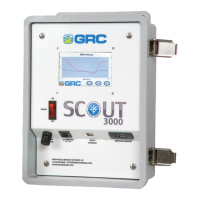
It is recommended to use a known functioning portable SCOUT unit for this exercise.
1. Record display screen information or error messages.
2. Insure all power going downhole is shutdown. FAILURE TO DO THIS COULD
RESULT IN INJURY, DEATH AND DAMAGE TO EQUIPMENT.
3. Shut down power at the surface display so that no voltage is applied to the Surge
Suppressor/Choke assembly.
4. Check to insure there is no voltage present at the Surge Suppressor/Choke
assembly. Visually inspect for damage/discoloration of components and wiring.
Then conduct individual resistance checks of the fuses, MOV and Surface
Choke.
a. All components should be isolated from the rest of the circuit while
checking; this will prevent a false reading
b. MOV should read infinite in both directions when checked with a multi-
meter.
c. Fuses should check less than 2 ohms except for the fuse in the Scout-
3000, which will read approximately 12 ohms.
d. Surface Choke should read approximately 260 ohms phase to phase and
130 ohms phase to neutral wire.
5. Allow for backspin of fluid before performing the following test. Depending on the
type of wellhead penetration used, separate the downhole cable from the surface
cable at the wellhead. If the downhole cable continues to the surface junction box
(i.e. no cable termination at the wellhead) the test may be performed there.
Disconnect the surface cable going from the junction box to the transformer in
this case.
6. Perform phase to phase resistance checks of the cable and record the values
and record.
7. Attach the positive lead of the portable surface display to one of the three phases
and the negative lead to a good clean wellhead ground.
8. Power the portable surface display on and allow the system to boot up and to go
through the analyzing process. If the system does not complete the analyzing
steps, record the errors shown and compare it to the Scout-3000 Error Chart
shown in the Scout-3000 manual (Sercel-GRC PN: 006-0191-00).
9. If errors are being seen, one corrective measure to try is to change the Line
Voltage value, to both a lower and higher value by putting the SCOUT in Manual
Mode. This is shown in the section “SCOUT-3000 Operation Settings”