29
9.0 Setup Guidelines
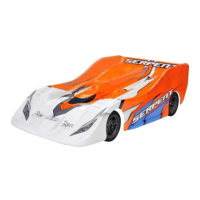
Setting up a racecar with fully independent suspension, like your
Serpent 950, is necessary to make the car perform well. We have
developed these straightforward procedures to help you set up your
car properly and easily. Always follow these procedures step-by-
step, in the order presented, and always make sure that you make
equal adjustments on both left and right sides of the car.
The set-up described here is a good starting point, but you may
adjust the settings to better suit different track conditions. Make
only small adjustments at a time, and see if you find any improve-
ment in handling with each adjustment. We advise you to keep
track of your set-up changes, and record which set-ups work best
at different racetracks under various conditions. After rebuilding the
chassis, or in case you are lost with your set-up, always return to
the set-up described here.
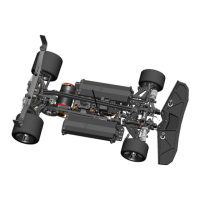
1 Shock absorbers
Shock absorber dampening influences the responsiveness of the
chassis during cornering (chassis roll), and helps to maintain proper
contact between the tire and the road surface during vertical move-
ment. Setting the right dampening is therefore always a compro-
mise and requires a lot of "hands on" experience.
No dampening means that the spring rate determines how long it
takes for the spring to compress and the suspension to reach a sta-
ble position. Dampening only comes into play when the suspension
is moving (either vertical chassis movement or because of chassis
roll), and loses its effect when the suspension has reached a stable
position. When the spring is compressed or decompressed, the
shock absorber oil resists this movement. How much it resists
depends on the thickness of the oil and how much the flow is
restricted (the number of holes in the shock piston) and of the
velocity of the piston.
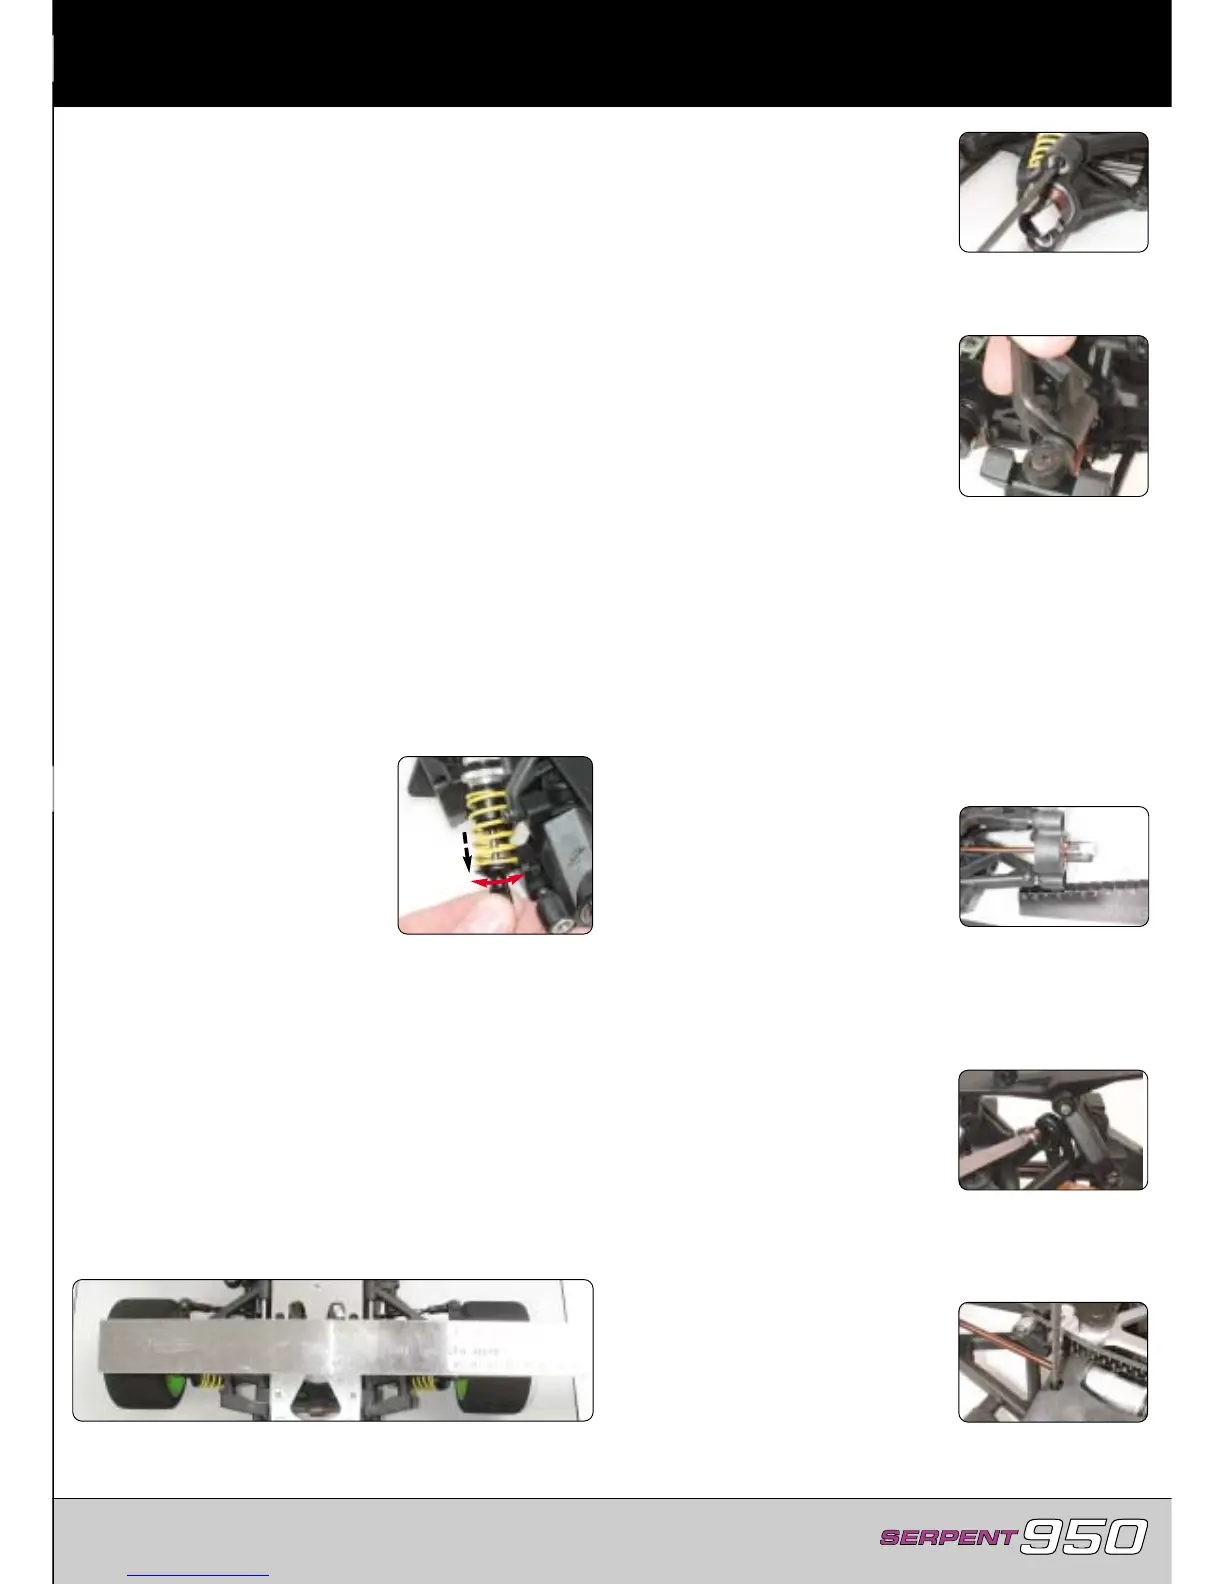
How to measure and adjust
The Serpent shock absorbers are
adjustable from the outside. Pull out the
pistonrod and turn it slightly until it
locks in the shock-cylinder. By turning
the pistonrod clockwise until the end
you reach the hardest position (1 hole).
Turning it from here anti-clockwise
means opening more holes. By feeling
the "clicks" you can determine the num-
ber of holes in the piston.
1.1 Front shock absorber setting
Adjust the front shocks to 2 holes (complete turn clockwise, then 1
click back)
1.2 Rear shock absorber setting
Adjust the rear shocks to 2 holes (complete turn clockwise, then 1
clicks back)
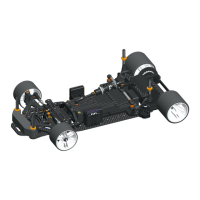
2 Track-width
Track-width affects the car's handling and steering response.
Increasing front track-width will result in more understeer, while
decreasing it will result in less understeer and faster steering
response.
Increasing rear track-width creates more rear traction, as long as
the car has a solid rear axle as it is in the 950. It may also help in
case of traction rolling.
2.1 Front track-width - Setting
Front track-width is measured on the out-
side of the wheels. It is important that
the front track-width is adjusted
symmetrically, meaning that the right and
left wheels must be the same distance
from the center-line of the chassis.
Set the front track-width to 254mm. Turn both pivot balls IN equally
to reduce track-width, turn them both OUT equally to increase
track-width.
2.2 Rear track-width - Setting
Rear track-width is measured also on the
outside of the wheels. As in the front it is
important that the rear track-width is
adjusted symmetrically, meaning that the
right and left wheels must be the same
distance from the center-line of the chas-
sis.
Set the rear track-width to 262mm. This is achieved by first remov-
ing both rear upper wishbone mounting points from the rear
upright. Unscrew both sides, together with the two lower pivot
balls, out to make wider and in to make narrower.
3 Downstops
Downstops limit how far the suspension arms travel downward
(which determines how far upwards the chassis travels). The
amount of downward suspension travel affects the car's handling,
and the effect may change with the type of track and/or amount of
grip available. In general, more suspension travel (less downstop)
makes the car more responsive but less stable. It is also better on a
bumpy track.
It is very important to adjust the downstops such that left and right
sides are equal.
How to measure
You check the downstops with the chassis
elevated above a reference surface. A
special, flat reference board is available
from HUDY (#108200 Flat Set-up Board).
We also advise you to use the downstop
measuring set from HUDY.
Using the measuring gauge, measure the distance from the refer-
ence surface to the bottoms of the rear uprights / front steering
blocks. Positive numbers indicate the distance (in mm) ABOVE the
level of the elevating blocks (or, above the bottom of the chassis).
Negative numbers indicate the distance (in mm) BELOW the level of
the elevating blocks (or, below the bottom of the chassis).
Perform these initial steps
A Remove the wheels from the car.
B Front anti-roll bar: Remove screw from
the right front anti-roll bar mount to dis-
connect it.
C Rear anti-roll bar: Disconnect one ball-
joint from rear anti-roll bar.
Remark: it is not necessary to remove the shocks, however you
must be sure that they are long enough not to limit the suspension.
Be sure the suspension is reaching the downstop limits, before the
shocks do.
3.1 Downstops front
Adjust the front downstop screws so that
the bottoms of the steering blocks are at
0mm on the gauge. (Actual measurement
= 0 mm above level of elevating blocks,
or level with the bottom of the chassis).
C
 Loading...