30
3.2 Downstops rear
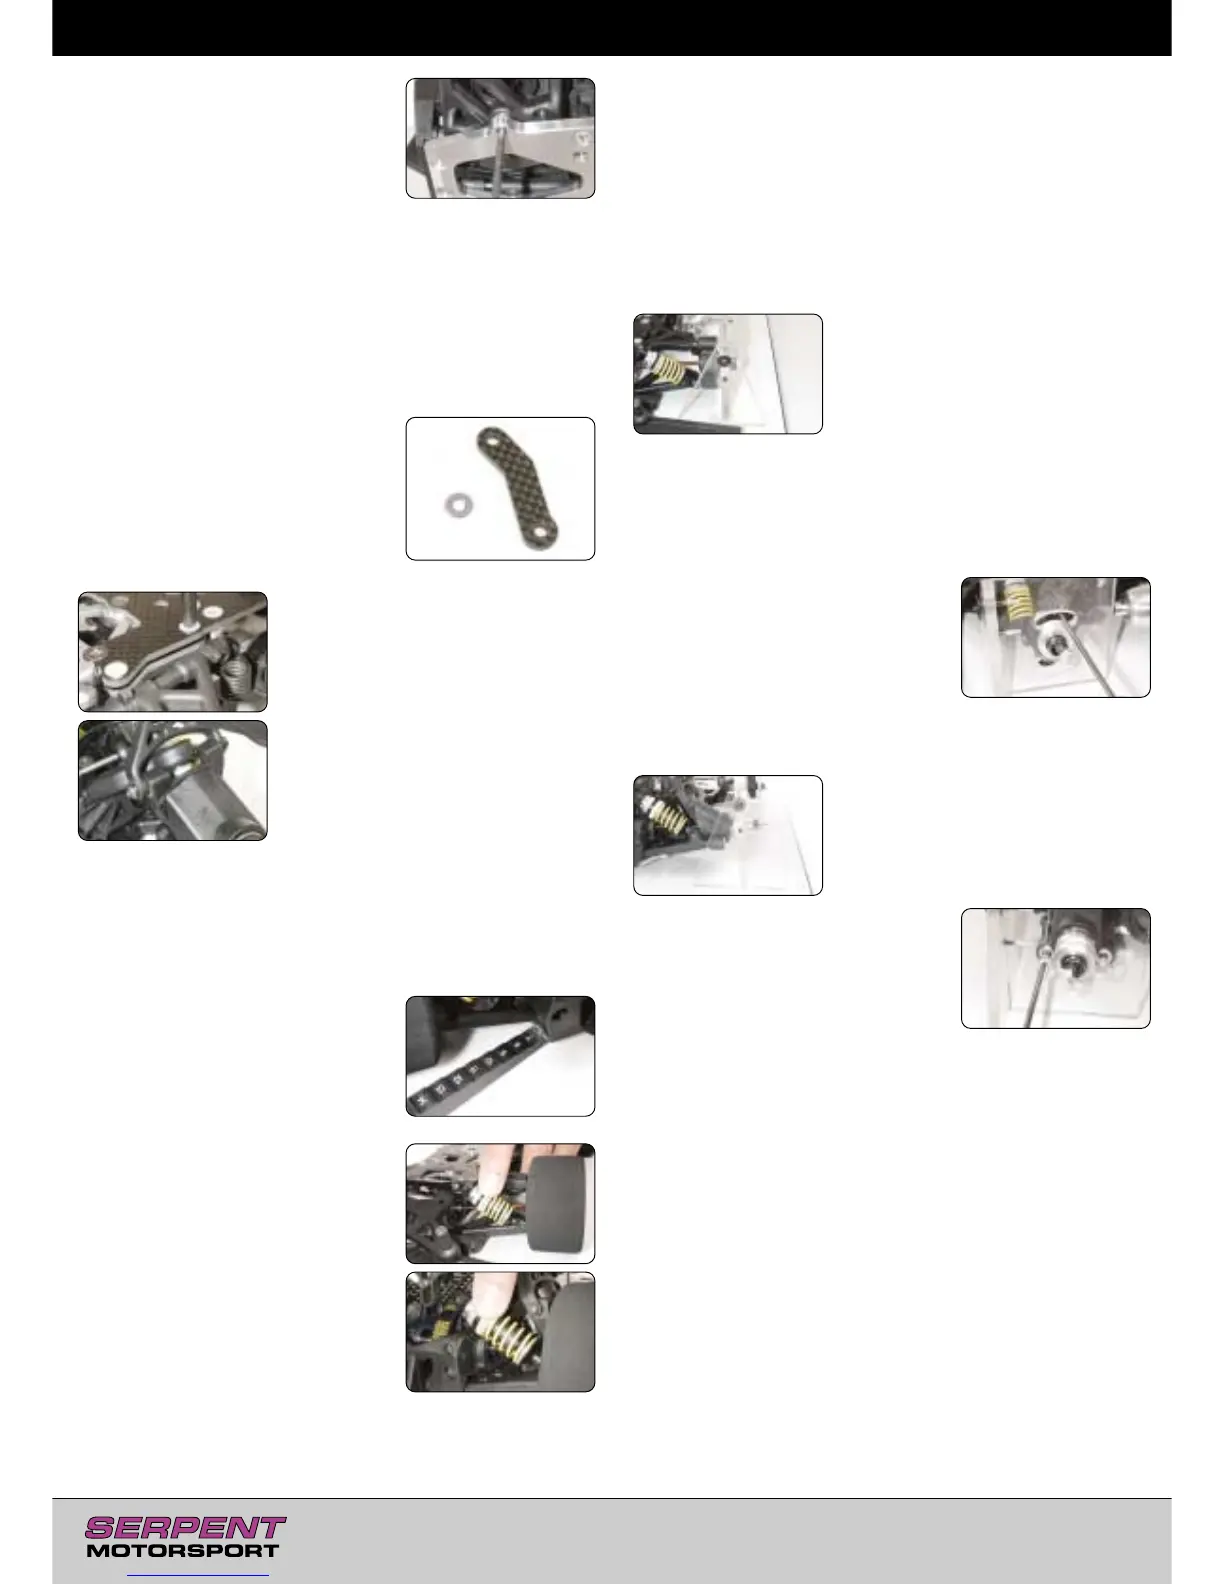
Adjust the rear downstop screws so that
the bottoms of the rear uprights are at
+9mm on the gauge. (Actual measure-
ment = 9mm above level of elevating
blocks, or above the bottom of the chas-
sis).
4 Roll Centers
The "roll-center" is the theoretical point around which the chassis
rolls, and is determined by the design of the suspension. Front and
rear suspension normally have different roll-centers. The "roll-axis"
is the imaginary line between the front and rear roll-centers. How
much a chassis rolls in a corner depends on the relative position of
the roll-axis to the center of gravity of the car. The closer the center
of gravity is to the roll-axis, the less roll the chassis has and the
less camber change there will be as a result of the chassis rolling.
How to adjust
Front and rear roll centers are both
adjusted by inserting spacers. For the
front you can add (rise the roll center)
or remove (lower the roll center) carbon
spacers above the front upper wishbone
pivot point-bracket. For the rear you can
place a spacer above the rear upright
beneath the rear upper wishbone (rise
the roll center).
4.1 Front roll center - Setting
Set the front roll center to its default set-
ting of 3mm.
4.2 Rear roll center - Setting
Set the rear roll center to 0 mm (no
spacer)
5 Ride Height
Ride-height also affects the car's traction as it moves the center of
gravity and the roll-center of the car. Decreasing the ride-height
(lowering the car) gives you more grip. However, because of
changes in suspension geometry and decreasing ground clearance,
there are also negative consequences to doing this.
How to measure
The cars ride height is measured when
mounted on the HUDY setup system or
using a set of 76mm rear / 70mm front
tires. Measure using a HUDY ride height
gauge or a calipers from the very end
point at both the front and rear of the
car.
5.1 Front ride height - Setting
Set the front ride height to 7mm. This is
done by adding or removing pressure on
both front springs pre-tension and there-
fore raising or lowering the ride height.
5.2 Rear ride height - Setting
Set the rear ride height to 7mm. This is
done by adding or removing pressure on
both rear springs pre-tension and there-
fore raising or lowering the ride height.
6.0 Camber
Camber is the angle of a wheel to the surface when the car is rest-
ing on the surface (with wheels and shock absorbers mounted).
Zero degrees (0°) of driving camber means that the wheel is per-
pendicular to the reference surface; negative degrees means that
the top of the wheel is leaning inwards; positive degrees means
that the top of the wheel is leaning outwards.
Camber affects the car's traction. In general, more negative camber
means increased grip. Nevertheless, it should always be adjusted
such that the front tires wear flat, while the rear tires should wear
slightly conical to the inside.
6.1 Front driving camber - Setting
Adjust the front driving camber to -1.5 degrees (tops of front
wheels leaning inwards).
How to measure
Before measuring front driving camber,
lift and drop the front end of the car a
few cm's to let the suspension settle.
Measure the camber using the Hudy set-
up system which you already used to
adjust ride height.
Notice: using wheels together with a camber gauge may result in
noticeable different camber readings. The reason is that especially
the rear tire has a tendency to lay flat on the surface. If then i.e.
the tire is not pre-coned, the camber reading may differ up to 1
degree less camber to the reading you get with the Hudy system.
How to adjust
Camber is adjusted by turning the pivot-
balls in or out. Turning the upper pivotball
in while turning the lower one out gives
more negative camber. Always turn one
pivotball in and the other one out, other-
wise you will change toe-in.
6.2 Rear driving camber - Setting
Adjust the rear driving camber to -3 degrees (tops of rear wheels
leaning inwards).
How to measure
The measuring is similar to the front
camber.
How to adjust
Camber is adjusted by turning the pivot-
balls in or out. Turning the (lower) pivot-
balls out gives more negative camber.
Always turn both pivotballs in or out, oth-
erwise you will change toe-in.
7 Toe-in
Toe-in is the angle of the wheels when looked at from above. When
the wheels are parallel, the toe-in is 0 degrees. When the wheels
are open towards the front, this is called toe-out (or negative toe-
in). When the wheels are closed towards the front, this is called
(positive) toe-in.
Toe-in is used to stabilize the car. In the case of oversteer (the rear
end losing traction before the front), adding extra rear toe-in may
help, but this makes on-power cornering a little more difficult. If the
car is too stable and pushing (understeering), removing some front
toe-in will remedy this.
How to adjust
Front toe-in is adjusted with the track-rods that connect the servo-
savers to the steering blocks. Making the track-rods longer will cre-
ate more toe-in, while making them shorter will create less toe-in.
To create more rear toe-in, turn in the front pivot ball and turn out
the rear pivot ball. To create less rear toe-in, turn out the front
pivot ball and turn in the rear pivot ball. Remember to make equal
(but opposite) adjustments to the pivot balls.
 Loading...