Operation Section 3
3-10
Part Number 020003996 4/12
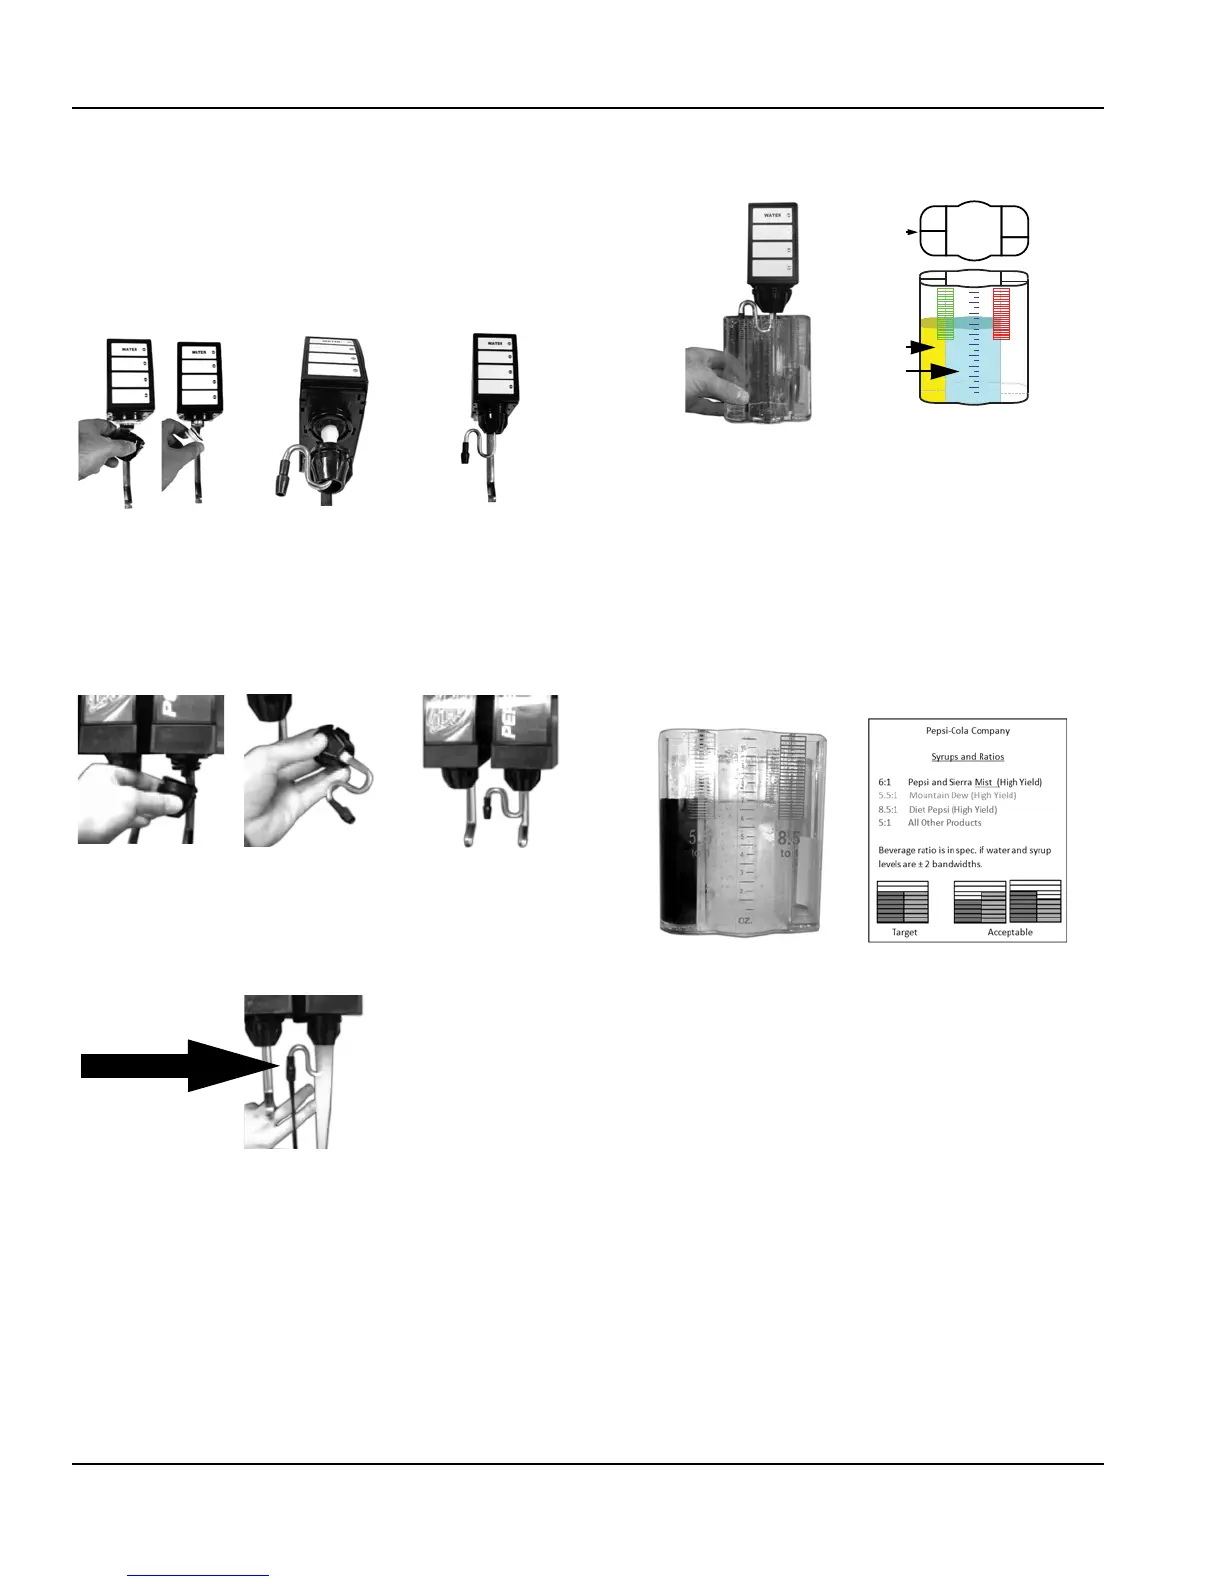
BRIX CHECK
Step 1 - Gather Tools
Tools you will need; brix cup and S tube.
NOTE: Follow instructions on 2a or 2b depending on
Valve Type that is being checked.
Step 2a - Attaching S Tube To Multi-flavor Valve
• Remove nozzle and syrup diffuser from valve.
• Slide white end of S Tube over tip of diffuser snuggly.
• Re-attach nozzle and diffuser with S Tube in place.
• Select flavor to brix.
Step 2b - Attaching S Tube To Single Flavor Valve
• Remove nozzle and syrup diffuser from valve.
• Slide white end of S Tube over tip of diffuser snuggly.
• Re-attach nozzle and diffuser with S Tube in place.
Step 3 - Prime S Tube
After nozzle has been re-attached, dispense a small
amount of product to fill up the S Tube.
• This is necessary to ensure an accurate reading.
Step 4 - Fill Brix Cup
• Position the large end of the brix cup under the valve.
At the same time insert the free end of the S tube into
the proper syrup chamber. See diagram to the right
for reference.
• Dispense product until product reaches the grid on
the Brix cup.
NOTE: The water should be clear. If the water is not
clear, the S-lube has not been attached correctly to the
syrup diffuser. Repeat step 2.
Step 5 - Read The Brix
• Remove filled brix cup from dispenser and tap on
counter 3 times. Place on flat surface.
• Look a the grid lines. The water and syrup levels
should be +/- 2 bars of each other.
• Repeat steps 1-5 for each different product that will
be brixed.
NOTE: If Brix ratio is not correct, contact service
company.
6:1
5.5:1
8.5:1
5:1
WATER
5.5
to 1
8.5
to 1
9
10
8
7
6
5
4
3
2
OZ.
SYRUP
WATER
SYRUP
RATIOS
High Yield Brix Cup