Maintenance Section 4
4-4
Part Number 020003996 4/12
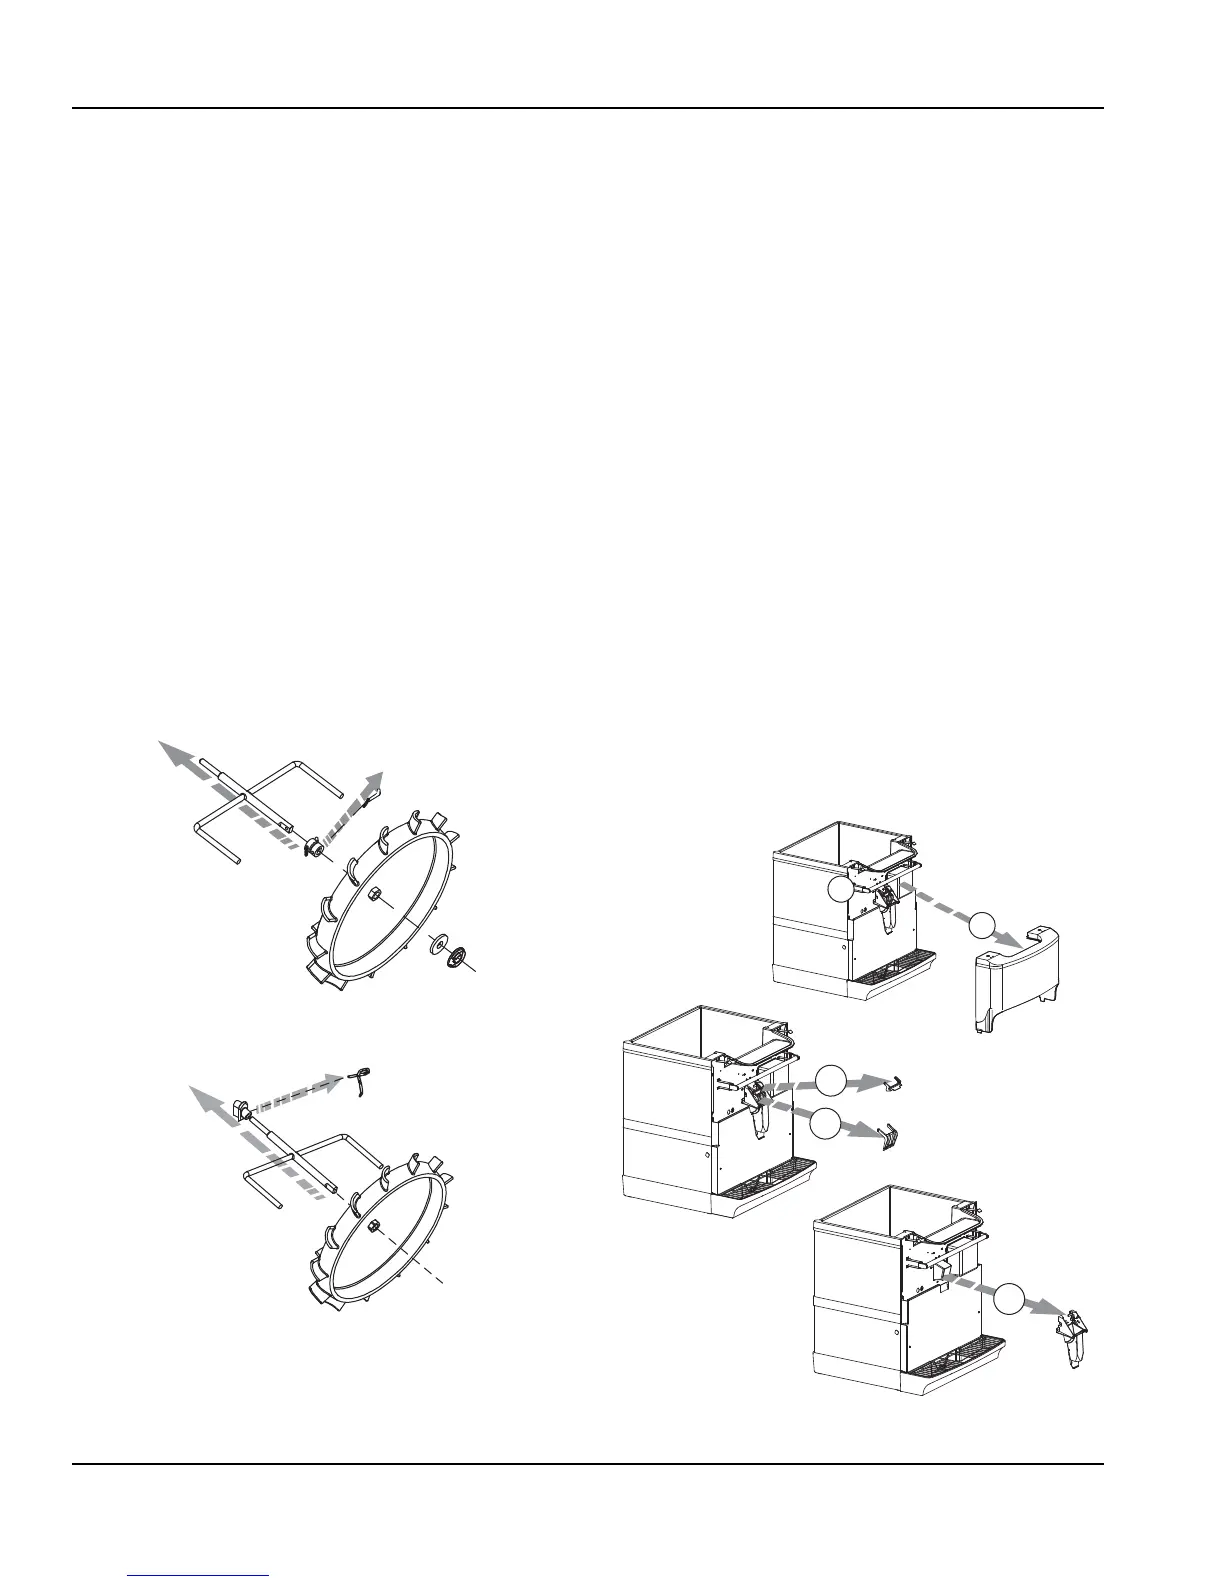
7. Remove agitator arm and paddlewheel pin.
Non-front Serviceable Motor
a. Rotate the agitator arm so the paddle wheel pin
handle is pointing up, toward the ceiling.
b. Prepare agitator pin for removal by removing the
stainless steel split ring.
c. Then remove the paddle wheel pin from the hole
in the agitator.
d. Push the agitator bar toward the back of the unit
until the agitator is free of the paddle wheel hub.
Front Serviceable Motor
a. With agitator arm in any position remove hitch
clip pin from the mushroom bushing on the rear
of the ice bin.
b. Push the agitator bar toward the bushing to
remove it from the paddle wheel hub.
NOTE: If a top mount ice machine is installed, sliding the
ice machine to one side will make bin component
removal easier. If the ice machine is hard plumbed it will
need to be disconnected.
Non-front Serviceable
Front Serviceable
8. Remove paddle wheel, bin liner and paddle wheel
area.
9. Move the front of the agitator to one side and slide
the agitator forward until the rear of the agitator shaft
is clear of the bushing.
10. Remove the agitator from the bin area.
11. Slide the paddle wheel from its shaft.
12. Loosen the four knurled fasteners that hold the bin
liner in place.
13. Remove the bin liner.
14. Remove the paddle wheel area from the bin.
15. Discard the remaining ice in the bin.
DISASSEMBLE THE ROCKING CHUTE
NOTE: For all quickdraw units, refer to the quickdraw
Components section for ice chute information.
1. Loosen the two knurled fasteners that hold the
merchandiser in place.
2. Remove the merchandiser.
3. Remove outer bracket.
4. Remove door lock.
5. Remove door.
6. Remove ice chute.
Ice Chute Removal
4
5
6