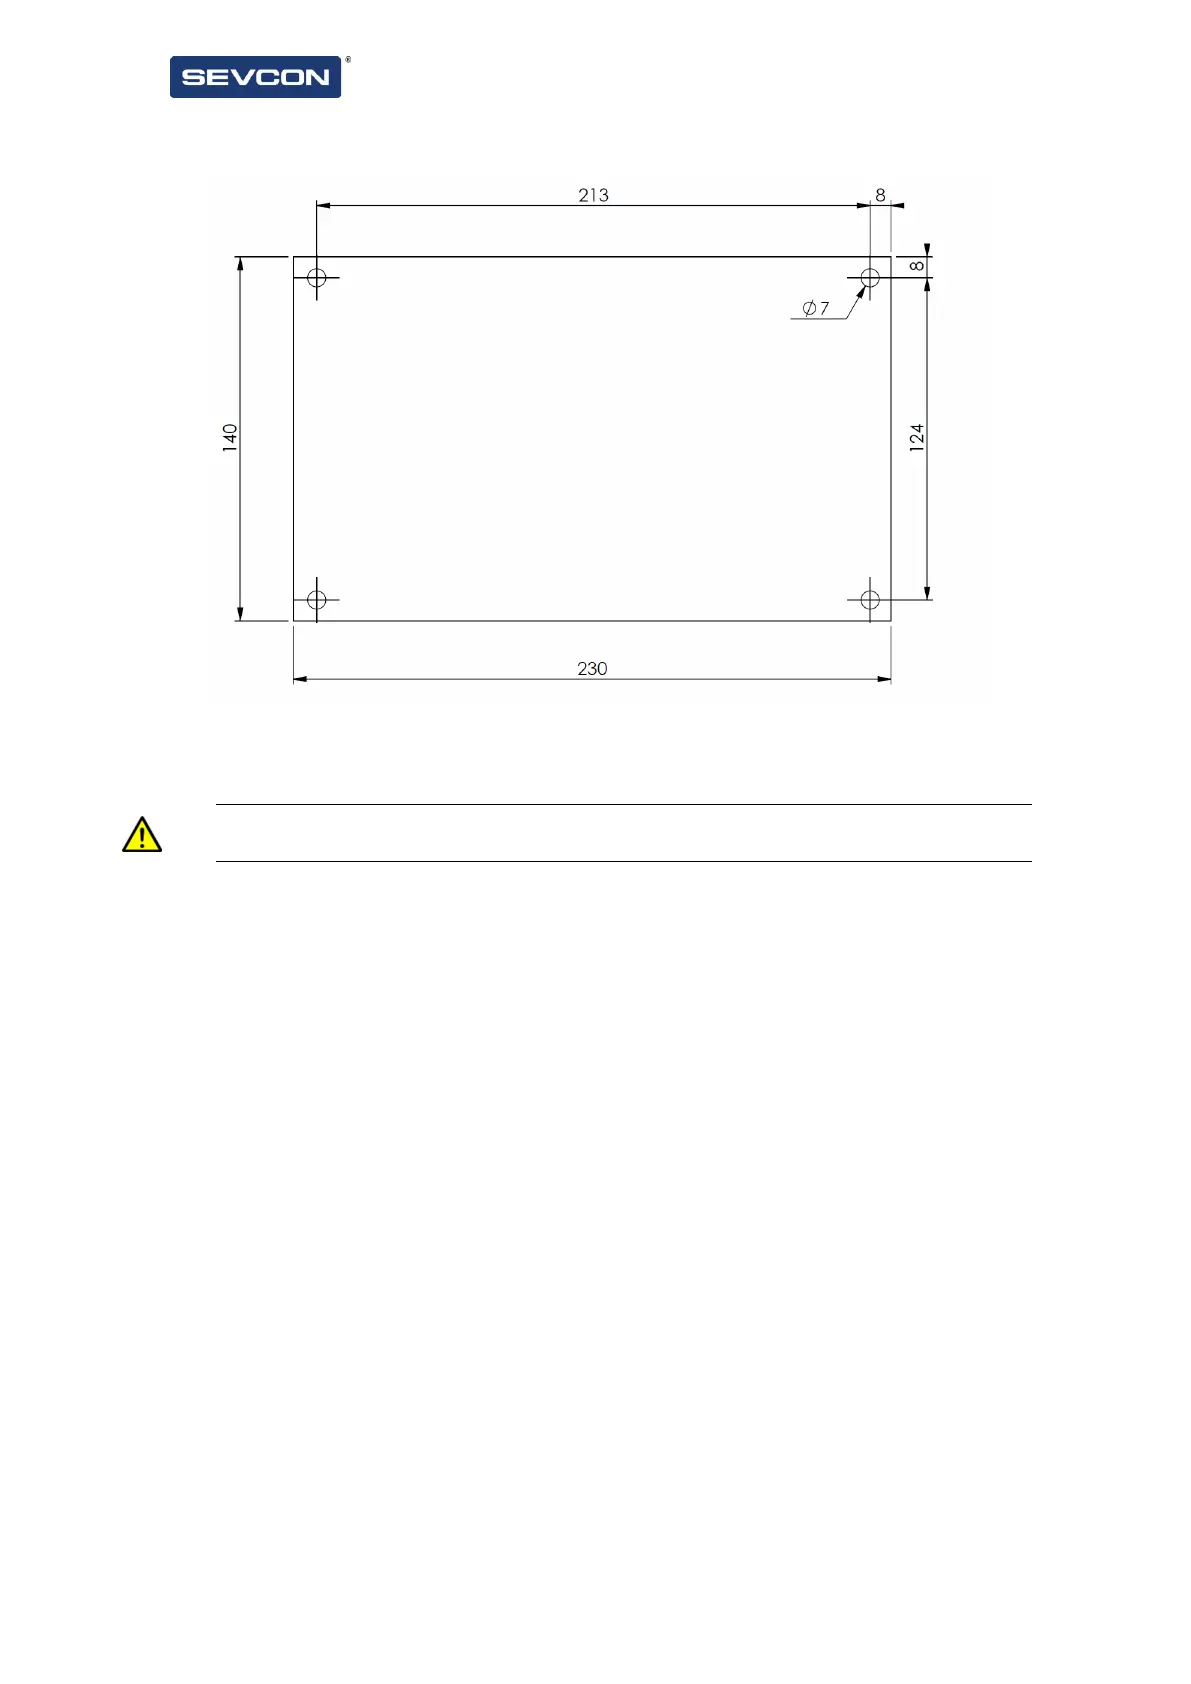
Figure 6 - Mounting Hole Pattern
Minimum flatness of mounting surfaces: 0.2mm
Failure to comply with this flatness specification can cause poor product performance or
deformation of the base and damage to the product.
Equipment Required
• 4 x M6 socket cap head screws and spring washers. Screws need to be long enough to pass through
16-18mm of Dragon8 base plate and penetrate the mounting surface a minimum of 8mm. If through
bolting to a panel then nuts and additional washers will be required and the screws need to penetrate
at least 1 thread turn through nuts.
• Socket wrench or Allen key
• Thermal grease
• Recommended torque setting: 10 Nm ± 2 Nm
Thermal Grease Application
It is recommended that a thermal interface material or thermal paste is used between the controller and
the mounting face. Spread a layer of thermal grease (such as Dow Corning 340) as described below,
before bolting to your mounting surface.
• Thermal compound should be applied with a small, soft paint roller to ensure an even spread of
thermal compound.
• The most appropriate thickness will look white, but with a greyish colour still showing through
from the controller base or vehicle mounting face material. It should be noted that too little thermal
compound will not fill all gaps left by the flatness mismatch of the contact surfaces. Too much thermal
compound may prevent the gap from closing up when tightening.
• It is recommended that thermal compound is applied to both the Controller base and the
vehicle/panel/boost plate surfaces.