AR-M256/M257/M258/M316/M317/M318/5625/5631 DISASSEMBLY, ASSEMBLY AND MAINTENANCE 10 - 5
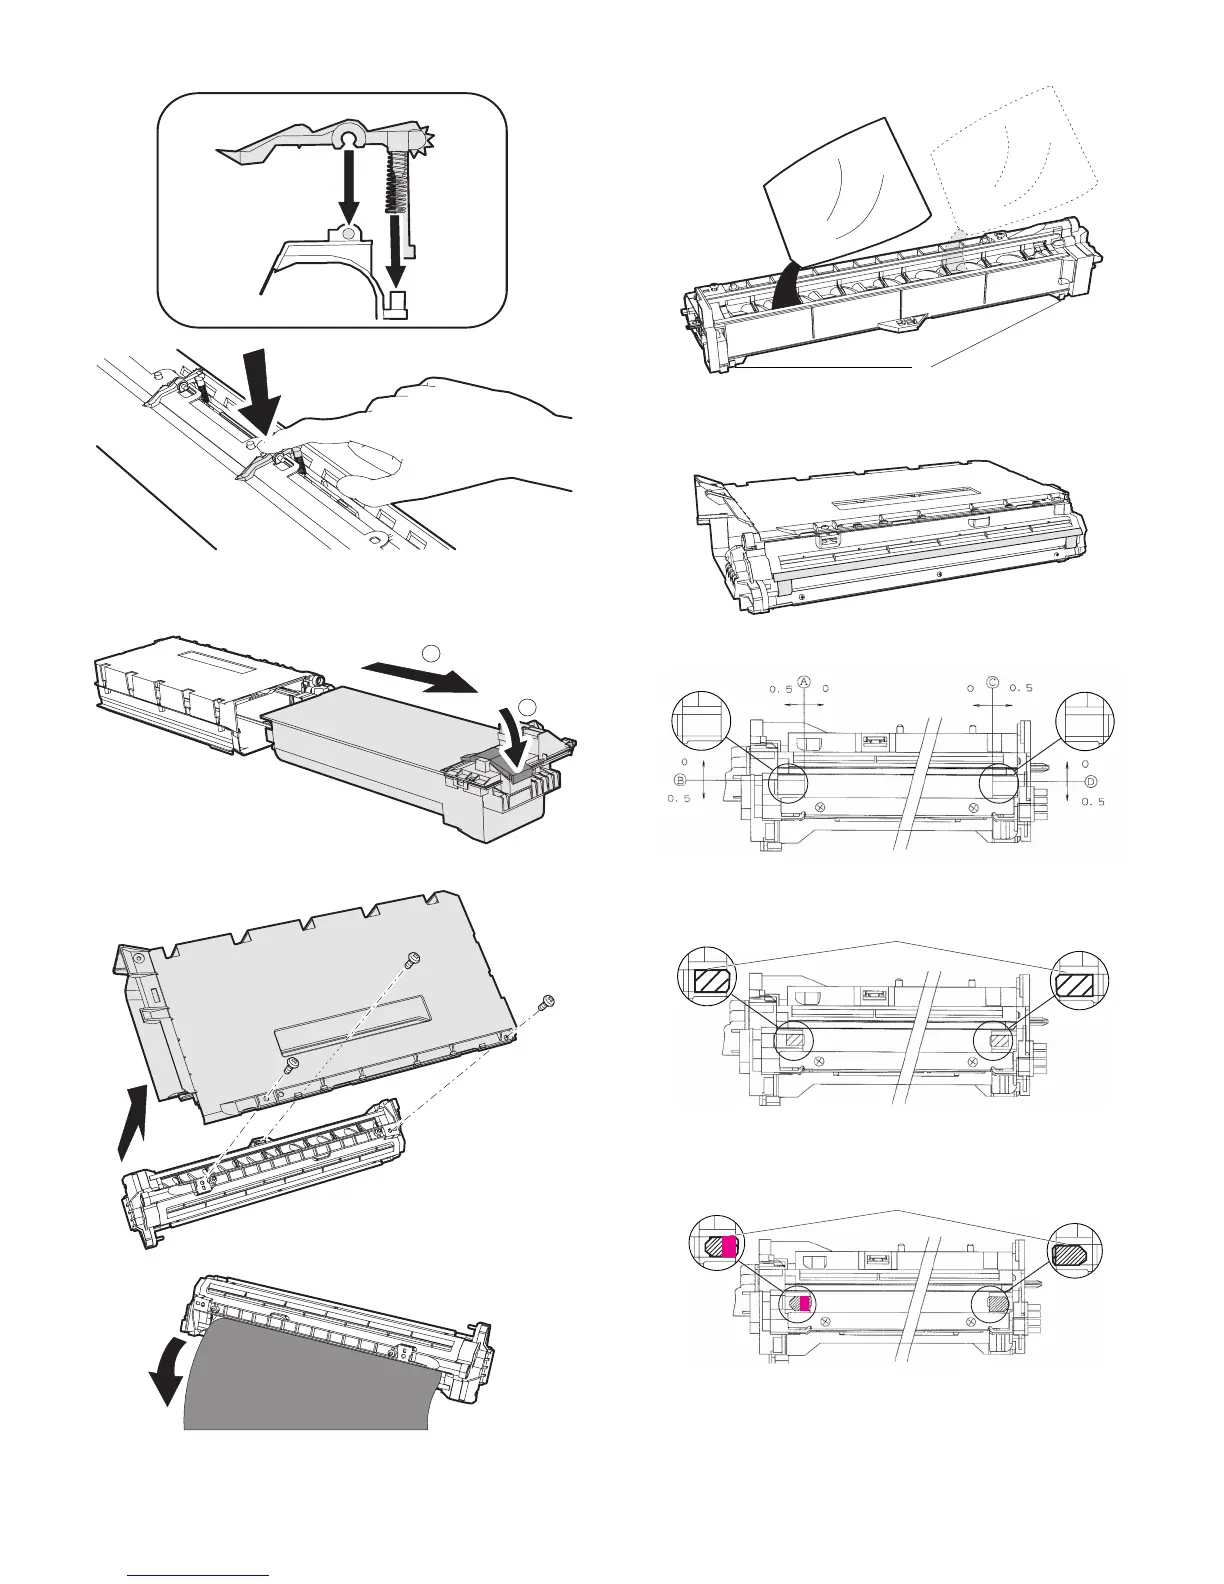
Assembly* Press the center of the separation pawl and install it.
B. Developing section
(1) Developer
∗ When assembling, check that the hook is securely engaged in two
positions.
(2) DV seal/side seal
[DV seal attachment procedure]
1) When attaching the DV side Mylar, check the position shown in the
figure below and attach it properly.
2) When attaching the DV side seal, check the position shown in the
figure below and attach it properly.
(First of all, attach the DV side Mylar.)
The attachment reference is the same, but the area of the N2
shape is reduced to half as shown with the red square in the above
figure.
∗ Be sure to attach the DV side sheet so that the notch is on the out-
side.
1
2
∗
Attaching reference
Attaching reference
Side seal
N
Side seal
N2