AR-M256/M257/M258/M316/M317/M318/5625/5631 EXTERNAL VIEW AND INTERNAL STRUCTURE 6 - 1
[6] EXTERNAL VIEW AND INTERNAL STRUCTURE
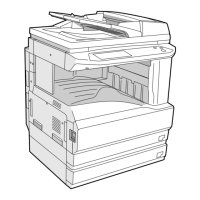
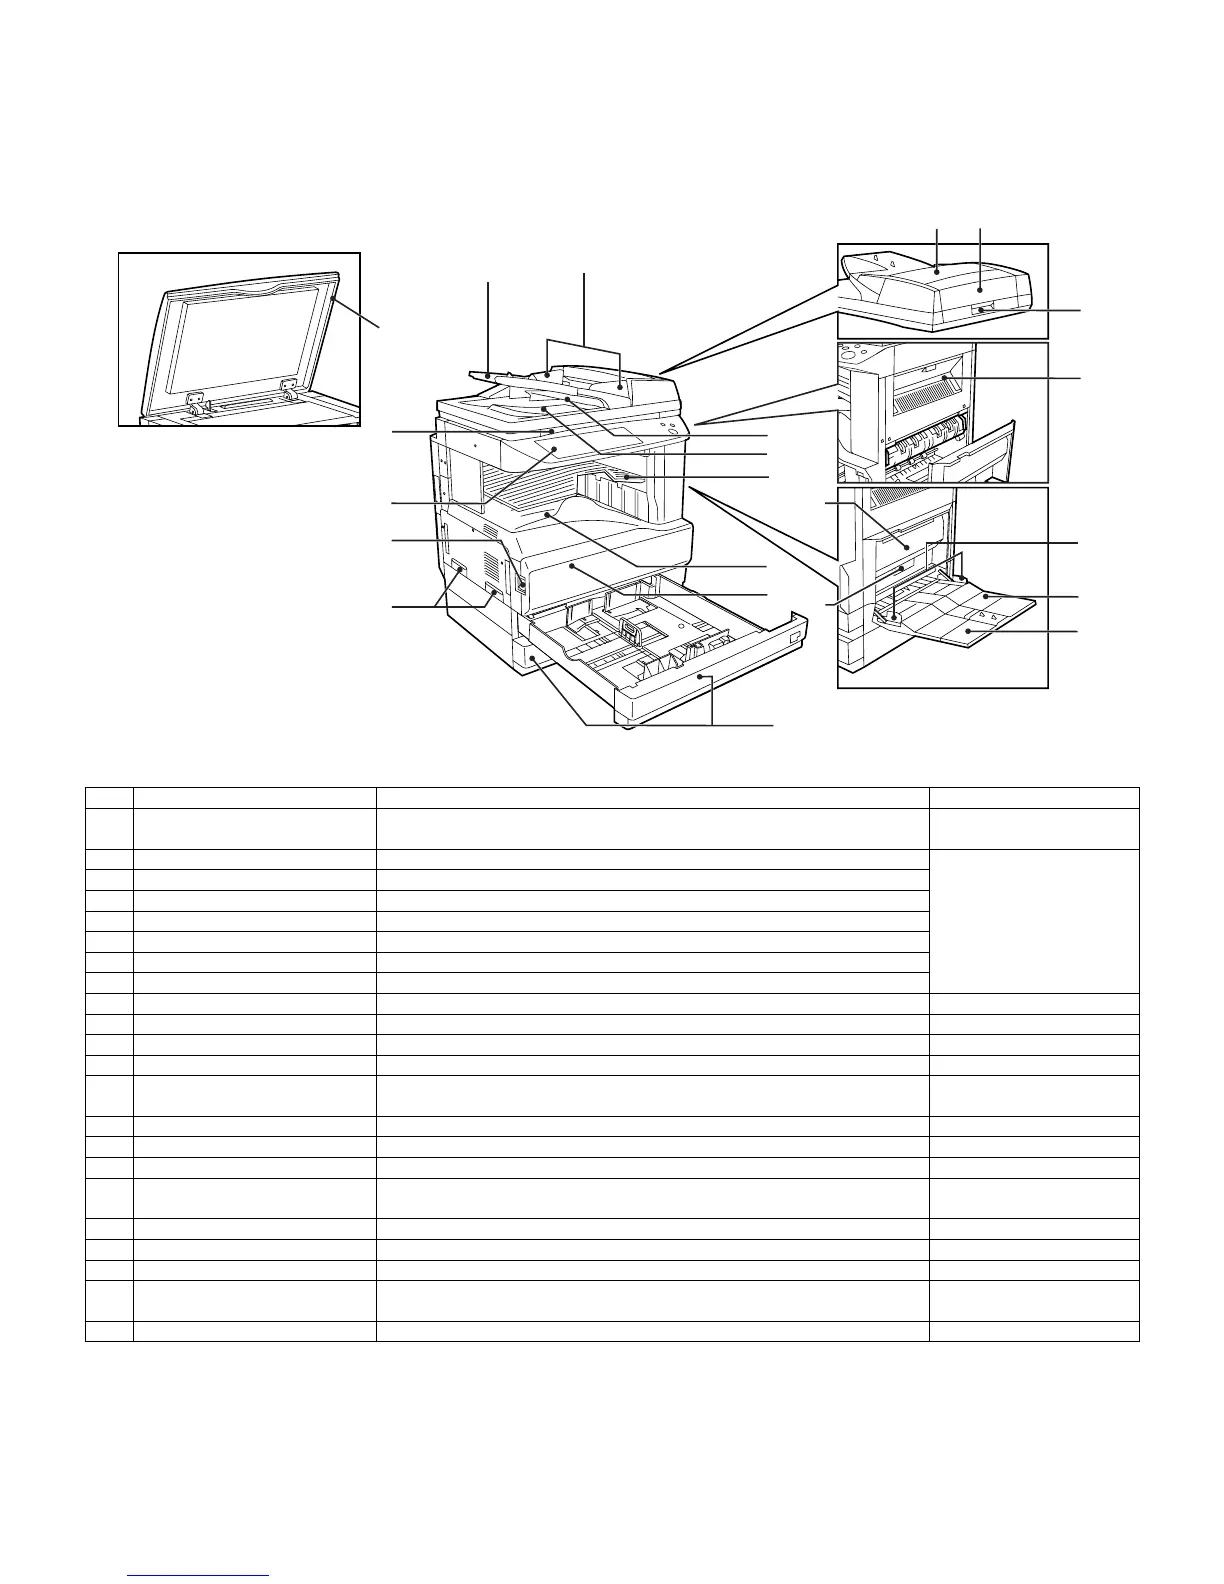
1. Name and function of each section
A. External view
No. Name Function/Operation Note
1 Document cover (optional) Presses a document. Optional (AR-M256/M258/
M316/M318/5625/5631)
2 Document feeder tray Place the original(s) that you wish to scan face up here. When the reversing single
pass feeder is installed.
(AR-M257/M317:Standard)
3 Original guides Adjust to the size of the originals.
4 Document feeder cover Open to remove misfed originals.
5 Reversing tray Pull out to remove misfed originals.
6 Exit area Originals exit the machine here after copying.
7 Document transport cover Open to remove misfed originals.
8 Document transport cover knob Pull to open the document transport cover.
9 Document glass Place an original that you wish to scan face down here.
10 Power switch Press to turn the machine power on and off.
11 Handles Use to move the machine.
12 Operation panel Contains operation keys and the touch panel.
13 Job separator tray (Upper tray)
(optional)
Print jobs and received faxes are delivered to this tray. When the job separator
tray installed.
14 Center tray Finished copies are delivered to the center tray.
15 Front cover Open to remove paper misfeeds and perform machine maintenance.
16 Paper trays Each tray holds 500 sheets of copy paper.
17 Upper right side cover Open to remove misfeeds when an optional job separator tray kit or a
optional finisher is installed.
18 Side cover Open to remove misfeeds.
19 Side cover handle Pull to open the side cover.
20 Bypass tray paper guides Adjust to the width of the paper.
21 Bypass tray Regular paper and special paper (such as transparency film) can be fed
from the bypass tray.
22 Bypass tray extension Pull out the bypass tray extension before placing paper in the bypass tray.
2
22
21
20
18
15
19
17
6
3
10
9
11
14
13
5
8
74
12
16
1