MX-M350/M450 N/U UNPACKING AND INSTALLATION 6 - 11
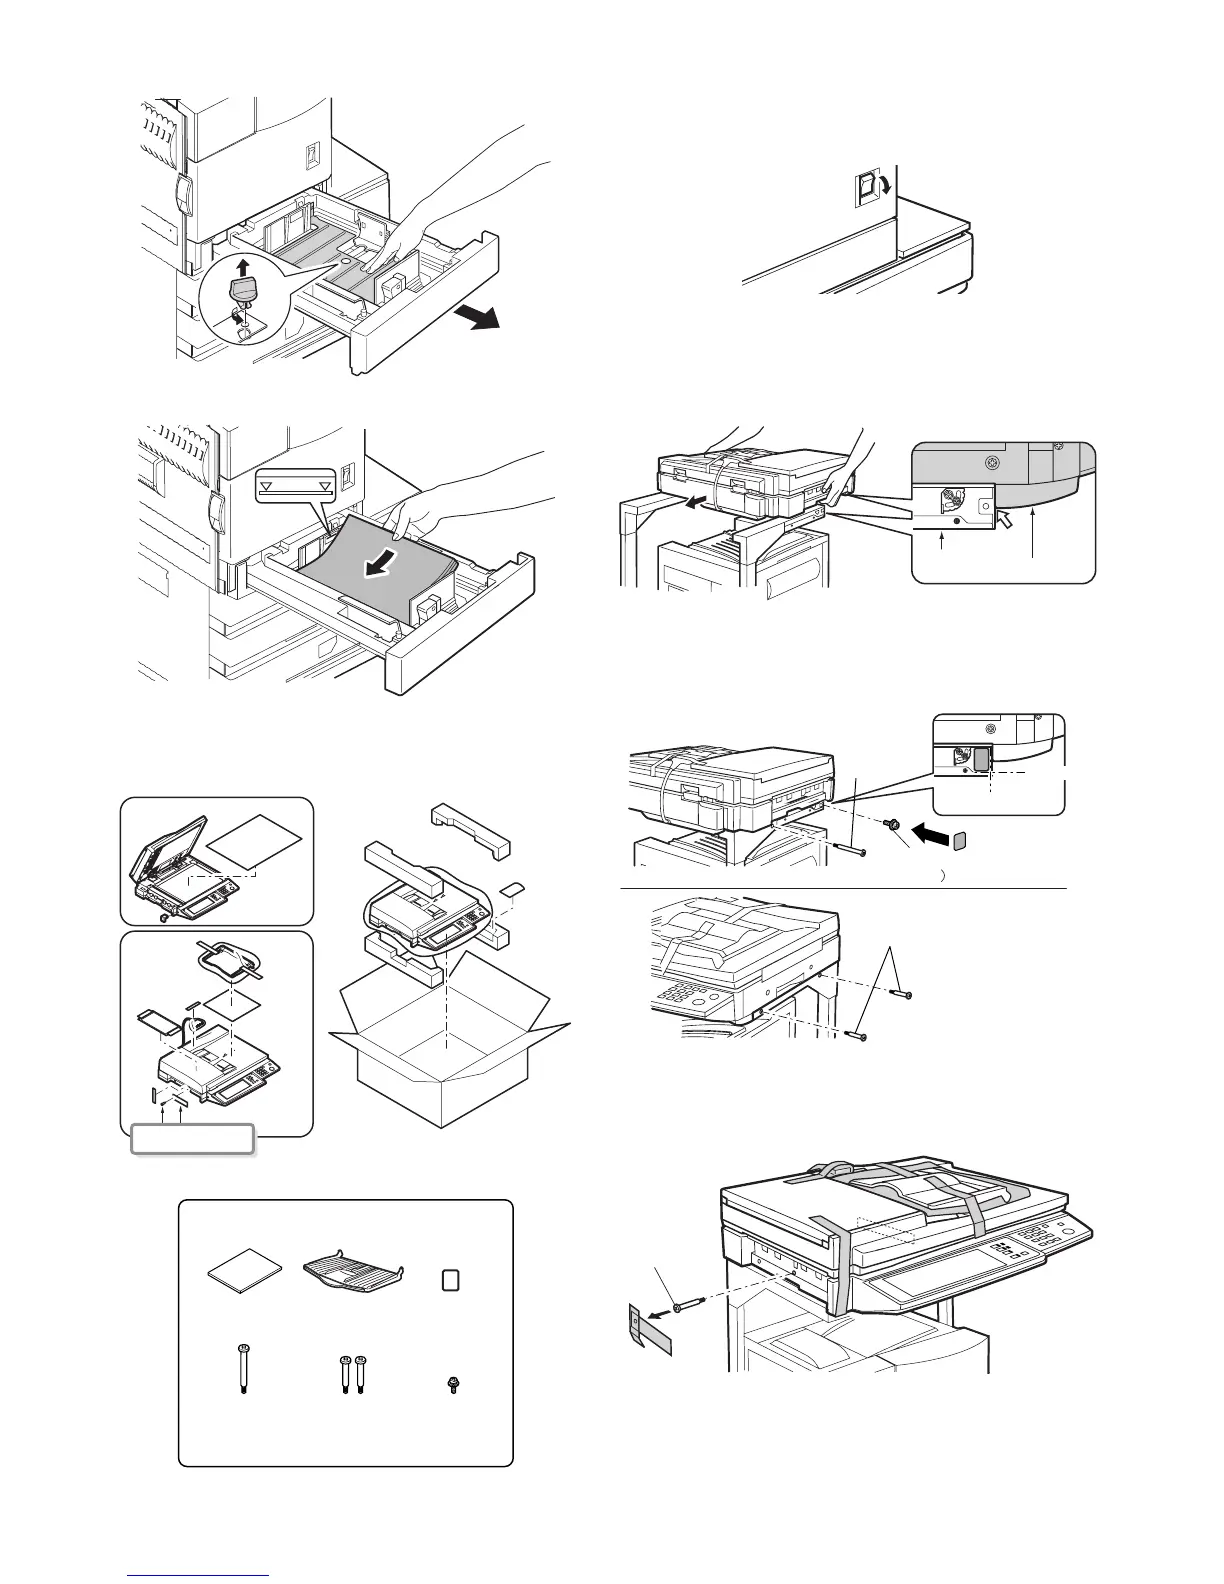
2) While pressing the paper holding plate, remove the fixing pin.
3) Put paper in the tray, and close the paper feed tray.
7. Unpacking and installation of the
MX-EFX1
1) Turn off the main switch of the main unit of the printer.
Turn the main switch located on the front side of the printer to
the "OFF" position.
Then remove the power plug from the outlet.
2) Put the scanner unit on the rack.
Hold the handle of the scanner unit, and put the scanner unit
on the rack from the front side of the rack as shown in the fig-
ure. Slowly slide the scanner unit until it is brought into contact
with the rack and stopped.
3) Fix the scanner unit.
Fix the scanner unit which is on the rack with the fixing screw
(M4 x 8), and fix it to the rack with the M4 step screw (long,
short x 2).
4) Remove the fixing tape for scanner packing and remove the
fixing screw.
Remove the pack fixing tape and the fixing screws which are
fixing the scanner unit, and remove the packing note.
Be sure to remove it,
or it may cause a trouble.
Parts included in the scanner unit
Fixing screw
(M4x8)
(1 pc.)
M4 step
screws (short)
(2 pcs.)
M4 step
screws (long)
(1 pc.)
Operation manual
(1 pc.)
Tray
(1 pc.)
Scanner
rack sheel
(1 pc.)
"OFF"
Rack
Scanner unit
M4 stepped
screw
M4 stepped
screw
Screw
(M4x8
Reference
Reference
Scanner unit
fixing screw