76
SmartMedia Card
Features
Self-timer operating indicator
Recording with the Self-timer
The self-timer function allows you to record
images after a time-lag of 10 seconds. This is
convenient when you want to record an image
of you and your friends together.
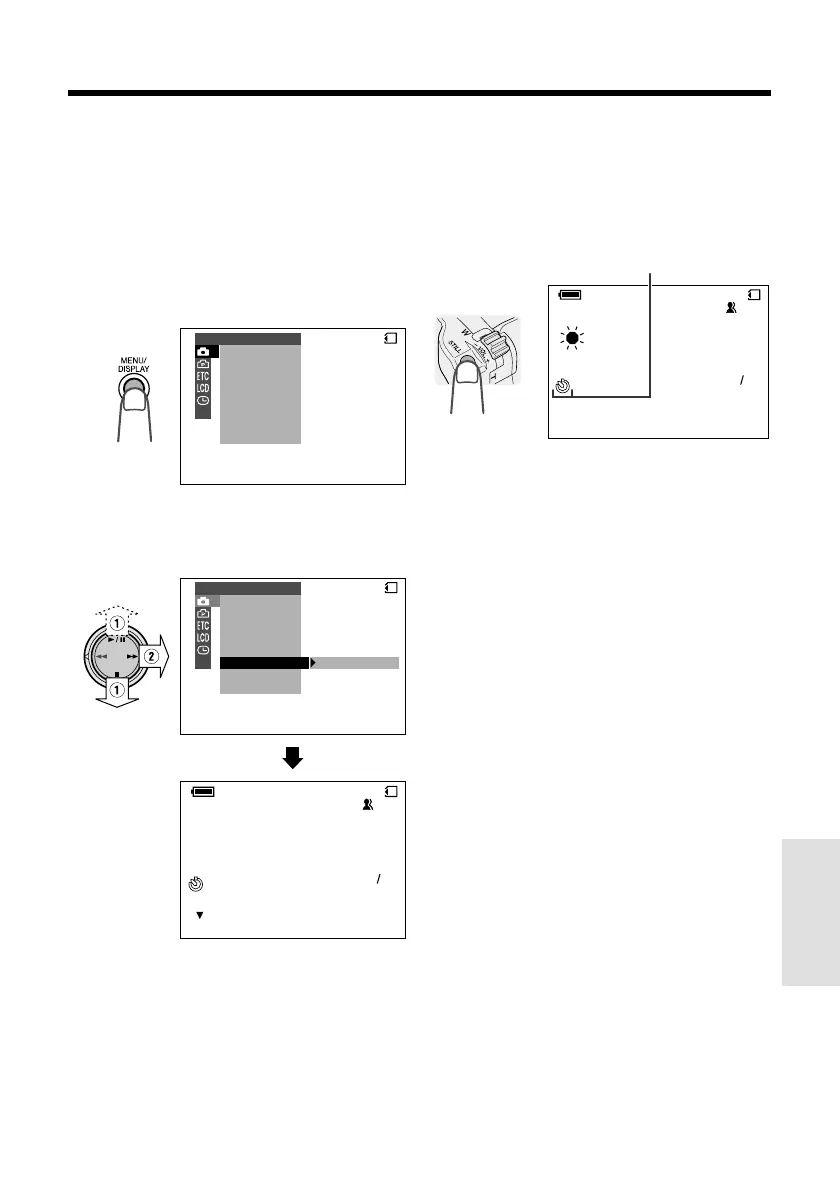
1 In CARD-CAMERA mode, press the
MENU/DISPLAY button until the menu
screen appears.
SCENE
SELF T IMER
MENU
DIS
M
AN. FOCUS
EXPOSURE
SHUT. SPEED
PIC. EFFECT
MANUAL SET
CARD
2 Select T, then press r on the
Operation button. Select “SELF TIMER”
(1), then press r (2).
CARD
NORMAL
[ BUTTON]
CANCEL
AUTO
SCENE
SELF T IMER
MENU
DIS
M
AN. FOCUS
EXPOSURE
SHUT. SPEED
PIC. EFFECT
MANUAL SET
CARD
9001
3 Frame the subject, and then press the
STILL button to set the timer.
• The self-timer operating indicator flashes
while the timer counts down.
• The shutter will be automatically released
10 seconds after, and a still image of the
subject is recorded.
Notes:
• When recording with the self-timer, stabilize the
camcorder in the horizontal plane by attaching it
to a tripod, etc.
• To cancel the self-timer, press the STILL button
again in step 3 above.
• Self-timer mode will be canceled after recording
one image. Repeat steps 1 to 3 to record
another image with the self-timer.
Caution:
• Do not turn the power off or remove the
SmartMedia card once the self-timer operating
indicator begins flashing.
CARD
NORMAL
[ ST ILL]
CANCEL
AUTO
9001