- 6 -
1.1 To Different Users
First-Time DIY System Builder
Welcome to the DIY world! Building your own computer system is not as diffi-
cult as you may think. To make your first computer DIY experience successful,
right from the start, we have designed the 3.1 Hardware Installation section
in a step-by-step fashion for all the first-time DIY system builders. Prior to instal-
lation, we also suggest you to read the whole manual carefully to gain a com-
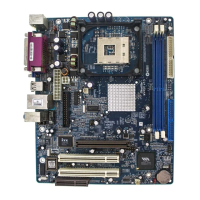
plete understanding of your new Shuttle MV43V/MV43VN mainboard.
Experienced DIY User
Congratulate on your purchase of the Shuttle MV43V/MV43VN mainboard.
You will find that installing your new Shuttle MV43V/MV43VN mainboard is
just easy. Bundled with an array of onboard functions, the highly-integrated
MV43V/MV43VN mainboard provides you with a total solution to build the
most stable and reliable system. Refer to sections 3.2 Jumper Settings and
Chapter 4 Drivers/Software Utilities to find out how to get the best out of
your new mainboard. Chapter 5 BIOS Setup also contains the relevant infor-
mation on how to tune up your system to achieve higher performance.
System Integrator
You have wisely chosen Shuttle MV43V/MV43VN to construct your system.
Shuttle MV43V/MV43VN incorporates all the state-of-the-art technology of the
P4 M266A chipset from VIA. It integrates the most advanced functions you can
find to date in a compact Micro ATX board.
1 INTRODUCTION
This mainboard adopted in MV43V and MV43VN mainboards at the same
time. The difference between MV43V and MV43VN is that MV43VN equips
with onboard VIA VT6103 LAN PHY. In the manual, if there are some
standards, characters, equipment or software only appeared or adopted by
MV43VN; it will be mentioned(MV43VN Only).