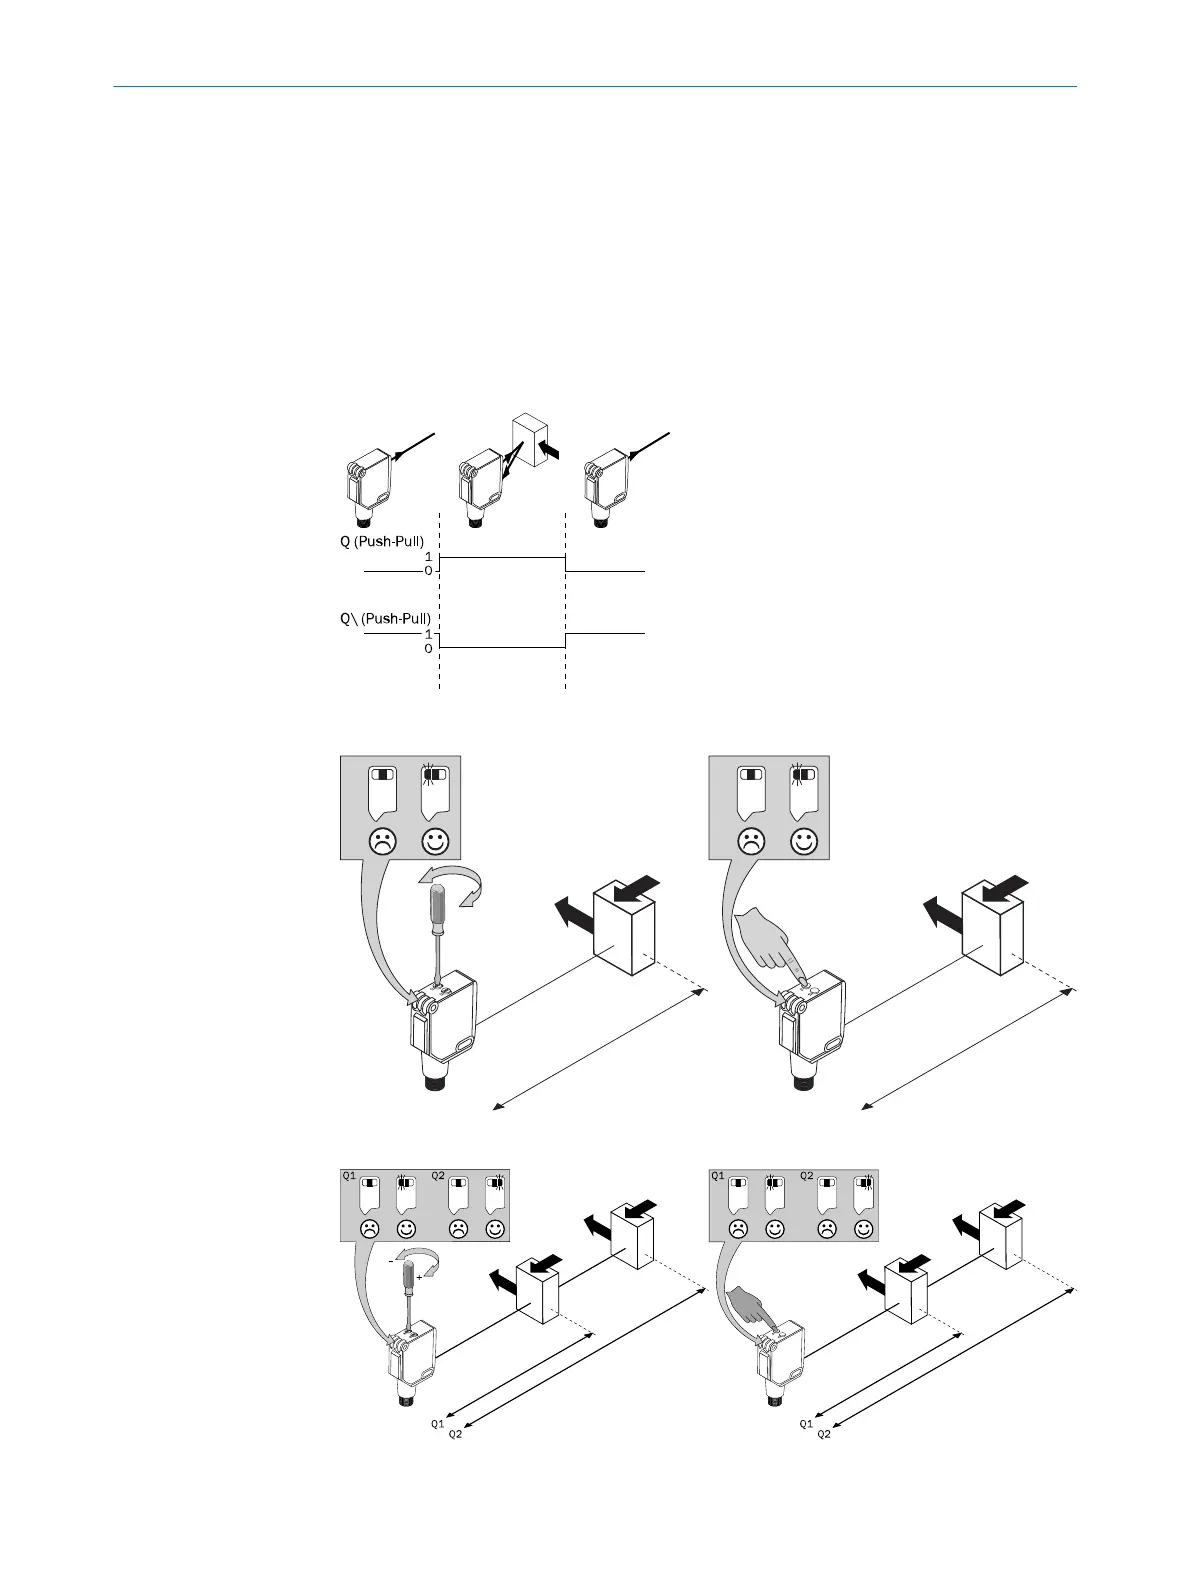
The sensing range is adjusted by pressing the teach-in button. Do not operate the
teach-in button using sharp objects. We recommend placing the switching state in the
object, e. g., see graphic E. Once the sensing range has been adjusted, the object is
removed from the path of the beam, which causes the background to be suppressed
and the switching output to change (see graphic C).
Please refer to the enclosed operating instructions for the IO-Link photoelectric sensor
for information about adjusting the IO-Link sensing range.
The sensor is adjusted and ready for operation. Refer to graphics C and E to check the
function. If the switching output fails to behave in accordance with graphic C, check
application conditions. See section Fault diagnosis.
Figure: C
Figure 2: E-1
Figure 3: E-2
Figure 4: E-3 Figure 5: E-4
CONFIGURATION 4
8018110.1BVZ / 2021-05-18 | SICK
Subject to change without notice
9

 Loading...